Ipinapakita ang mga post na may etiketa na A. Ipakita ang lahat ng mga post

Lunes, Enero 30, 2017

Basic Airbrush Maintenance and Cleaning Q A


Many different experience levels come and visit us here at Chinook & Hobby West to talk about Airbrushing. We also get many questions regarding Airbrushes through our social medias and by email.

We carry Paasche, Iwata and Badger currently and yes, we do promote these items. We also have general information to help all Airbrush users.

The following are some of your questions and answers we have researched for you.  If you still have questions, please email us at hobbywest@shaw.ca.


Q: Why should I use SuperLube?
A: When you’re using a substance to lubricate your airbrush needle (or trigger) you run the danger of some of that substance getting into the spray and onto your project (that’s why you only need a little bit). The question is what will happen when that greasy substance reacts with your paint. SuperLube doesn’t like to react with oil-based or water-based paints – that’s why we recommend it – we know what it will do. If you use an oil-based lube it might react with your acrylic paints (it’ll mix like oil and water).
Another suggestion is Woodland Scenic Light Gear Oil.  As with any Oil, please test your airbrush on a scrap paper or project just to ensure your oil doesn't interfere with your paint work.

Q: Why do I need to lubricate the needle?
A: The needle doesn’t really need the lube rather the needle in turn lubricates a little o-ring deep in the body of the brush that prevents blowback. It’s really rather small so it doesn’t need much lube and it only needs to be lubed every now and then.


Q: Are airbrushes hard to keep clean?
A: No, it’s quite a simple task, though it might be difficult at first. Develop a regular maintenance habit of rinsing the airbrush with the appropriate cleaning agent for the material being sprayed between color changes. Thoroughly clean your airbrush at the end of the workday. Check out the appropriate cleaning guide for your brush online or come down and see us to help you find a copy.

Q: How often should I thoroughly clean my airbrush?
A: It’s easy to say that you should clean your airbrush at the end of each workday; however, you should thoroughly clean the airbrush when the inevitable buildup of dried paint begins to interfere with normal operation. For some people this is once a week, for others, it’s once a day. It should be noted that regular and timely rinsing of wet paint with the appropriate cleaner will lengthen the amount of time between thorough cleanings. In short, rinsing more means cleaning less.

Q: How do I rinse my airbrush?
A: To rinse out the airbrush, simply flush it with the appropriate paint cleaning agent – Medea Airbrush Cleaner for water-based paints and paint thinner for oil-based paints. Never immerse or soak an entire airbrush. When using flammable cleaners never flush the airbrush near an open flame or lose electrical wiring and always flush the cleaner into an appropriate container to deal with these materials.
Q: How often should I rinse my airbrush?
A: You should rinse out the airbrush generally in-between color changes, before taking a break, and at the end of the day. Here’s why – wet materials clean up easier than dry materials. Rinse it while it’s wet and you won’t have to do a thorough cleaning as often when it’s dry. Rinsing between color changes is a maybe. If you’re blending colors and working from light to dark then chances are good that you won’t have to rinse. If you need a pure color then you will have to rinse out your airbrush.


Q: When I’m thoroughly cleaning out my airbrush why should I use a solvent?
A: Solvents quickly break up the molecular bonds paint forms when it dries. We recommend acetone or lacquer thinner as solvents, but stay away from paint thinner – paint thinner, in our experience, doesn’t seem to work well cleaning airbrushes. Do not soak your airbrush in a solvent. There are parts and greases in other areas of the airbrush that don’t take kindly to it. With that said, you should generally use only as much solvent as can be held in a cotton swab or in a pipe-cleaner. WARNING: DO NOT SPRAY SOLVENTS THROUGH THE AIRBRUSH. Bad idea, here’s why.
Q: What about Medea Airbrush Cleaner? Can I use it to clean out my airbrush instead of solvent?
A: There’s a saying-”the right tool for the right job”. Medea Airbrush Cleaner is great stuff and it works really well on wet paints and materials. Paint is a suspension of pigment in an adhesive substance. When the adhesive is wet you can wash it off with soapy water-when it is dry, you need something to dissolve the molecular bonds the adhesive creates. This is where solvents such as acetone or lacquer thinner come into play.


--------------------------------------------------------------------------------


Source

Thank you for checking out our Blog.  Please visit our Website, Facebook and Newsletters.


Linggo, Enero 1, 2017

Miyerkules, Disyembre 28, 2016

More progress on the layout A video


My summer vacation is slowly ending.  Back to the grind on Monday.  Thought I would update with a video this evening.  Enjoy!


Lunes, Oktubre 31, 2016

A little scenery and boom its back!


Yes, tearing up a completed section and putting it back together took longer than I thought but finally it's done.  I'm talking about the track to the helix from BY.  I did the ballast last night because it needs several hours to dry so I did it before I went to bed..  Completed the scenery (grasses and weeds) this afternoon and just put the trees back in order just now.  Now the scene is complete and I can move on to other items.

I find I get really distracted once I get in the layout room.  I have some signals that I need tested that came off the layout last year.  The wires are not marked well so I will be doing some figuring out of them.  I was going to do that tonight knowing all I need to do is the trees for the area I have been working on.   But, I find myself working on a few car cards.  Where did that come from???  I did get to the trees...


The shack is still by the tracks.  Lighter ballast in the new area.  I'm calling it done.

The object of the bridge is help conceal the "hole" to the helix.  

VMID #299 staged for a photo in the new scenery.

Are we hauling coal on the Midland?  Looks that way.  I'm in the process of building a small unit coal train for transfer to the F&NN.  Should be about 6-7 cars. 


Sabado, Agosto 20, 2016

And to a screeching halt


The past two weeks have been two to forget.  On the night of January 4th, I had to be rushed the ER because of severe flu-like symptoms.  Not 24 hours later, I was back in the ER with major chest pains.  The verdict was Myocarditis.  Don't know where this came from and the doctors could not figure it out.  It required a 5 day stay at the hospital.  A very tough ordeal that real took a lot out of me.  Getting up to go to the bathroom was an exhausting task.  I've been recovering this week and spent most of the week down with my mom and step dad.  That did wonders on getting my health back. Being 41, I would not think that my heart would be effected by something like this, but you never know these days.  Twenty percent of people who are affected by this condition die!  Very scary. So thanks for all who texted, called or sent a message through Facebook.  I do have another week off from work for recovery and I plan on definitely spending a lot time in the layout room.  It's messy from the upper valance work but that is about done except for a few items.  A little cleaning up and it will be good to go!  The main thing it provides when you walk into the layout room is the professional look.  It really improves the look immensely.

Martes, Hulyo 26, 2016

10 Tips For Buying A Model Kit


Generally a model kit contains a scale model of an object or vehicle - automobile, aircraft, military vehicle, motor, building, replica figure, etc. (there are many to look at and choose from). Such kits include all the necessary pieces of the idea photo on the box (make sure to ask if you are unsure as some buildings show fences and trees, but these are sold separately or just a special part(s) of a larger model), which the hobbyist assembles and then personalizes with paints and decals (usually sold separately).
With model kits, there are two primary types of hobbyists: the builder and the collector. The builder fancies the challenge and the hands-on aspect. The collector, on the other hand, focuses on the possessing, and many collectors opt to display the kits untouched, in their original packaging.

Buying a Model Kit

For the new hobbyist, buying a model kit can be a daunting task simply due to the sheer amount of choice that’s available. Collectors have to choose a vehicle and the scale at which they want to work. Then, they have to factor in price, complexity, customization, tools and supplies, and so forth. If the desired model is no longer manufactured, then the hobbyist has to deal with a series of additional concerns, including appreciation. Choosing a kit is not simple, but even the new hobbyist can avoid the most common pitfalls by following these 10 tips:

1. Research Model Kit Types

The first step is awareness of the various types of kits that are available. The traditional model kit, often called Snap-Tite or Skill Level 1, is made of plastic and simply snaps together. Snap-Tite kits are very newbie-friendly and usually only require mild filing and light gluing to complete.  Experienced hobbyists will eventually graduate to Skill 2 requiring glue and paint and to any of the more advanced Skill 3-5 kits as well as die cast models and radio-controlled vehicles.


2. Choose a Vehicle Type

The next step is to choose the type or class of vehicle. The most popular model kit classes are classic, sports car, NASCAR, hot rod, truck, and service vehicles. Classic car models tend to focus on American muscle, but there are models available for the classics from all over the world. Skill 1 classics tend to be the most accessible kind of kits for the beginner. Hot rods are roadsters, typically open wheel, that have very distinctive aesthetics and engine mount configurations. Hot rods make great looking models, but they can be quite challenging in the building and customization stages. The most popular type of automotive model kit is the sports car model (Corvette, Austin Martin, Ferrari, etc), a class that focuses on street legal sports cars from all years and from all around the world. In the U.S., NASCAR models rival the sports car and classic car classes in overall popularity. The service vehicle class, which are intricate and challenging, includes vehicles like fire trucks, ambulances, snowplows, and so forth.
And just to add to the pile, don't forget Military vehicles, aircraft and ships.

3. Select an Interesting Subject

When choosing a particular model, collectors should opt for a subject that engages them. A Porsche 911 is very popular and a staple in most automotive model collections, but it can also be very boring due to that commonness. Rather than choosing a model based on what is already known, the collector should shop around until a model chooses them. Finding a model car that is aesthetically interesting, challenging to build but still suitable to the beginner, can be difficult, but such models are available.

4. Decide on Scale

The next step is to choose the scale of the model. The most common model size for a car is 1:25 (and manufacturers often use 1:24 rather than 1:25), which is approximately 6 to 7 inches long. In Europe, 1:18 is also very popular. The 1:18 kits are approximately 9 inches long. There are also 1:60 scale kits, which are approximately 3 inches long and are particularly well suited to the small hands of a young child. Small kits are also popular among collectors and builders who enjoy the miniaturization aspect, but tiny kits can require a great deal of patience and fine hand control.
We will discuss in a future blog about the different scales in military, ships and aircraft.

5. Evaluate the Complexity

After choosing the model and scale, consider the complexity of the kit. The first gauge of complexity is the number of pieces in the kit. A Skill 1 kit usually has less than 50 pieces. A Skill 2 kit can have up to 200 pieces. A Skill 3-5 kit can have 200-1500 or more pieces and include many fine parts.
Skill 1 kits are preferable for beginners, children, and adult builders who just want a relaxed experience. Most children can complete a Skill 1 kit with little supervision and only occasional help. Skill 2 or higher kits require additional skills, tools, and supplies. Be aware that choosing a complex model that the builder isn’t ready for can intimidate and overwhelm the builder and therefore loose interest in a very enjoyable hobby.

6. Consider Customization Options and Necessities

An often hidden aspect of model building is the optional, and sometimes necessary, customization and personalization of the model. Automotive model kits are often labeled 2-in-1, 3-in-1, and so on; what that means is that the build process has a branch that allows for multiple finishes. For instance, many classic car kits come in a 3-in-1 configuration, which means that the collector can build it as a stock car, custom car, or race car. Many hobbyists opt to build these kits in all variants and display them alongside each other. First-time builders, however, should consider a basic kit that has no variants for simplicity.

7. Consider the Needed Tools and Supplies

Another important consideration is tools and supplies. The beginner will require basic hobby tools, such as a hobby knife, tweezers, paint, a fine file, and modeling glue/cement. Skill 2 and higher kits, however, will require a range of hobby knives and files as well as putty, sanding paper, spur cutters and perhaps a rotary tool or other power tools. Diecast models require metalworking tools, and radio-controlled models require batteries, an electronic motor, controller, and so forth.

8. Opt for a New Automotive Model Kit

Manufacturers produce kits in runs, which are typically time-limited. Once a run ends, the kit then becomes vintage and begins to appreciate in value. Vintage model cars sell at many times their original sticker price. For the builder, the most common reason to buy vintage is to get a particular classic car, which tend to go in and out of production. Although this will limit the hobbyist’s options, the beginner should focus on new kits in order to work with modern materials and avoid the vintage premium. (many kits are done in a re-release at milestone marks such as the 10th, 25th or 50th year anniversary of that kit or the car/piece)


9. When Buying Vintage, Price It and Haggle for It

If the collector opts to purchase a vintage model, then they should price it first. Price guides will provide a general appraisal, and the Internet is a powerful resource to determine the actual going rate. When buying a vintage model, shop around; check online, local shops, garage sales and shows/conventions. Once found, don’t settle for the listed price, which is generally a best-case scenario for the vendor.
(Be realistic in your negotiations you don't want to insult the one selling the kit in case you want to buy from them again)

10. New Builders Should Have a Contingency Plan

New builders should have a contingency plan because first builds usually do not go according to plan. A benefit of buying a current kit is that the collector can easily purchase an additional kit from the store or replacement parts directly from the manufacturer. Some vendors sell open box kits, which may be missing parts but are a cost-effective way to have spare parts on hand.


Conclusion

Buying a model kit for the first time can be difficult due to the sheer amount of choice available. A hobbyist’s first step should be to educate himself or herself on the various options that are available: classes, models, scales, books and other sources. Next, the beginner should choose a subject that interests them, but also one that isn’t so complex that makes it difficult to learn. With the first build under one's belt, the builder will be able to graduate to one of the more intricate kits the next time, and go into dioramas - but that's another blog......

What did you think of this article?  Please email us or comment on this post and let us know your thoughts and questions.


partial source 

Lunes, Hulyo 11, 2016

Tips for Painting and intalling a canopy on your model aircraft


Have you ever felt frustrated trying to put a conopy on your aircraft?  Did it cloud up or the paint wasn't looking great on the canopy accent?
     I know how you feel! When little mistakes happen it tends to kill any creative inkling you may have felt.
It's daunting enough creating your favourite aircraft – never mind putting together a piece you can be proud to show off.
     Here's some helpful tips to help create a model to be proud of; without fancy terms, and keeping it simple.

 When you've finished this post, you'll know exactly how to create a great canopy for your next model plane.
Please make sure to comment on this blog post with your thoughts and don't forget to sign up to our Newsletter to keep up on new product, contests, sales and more!

Let's have some fun!

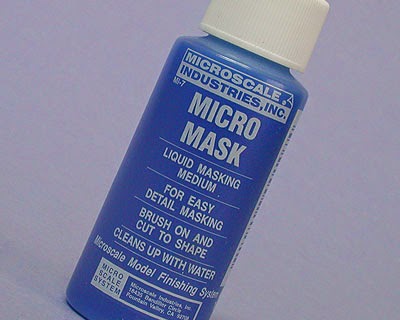
-Two kinds of successful mask. Liquid and tape


     Before starting, make sure you have all your supplies together. Your mask tape, hobby knife with a sharp blade (#11 works best), proper cutting surface, good lighting, hobby paint for your project and Clear parts glue

MASKING THE CANOPY FOR PAINTING
1)  make sure that all the clear airplane model parts are clean, dry and free of any fingerprints or dust. And your hands are clean and dry.
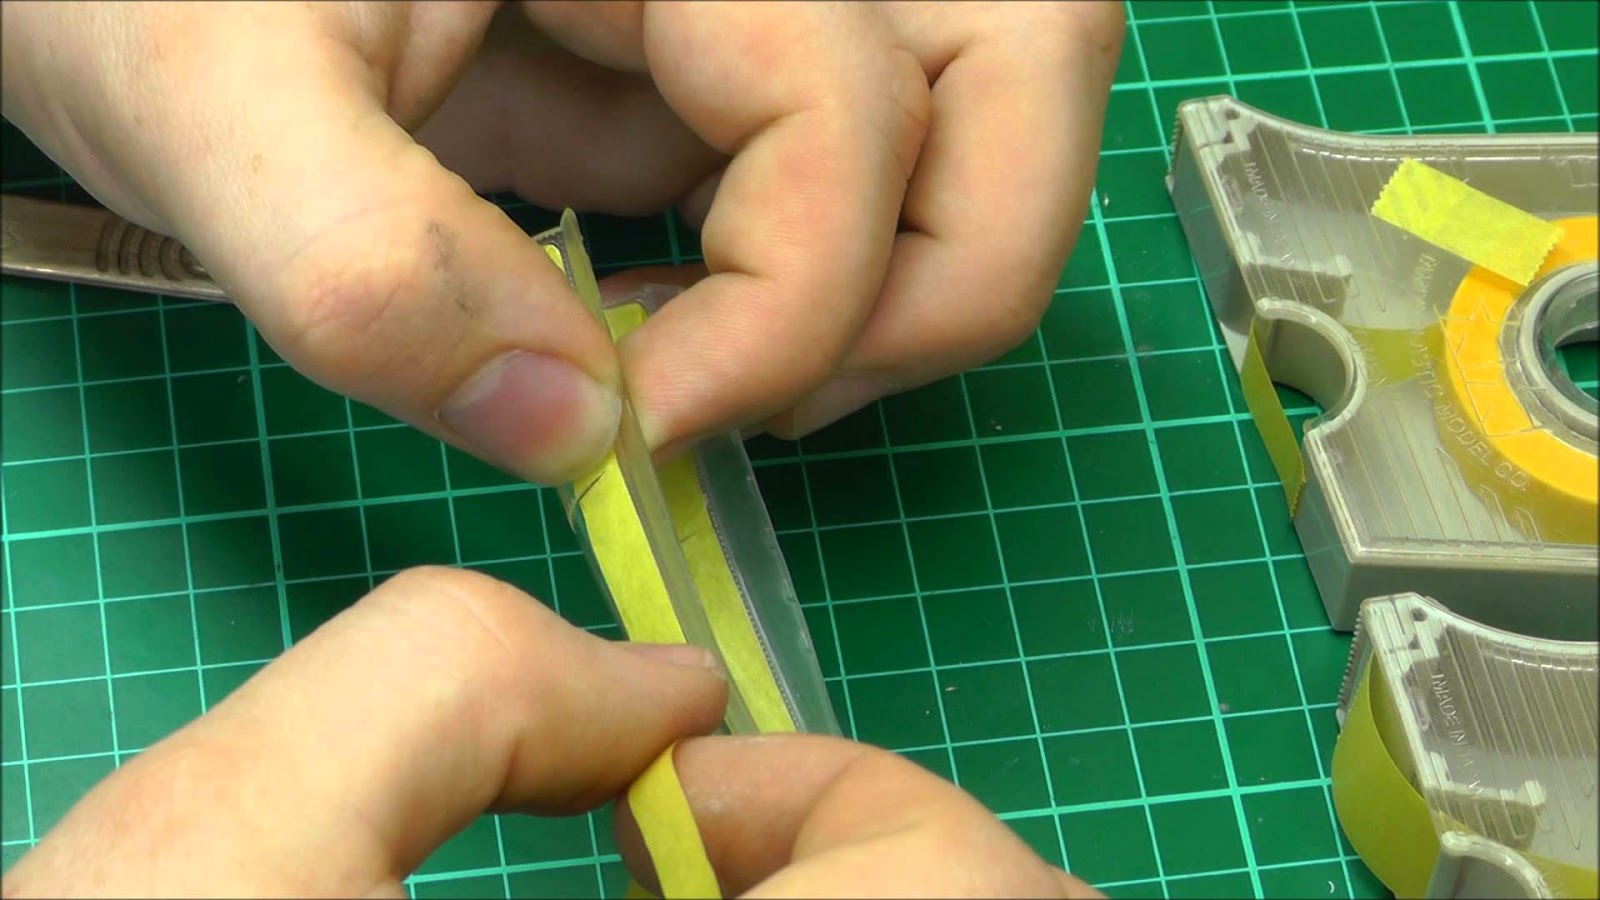
2)  Start with the 6mm Tamiya masking tape. Tear off a 4' piece and starting at the rear flat edge, carefully run the tape along the bottom outline of the
canopy.  Gently press into place.
 a short video with more tips for Masking Your Canopy


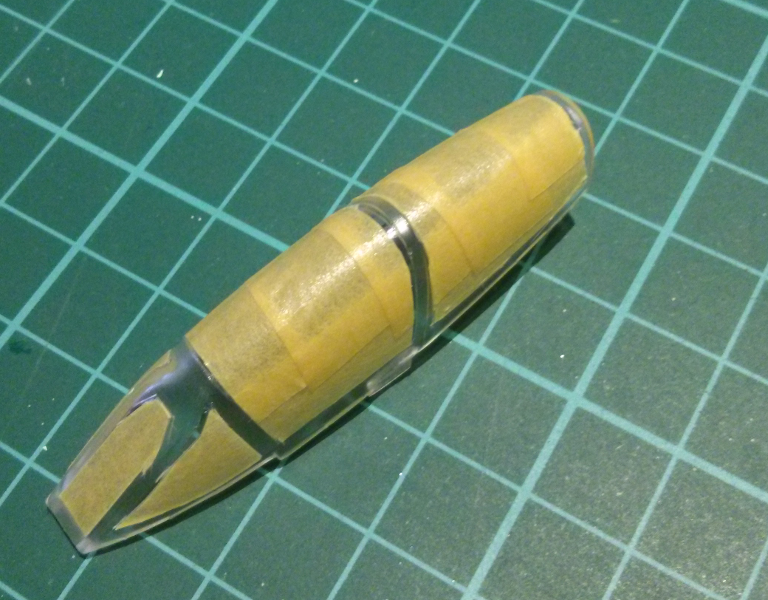
3)  Using the 6mm tape, mask alongside any raised parts (so you don't cover the part you want to paint)
4)  Bring the tape smoothly to the end of the edge and cut off excess.
Tip:  Make sure to cut past the end of your piece of canopy or you may cut into or scratch, your conaopy

5)  Either continue to mask areas you don't wish to paint with the 6mm or fill in with the wider tape such as the 18mm.
6)  Take your time when masking - it's a learning process.

Tip: If you choose to use liquid mask, just use a fine brush to paint on the liquid mask and let it set before you paint your model (follow the directions on the
bottle).  Peel off mask after you've let the paint dry, scoring the mask along the paint line for clean edges.

TIP: It's really important to take your time, use a very sharp hobby knife and cut a clean, precise section, free of tearing. Any raised details you intend to paint,
should be the only areas visible through the mask.


PAINTING YOUR CANOPY:
     Now it's time to paint the canopy of your model aircraft.
1)  Airbrush or handpaint your first coat using the interior cockpit colour and allow some time for it to dry.
2)  paint the fuselage colour over it and allow it to dry.  Or finish the canopy of the aircraft by applying your preferred paint colours
3) finish with a final coat to seal the paint (dull, gloss, etc.) over the canopy before you remove the mask.
 4)  After all paint has dried, use your hobby knife and carefully run it along the edge of your mask and gently lift off the mask with the tip of the blade and slowly peel off the mask.

Enjoy your work!

Tip: don't use dullcote or gloss cote directly on clear areas, if you wish that part to move on your model. Spray the model and clear part separately, then attach the clear part.  Don't spray any unmasked clear parts as dullcote can cause the part to fog, so keep the mask on and spray the painted areas.

Now you're ready to glue on your canopy

USING CANOPY GLUE (clear parts glue)
- This is a glue that dries clear and doesn't cloud your clear parts

  Now your canopy is ready to install. I like to use Testors Clear Parts Glue to glue it in place. This glue goes on white but then dries clear. It's best to put a small puddle on a scrap piece of cardboard and use a tooth pick to draw a fine line of glue around the perimeter of the Canopy.


Now place it in position and use folded piece of Kleenex or paper towel to hold it in place and avoid fingerprints. Once the glue has dried, apply the rest of the glue and guide it into position if needed.

 Tip: The Testors Clear Parts glue cleans up with water before it dries so you can wipe small smudges off with a damp cloth.


```Extra Tip:  using Future floor finish. This technique will make the clear plastic appear thinner and clearer. Surprisingly, it can also hide minor scratches and blemishes that are often unavoidable when working with clear model kit parts.
      Check out how:

Now it's your turn!  Please leave a comment on what you thought of this blog post.  We would also love to see your work or works in progress!  Please email us with your photos Today!

Huwebes, Hunyo 23, 2016

A little write up about me in the 2015 Winter edition of the Potomac Flyer


Did a interview for the Potomac Division of the NMRA for their upcoming Potomac Flyer publication that comes out four times a year.
NMRA Potomac Division Website

On the left click on Potomac Flyer and then click on Winter 2015.  My article is on page 21.  This a good publication and has lots of good articles.

I want to thank Roger Sekera who contacted me and did a great write up.  Also wanted to thank Norm Wolf on the thoughtful quote.


Biyernes, Mayo 13, 2016

Busy week on the lower level and a loco back from the dead


With Thursday and Friday off, it gave me the chance to get my room back in order and get away from the layout somewhat and finish a few projects on the desk.  I finally got my VMID U23B back on the tracks running well.  It had been sidelined with unreliability and made it a bad runner.  I could not fit a Keep Alive capacitor under the hood and thus made the U23B to sit on the desk for a while.  In some research for smaller speakers, discovered Apple I-phone 5 loudspeakers.  These speakers are small and sound great.  Getting 5 for $8 on Ebay is a good deal also.  I finally put one of those speakers in the cab of the U23B.  Yes, it's that small.  The #289 is running well and sounding great.  The #289 is special to me.  It's the first loco I installed a Tsunami in.  The Tsunami FDL GE sound is outstanding.

I also have all the track laid for the branch line on the lower level.  This section is directly below Battlefield Yard.  It serves a sand and gravel plant (Spur only) and a propane dealer.  The branch line will be named the Mine Run Branch and is actually a town name on the real Virginia Central Railroad.  There was no branch line there however.
VMID #289 ready to mix it up in Battlefield yard.  She's in original VMID paint.  One of the first locos I painted in VMID paint.
This will be Mine Run.  Don't know if I'll keep it in canal form but it looks good.  Probably will take out the dock.  A simple bridge here will complete the scene.

The look from the bridge to the propane dealer and the trackage back to the mainline. 
An overview of the scene.

Here's the trackage looking from the canal.  It has a run-around track for the hoppers returning to the loading facility.
Another view of the run-around track and spur.  The hoppers are sitting on the spur to the plant.

The end of the line and run-around track.  Lots of switching in this small area. 

Overview of the end of the branchline.


Martes, Pebrero 2, 2016

Chesapeake Valley SWEETENERS has finally settled on a name and is nearing completion


Lots of tedious work this week on the facility and the name has changed again.  Decided to settle on Chesapeake Valley Sweeteners based on another "sweetener" plant in upstate NY.  Sweeteners Plus is located in Lakeville, NY and the website has some good shots of the facility.  Most of my buildings are scratchbuilt and when you have a small railroad like me, you have to fit them in the space you have.  I also heard from someone in the MR business that you layout should not look like the Walthers catalog.  Walthers does make some great kits but do some kitbashing for a truely unique structure.
Yep, my work desk is a mess and this is a good size structure.

Painting on the front porch.  My layout is as soon as you walk into the front door so this is convenient.  That's not one of my good chairs!  Settled on this yellow.
Looks good under the lights.  The downspouts will hide the seams.  It will hold 3 tank cars.

The facility as of yesterday.

Today consisted of adding and gluing the roof on and adding doors and windows.

The white roof looks good and I wanted a flat roof on the left to add blowers and such.  Might go with the white flat roof instead.  

Close up of the office.  I still have to add a small awning in the office.  Might do something else.  
The roof of the loading building is huge.  All Pikestuff materials.  
These wood strips will help hold the roof of the loading barn,


Sabado, Enero 30, 2016

A Clowder of Locomotives


Perhaps it should really be a pride of locomotives, but nonetheless, I present a quick dump of latest locomotive photos not yet added to the roster page. I apologize for the EL locomotives that sneak in from time to time, as I try to keep an Erie pure roster in time and liveries, but alas. 

Nothing to report of consequence on the layout itself. A minute or two of research is possible to cobble together during the day in between meetings and tasks where leveling benchwork (the current task) or laying track or running wire (the next task) is impossible without being in situ.