Ipinapakita ang mga post na may etiketa na your. Ipakita ang lahat ng mga post

Linggo, Nobyembre 6, 2016

Easy model railroad photography videoing with your smart phone


All the the photos I put on this blog are from my camera on my I-phone 4.  Sometimes they are quick grap ones and sometimes thay are a little more involved.  I do have a regular camera but who uses thoes these days?  I probably will ugrade in a few months but this is how I get good pics easily.
This is mainly for I phone 4's:

First, get to the camera mode and make sure your flash is off and not on auto.
On the the left side of the screen, there is a HDR mode that is usually off.  Turn it on.  The HDR mode is a mini image stacking item on your phone.  Which improves the overall picture.  With this HDR mode, You need to have a steady phone for this to work well.  We will need something to "hold" the camera.  This is where the clamp showed below comes in handy.
This type of small clamp can be bought at Home Depot or any hardware store for a buck or two.  It holds the phone upright and still for pics and video.   
As you can see, the end has electrical tape on it.  This prevents shorting out the layout when it touches the tracks.  Yes, it happened to me.  The clamp is small and can be laid almost anywhere.  This clamp is ideal for video and I use it all the time for my You Tube videos.


When the picture is taken in HDR mode, there will be 2 pics.  The first one is regular and the second will have HDR on it.  Use the HDR one and erase the other pic.
Examples:

Non-HDR mode:  Bright light overhead and some blurriness.  

HDR mode:  overhead light not as bad and the vegetation is sharper.
 The above pics are not ideal but a good demonstration for what I needed.  Hopes this helps you get some better pics on your layout or in everyday life!


Sabado, Setyembre 17, 2016

Creating Display Dioramas Accessories For Your Action Figures


We regularly ask for tips, article ideas and general info from guys and gals just like you!  Recently, we were send this article. For the full article scroll to the bottom and hit the link.

This is just an opinion post about what you may try to do yourself. We are not responsible for any loss, injury, theft, etc. regarding any of the tips in this post.


Making an Oil Drum


  • Take a 14 ounce can and remove the top and label. 
  • Use one of the new Euro-Openers that cut from the side for best results. Eat contents and clean can. Dry well. Using a hot glue gun, glue the top back on. 
  • Hot glue a 1/4" hex nut to the top near the edge and fill in the hole with glue. 
  • Spray the can one of 3 colors: sage green, battleship gray or mint green. 
  •  Label drums with rub on letters purchased from your local hobby shop.
  • Display!


Making Walls

Here's on way on how to make a stone wall:
  1. Items required: gravel, silicone RTV sealer (or caulking, or something similar), piece of wood as long as, and slightly wider than the section of wall you wish to build.
  2. Glue the pieces of gravel to the wood using the silicone. Mix and match (like a puzzle) the gravel to give straight lines on the sides and eventually the top. The wall will get heavy enough to cause distortions if you try to do it all at once. Do about an inch or two high along the entire length of the wall and then let the silicone cure. Continue to add an inch or two in height every day until the wall is high enough. 
  3. If you need a really thick stone wall, use a piece of Styrofoam and glue the gravel to the sides and top of the Styrofoam. The wall will still get heavy but the Styrofoam will help a bit!
  4. If you fit the gravel together tightly, you can make a replica of a mortar-less stone wall. If you prefer to make a replica of a wall with mortar between the rocks, make the wall as noted above and let the silicone cure. After the silicone cures, run a bead of Elmer's or another hobby glue along the joints between the gravel and then sprinkle fine sand over the glue. After that dries brush off the excess sand. You can get fine sand in different colors from a hobby store that carries supplies for sand art.
  5. Build the wall up to the end edges of the wood. This will allow you to make several sections of wall that will be smaller, easily stored and allow configuration changes for dioramas, etc. If you need to make a 90 degree corner, you can either make the corner as part of one section of wall, or make the wood ends as wide as the wall instead of a bit wider.
  6. To finish off the sections of wall, glue dirt, model railroad ground cover, etc to the wood at the base of the wall. Also glue in a few bits of straw to simulate taller growing grasses, etc. -- Rob S.

Making Barbed Wire

How to Make Barbed Wire: Items needed: 30 gauge wire (found in hobby stores, Wal-Mart, etc - used for flowers & stuff), twigs (about 1/2 inch diameter), piece of wood (about 1/2 inch thick, plywood OK), glue, locking pliers or forceps, wire cutters, drill & bits, saw, rag.

  1. Determine how much distance you want between fence posts. Also determine how high you want the fence to be (about 6 inches for a regular fence, about 16 inches or higher if you want to build a POW stockade).
  2. Cut your wood about 2" - 3" wide and 2" - 3" longer than you want the fence section to be.
  3. Cut the twigs to length, adding about 1/2 inch (or the thickness of your wood).
  4. Drill 1/2 inch holes in the wood where you want the fence posts to be.
  5. Glue fence posts into holes in wood. Set aside to dry thoroughly.
  6. Cut a piece of the wire two times the distance between the fence posts, plus an extra 12 inches. For a 12 inch length of fence the length will be 36 inches (12 inches times two plus 12 more inches). The extra 12 inches of wire will be used to wrap around the fence post and secure the wire to the post.
  7. Place the two ends of the wire together and pull the wire tight to form a doubled piece of wire.
  8. Using the vice grip pliers or forceps, grab each end of the doubled wire and twist the wire. Keep twisting the wire until it has about 1/8 inch or less between the places where the wire crosses over itself.
  9. Place the rag over the doubled & twisted wire and firmly pinch the wire (I fold the rag several times to give me a thicker pad of protection). Starting at one end of the twisted wire, squeeze and pull the rag along the length of the twisted wire (similar to closing a "zip-lock" bag). Do this a couple of times. What we are doing is setting the twist into the wire so when we remove the pliers/forceps the wire won't untwist by itself. You MUST use a rag or something similar because the wire will cut through skin if you try this with unprotected fingers!!! Set the wire aside.
  10. Repeat steps 6 through 9 until you have one strand of wire for every inch to inch-and-a-half of post height.
  11. Cut a bunch of 2" lengths of wire. Keep cutting, you'll need a BUNCH of these!
  12. Take the 2" pieces of wire and wrap them around the twisted wire sections. Start about 3 inches from one end and wrap them every inch. Make sure you wrap them tightly against the twisted wire, and wrap each one about 4 times around the twisted wire. These will be the "barb" part of your barbed wire fence. Don't worry about how long the ends are, just wrap the entire length of twisted wire. Do this for all pieces of twisted wire you made in steps 6 - 9.
  13. Take your wire cutters and snip off the extra length on each end of the barbs. Real barbs are about 1/2 inch long. I make the barbs a bit longer than normal (scale-wise) because they look better (i.e. you can see them!). Play around with the final length of your barbs and make them as long as you think looks good.
  14. Wrap the ends of each section of barbed wire around the fence posts and twist the wire back on itself to hold the wire onto the post. BE CAREFUL - the barbs are REAL! ;-) Snip off the extra wire. Do this on both sides of the fence section, starting about 1 inch from the wood and working up about an inch for every piece of wire.
  15. The fence section is finished. I make mine about 12 inches long so I can move them around easily. You can make them any length and any height. A good way to finish off the wooden bottom is to glue dirt, flocking, etc to the wood to simulate dirt, grass, etc. Need something besides fences? Make the sections of barbed wire and then coil them up to simulate coiled barbed wire. Use small (about 1 inch tall) pieces of smaller twigs glued into a wider section of wood, string the barbed wire between them and create "tanglefoot." Let your imagination roam wild! Good luck & have fun! -- Rob S

To see the complete article CLICK HERE
GI Joe® is a trademark of Hasbro, Inc.


We hope you enjoyed this post!  Let us know what you think or share any tips or ideas in the comments below.

Check out our Website: CLICK HERE
Like us on Facebook: CLICK HERE

thanks for reading this blog post and we look forward to your sharing with us.

Happy Hobbying!!

Valerie


Lunes, Hulyo 11, 2016

Tips for Painting and intalling a canopy on your model aircraft


Have you ever felt frustrated trying to put a conopy on your aircraft?  Did it cloud up or the paint wasn't looking great on the canopy accent?
     I know how you feel! When little mistakes happen it tends to kill any creative inkling you may have felt.
It's daunting enough creating your favourite aircraft – never mind putting together a piece you can be proud to show off.
     Here's some helpful tips to help create a model to be proud of; without fancy terms, and keeping it simple.

 When you've finished this post, you'll know exactly how to create a great canopy for your next model plane.
Please make sure to comment on this blog post with your thoughts and don't forget to sign up to our Newsletter to keep up on new product, contests, sales and more!

Let's have some fun!

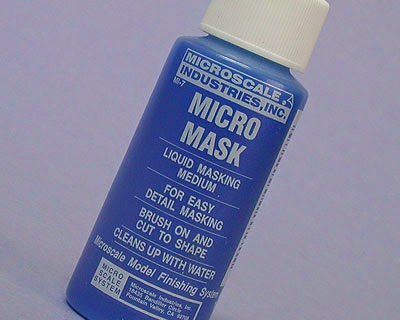
-Two kinds of successful mask. Liquid and tape


     Before starting, make sure you have all your supplies together. Your mask tape, hobby knife with a sharp blade (#11 works best), proper cutting surface, good lighting, hobby paint for your project and Clear parts glue

MASKING THE CANOPY FOR PAINTING
1)  make sure that all the clear airplane model parts are clean, dry and free of any fingerprints or dust. And your hands are clean and dry.
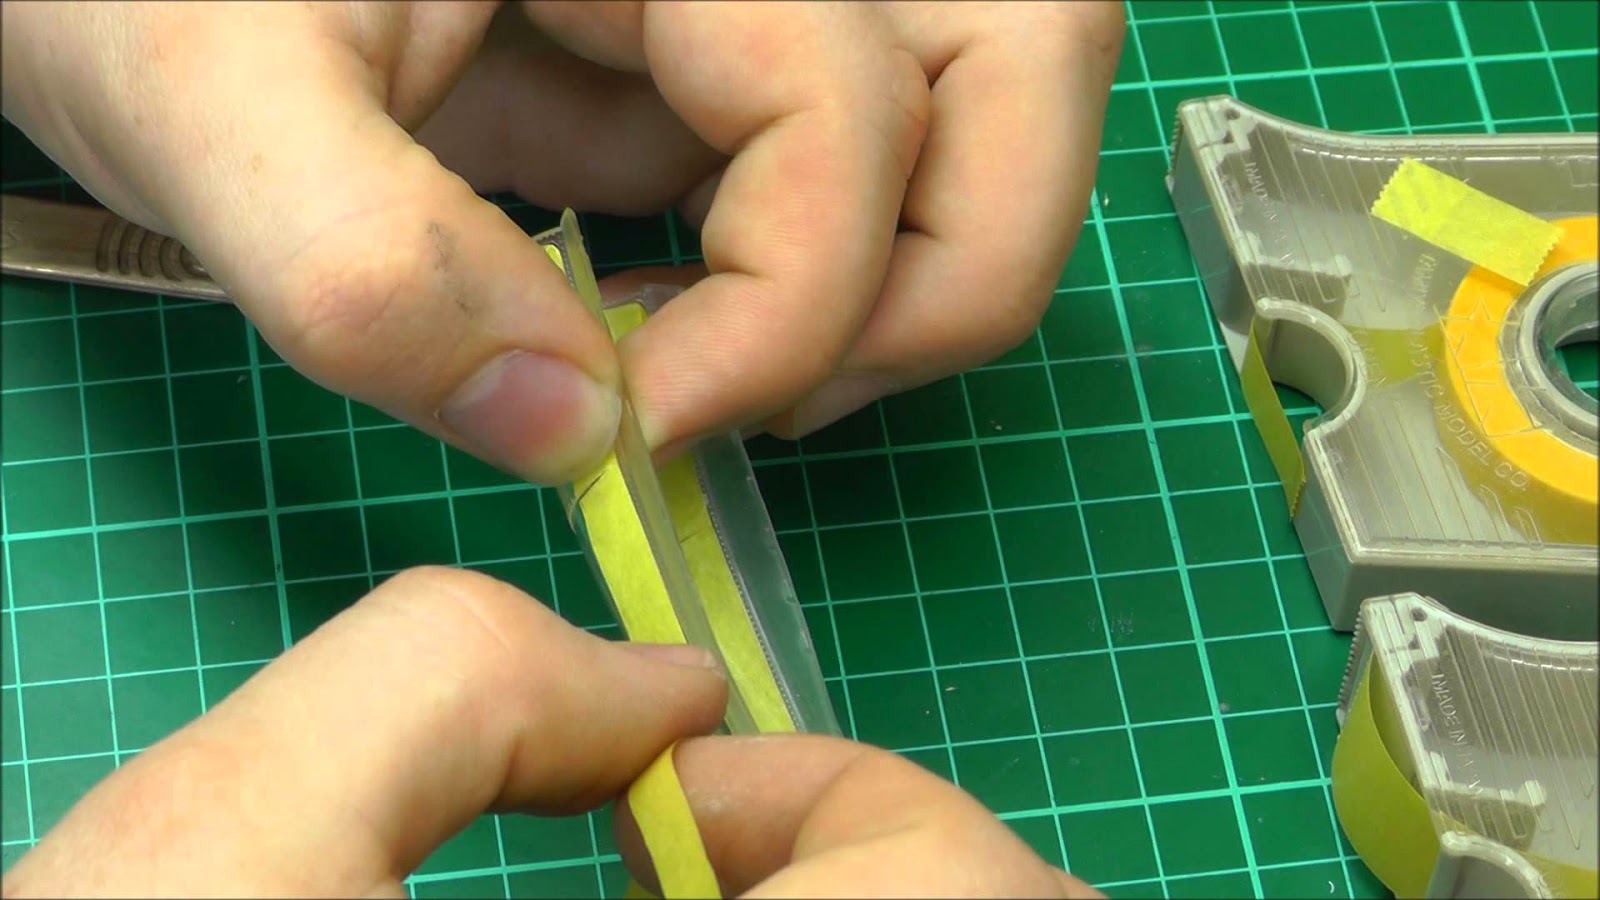
2)  Start with the 6mm Tamiya masking tape. Tear off a 4' piece and starting at the rear flat edge, carefully run the tape along the bottom outline of the
canopy.  Gently press into place.
 a short video with more tips for Masking Your Canopy


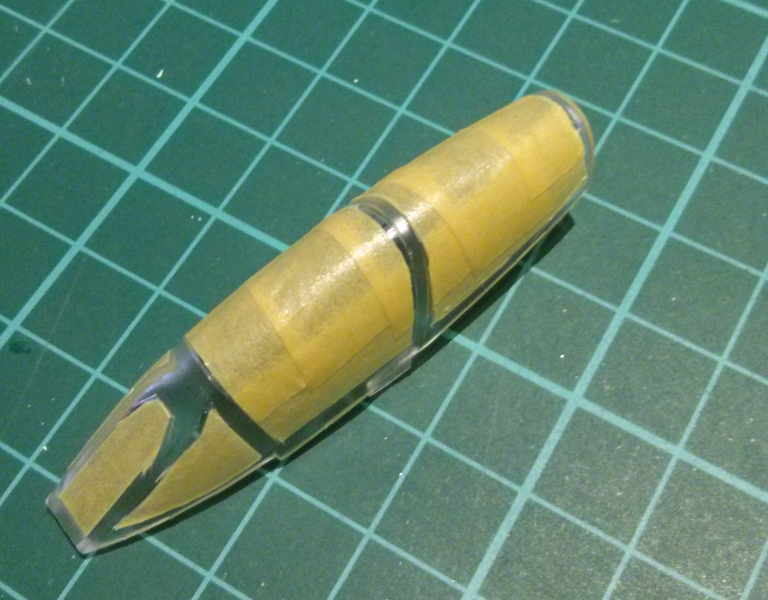
3)  Using the 6mm tape, mask alongside any raised parts (so you don't cover the part you want to paint)
4)  Bring the tape smoothly to the end of the edge and cut off excess.
Tip:  Make sure to cut past the end of your piece of canopy or you may cut into or scratch, your conaopy

5)  Either continue to mask areas you don't wish to paint with the 6mm or fill in with the wider tape such as the 18mm.
6)  Take your time when masking - it's a learning process.

Tip: If you choose to use liquid mask, just use a fine brush to paint on the liquid mask and let it set before you paint your model (follow the directions on the
bottle).  Peel off mask after you've let the paint dry, scoring the mask along the paint line for clean edges.

TIP: It's really important to take your time, use a very sharp hobby knife and cut a clean, precise section, free of tearing. Any raised details you intend to paint,
should be the only areas visible through the mask.


PAINTING YOUR CANOPY:
     Now it's time to paint the canopy of your model aircraft.
1)  Airbrush or handpaint your first coat using the interior cockpit colour and allow some time for it to dry.
2)  paint the fuselage colour over it and allow it to dry.  Or finish the canopy of the aircraft by applying your preferred paint colours
3) finish with a final coat to seal the paint (dull, gloss, etc.) over the canopy before you remove the mask.
 4)  After all paint has dried, use your hobby knife and carefully run it along the edge of your mask and gently lift off the mask with the tip of the blade and slowly peel off the mask.

Enjoy your work!

Tip: don't use dullcote or gloss cote directly on clear areas, if you wish that part to move on your model. Spray the model and clear part separately, then attach the clear part.  Don't spray any unmasked clear parts as dullcote can cause the part to fog, so keep the mask on and spray the painted areas.

Now you're ready to glue on your canopy

USING CANOPY GLUE (clear parts glue)
- This is a glue that dries clear and doesn't cloud your clear parts

  Now your canopy is ready to install. I like to use Testors Clear Parts Glue to glue it in place. This glue goes on white but then dries clear. It's best to put a small puddle on a scrap piece of cardboard and use a tooth pick to draw a fine line of glue around the perimeter of the Canopy.


Now place it in position and use folded piece of Kleenex or paper towel to hold it in place and avoid fingerprints. Once the glue has dried, apply the rest of the glue and guide it into position if needed.

 Tip: The Testors Clear Parts glue cleans up with water before it dries so you can wipe small smudges off with a damp cloth.


```Extra Tip:  using Future floor finish. This technique will make the clear plastic appear thinner and clearer. Surprisingly, it can also hide minor scratches and blemishes that are often unavoidable when working with clear model kit parts.
      Check out how:

Now it's your turn!  Please leave a comment on what you thought of this blog post.  We would also love to see your work or works in progress!  Please email us with your photos Today!

Linggo, Marso 27, 2016

Tips For Scenery On Your Layout or Diorama


     Have you ever wondered how modellers of dioramas and railroad layouts get nice clean, carved lakes, water bodies and cool mountain scenery?  How its done without the heavy hassle of wood and plaster?
    
     The trick is to making your project lighter, easier and more fun to work with is the Insulating Styrofoam. You know the dense stuff that comes in Pink or Blue. Its easy to get from home improvement stores or somewhere that sells construction supplies. The foam usually comes in 4' x 8' sheets and doesn't flake away or create a huge mess like the pellet white Styrofoam can.

     Using a knife, hot wire foam cutter or other creative tools you can carve into it, cut it, and paint it (with acrylics). To create water bodies outline the area with a pencil line gently pressed into the foam (you can change or adjust it as needed). When you have the area lined out, carve it out with varying depths for realism. Make sure you seal the bottom with an acrylic sealer or a layer or two of white glue.

     The pink Styrofoam is very rigid and I have found it's also very easy to stack to make very realistic looking mountains, just stack, glue and carve. You can add small areas of hydrocal rock faces for extra effect and little added weight.

     So, the next time your stuck in a construction related traffic jam, don't get to frustrated you can spend the time looking around for bits of discarded foam and thinking of that new idea to add that extra fantastic look to your next project.

~ submitted by Jesse Millington


(This article is by one of our staff. He has had experience with model building, model railroading and collecting. This article is his opinion. There are many different ways to make and design water and if you have any tips you would like to share or an article you think our readers would enjoy, we invite you to share it in the comments on this blog, on our Facebook (www.facebook.com/ChinookAndHobbyWest) or on our website (www.chinookandhobbywest.com). Thank you for following our blog Chinook Hobby Talk.)

Lunes, Marso 30, 2015

6 Tips and Ideas to Customize Your Model Kit


So you've built a few model kits and you're ready to up your game and do something unique and different to your piece?

First, go check out your local hobby shop and get some ideas on what you may want to do to upgrade your model. Do you want to custom design and make your own decals? Change the interior? Add something completely different?

Ask yourself if this is for you or to enter in a show and what level you are building at. Be realistic with your skill level and remember with each kit you do, you're going to get better!

Painting is the most common way to make your model stand out. If you're brush painting, make sure to keep your brush strokes going in one direction for a better look.

When customizing your colours be sure to write down how much of each colour you're mixing so you can get an exact match each time. Who knows, someone may want that colour combo and ask you for the mix ratio. Use eyedroppers or pipettes to help with this.


Weathering can really add that "something special" to your custom build. It can make your piece look beat up and rusted or look as if it's just been though the mud. It can be used to create blaster marks on a Sci-fi kit, engine exhaust stains or peeling paint on a car.

It's all in how you use your paint and brush. For example for blaster marks use paint and brush to 'dry brush' the look you want. For a dusty look you can use chalks. Just make sure that after you create the weathered look you desire, seal it with a clear coat of Matte, Semi-Gloss or Gloss. You don't want to ruin that hard work.


Decals are a fun way to customize for beginner to intermediate builders. The majority of kits already have a sheet of decals ideal to your model choice, with sometimes two or three variant choices; But what if you want something unique to your imagination?  Decal sets and paper are just what you're looking for.

Basically decals are layers of paint built up on plastic film with a paper backing.  The glue is usually activated by water.  Your printer may be up to the task of creating your decals.

When using decals make sure to cut as close to the pattern as possible (nail or craft scissors work best for this). Dip your decal in water for the instructions set amount of time and add it to your model. You can use Microset to help the decal settle onto the model more snugly.  There are many articles and YouTube videos on how to use and apply decals. Practice makes perfect in this case.  Even the most expert model builders can have trouble with decals. Just take your time with it.

Finally, consider adding your model onto a Diorama to add dimension and truly get the feeling across to those looking at your creation. They can be as simple or complex as you want them to be. Ask your experienced local hobby shop for tips and ideas.


With the help of your local hobby shop's knowledgeable staff, checking out a few YouTube videos, researching articles like this one and your own imagination, you can create a potential masterpiece from a humble box of plastic and photo-etched parts.

Make sure to read these great blog articles too and share them with a friend:

  • 10 Tips For Buying A Model Kit
  • Basic Tips For Model Building

  • Model Tips for Beginners - Part 2
  • Model Kit Building And Painting Tips And Tricks
Please make sure to comment below if you have a tip to share!  Like our blog to get updates on the newest additions. We post every Thursday, alternating Trains and Model/Toys.

Also, make sure to check out our Website, Facebook and YouTube Channel for inspiration, learning and fun!

Thanks for reading

Happy Hobbying


Martes, Abril 22, 2014

Have You Lost Your Sense of Wonder


     Today I was asked the question, "When was the last time you felt a sense of wonder?". I can honestly say I get to see it every day. I get to see it at home through the eyes of my 6 and 9 year old kids. I love seeing it in our store when a customer comes in and notices the G scale train running around above their heads. To see the kids as they notice the Star Wars movie playing in our toy section and my favourite, to see someone get inspired by one of the dioramas or models we have on display around the store.


At both our North and South store you can see a unique G scale train travelling above your head!


At our South Store you can see this 6 ft. Star Destroyer that is an exact scale replica of the one they used in the Star Wars movie "A New Hope".


When was the last time you felt that sense of wonder? The 'Wow is that cool!' or 'I remember that when I was a kid!'. I asked a few people how they might rekindle their sense of wonder.

  1. Look at your next task through the eyes of  a child.
  2. Make a list of your favourite things you did/built/played with as a child. Pick something off the list and do it. (look up at the clouds and find shapes for example)
  3. Take a different route to work, if you can't then make it a point to notice something different every time you stop at a traffic light. (maybe the grass is turning green or there are more potholes)
  4. Forget your cell phone at home and walk around your neighbourhood.
Its amazing how much stress dissolves and what great memories are made when you rediscover your sense of wonder. We look forward to you coming down and experiencing the wonder for yourselves!

Let us know what you did!

Val


Biyernes, Abril 11, 2014

New Video Installing working signals on your layout


I've had a few emails over the last year asking me about my working signals on the layout.  Well, the last email from Philip H. got me motivated tot do a how-to-video.  I get turned off with the block detection and JMRI concept of controlling the signals.  Lots of work to get it to operate and expensive components.  I've added toggles on my fascia to control the signals on the layout.  Adds another component to running trains!  Let me know if you have any questions!