Ipinapakita ang mga post na may etiketa na Scenery. Ipakita ang lahat ng mga post

Biyernes, Disyembre 23, 2016

Scenery Plan


Preliminary area plan for landscaping. I failed to indicate that the dashed line is a chain link fence. Some of it is on concrete pony wall (bottom, or south side), some on the ground (I think the rest of it).
Lots of concrete at Harlem Station! I hadn't really noticed, but I guess with all of the LCL going into trucks, there needs to be an all-weather surface to keep the freight moving.

This quick sketch of a scheme is based on an equally quick interpretation of the aerial photo from 1956 and various photos. As always, please feel free to share with me any information you might have on this subject.

The freight shed is gone by my modeling date of 1959, and the new freight house expanded to cover the tracks to make an indoor unloading facility. I'm not keen on covering up all that layout area, so I'm either A) going to back date this terminal to early 50s or B) stay accurate and build just the walls of the freight house extension and lose the 'cute' freight shed building.

At this point, I would bet on 'B' if I were a viewer of this blog. (Remember: all wagering is for entertainment purposes only.)


Lunes, Oktubre 31, 2016

A little scenery and boom its back!


Yes, tearing up a completed section and putting it back together took longer than I thought but finally it's done.  I'm talking about the track to the helix from BY.  I did the ballast last night because it needs several hours to dry so I did it before I went to bed..  Completed the scenery (grasses and weeds) this afternoon and just put the trees back in order just now.  Now the scene is complete and I can move on to other items.

I find I get really distracted once I get in the layout room.  I have some signals that I need tested that came off the layout last year.  The wires are not marked well so I will be doing some figuring out of them.  I was going to do that tonight knowing all I need to do is the trees for the area I have been working on.   But, I find myself working on a few car cards.  Where did that come from???  I did get to the trees...


The shack is still by the tracks.  Lighter ballast in the new area.  I'm calling it done.

The object of the bridge is help conceal the "hole" to the helix.  

VMID #299 staged for a photo in the new scenery.

Are we hauling coal on the Midland?  Looks that way.  I'm in the process of building a small unit coal train for transfer to the F&NN.  Should be about 6-7 cars. 


Miyerkules, Oktubre 12, 2016

Layout Scenery Part I – The Mountain


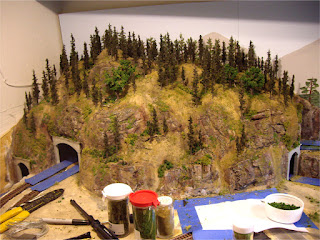
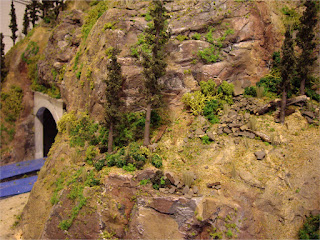
Completed mountain forest scenery
I’ve been excited to start the actual scenery on my layout since I began this project over 2 years ago, and finally, the time has arrived. Building my layout thus far has been mostly a step-by-step process, starting with benchwork, then track, electrical, plaster terrain, etc. This one step at a time progression always meant that I knew exactly what I needed to work on, and what my next steps were in the construction of my model railroad. However, once I finished my hard-shell terrain a couple months ago, I realized that I now had several options as for what project I wanted to tackle next. It was now time for the scenery stage. I soon though realized that the ‘scenery stage’ was quite a broad term and entailed pretty much the rest of the construction on my layout. I needed to break down this scenery step into more manageable stages, so I decided to fully complete one section of the layout at a time. With that plan in place, what a better section to start on then the main feature of my layout, the mountain.

Creating bushes with ground foamFine and coarse foam ground cover

I’ll first start by saying that I don’t really have any evolution photos of the scenery on the mountain but only before and after shots. This is because I did a lot of experimenting with different ground cover and techniques, and before I knew it, my scenery was pretty much complete before I even considered taking photos. So instead, I will describe the materials used. The terrain and rock croppings were already previously painted (see my “Painting the Terrain” post), so I didn’t have to worry about this step.

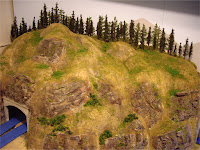
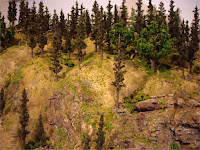
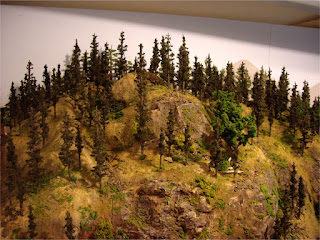
Start of tree line in the backgroundCompleted mountain forest scenery

I started by liberally applying thinned white glue with a paint brush directly onto the painted terrain, spreading it over about 6” by 6” sections at a time. I then sprinkled Woodland Scenics earth-blend blended turf over the wet glue. The earth-blend turf seemed to really compliment the tan colour paint I had used on all of the hard-shell terrain. I used the same firm’s green-blend turf to then highlight certain areas, such as more level areas where green grass would be more prevalent. I had a rather large gap between the bottom edge of my backdrop and the mountain terrain, so I filled this space using light green lichen, also from Woodland Scenics. Everything was then sealed in with a light spray of thinned white glue.

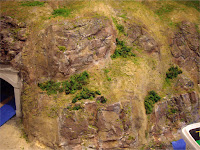
Mountain forest scene details with ground foam, trees, and talus

Trees were the next step, which I had previously completed putting together (see my previous post). I started with smaller trees in the background, placing them quite densely so they would blend into my backdrop. As I moved forward, I used increasingly taller trees which seemed to add a bit more depth to the forest. I also found that placing tall and short trees side-by-side made the terrain look steeper than it actually was. I didn’t use the supplied bases that came with the trees armatures; instead I drilled small holes directly into the plaster terrain so I could attach the trees using the small insert pins at the bottom of each tree. Any plaster dust that came up from drilling was carefully blown away with a can of compressed air.

Completed mountain forest sceneryCompleted mountain forest scenery

Bushes, coarse turf, underbrush, lichen, and other various types and colours of ground foam were added next, mostly all from Woodland Scenics. This step took a lot of trial and error and paying around with different materials to achieve the look I wanted. However, nature is quite random and has a lot of variety when it comes to colours and plant life, so applying the different scenic materials in a haphazard manner only adds to the realism of the forest scene. I chose mostly Woodland Scenics material because the different ground foams and colours can be easily combined in any way and still look natural, which is a great, fool-proof method for first-timers!

Scenery using Woodland Scenics ground foam and field grass products

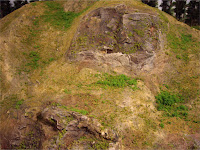
To finish the scene, I added natural talus rock that I found in the coulees near my home. I added small tuffs of Woodland Scenics field grass in random areas, and added any additional details in spots that I may have missed. For deadfall, I used small wood pieces that I carefully picked out of a bag of old potting soil, as well as real deadfall I found in nature.

Scenery using Woodland Scenics ground foam and field grass productsMountain forest scenery

I’m quite happy with the final results, and will continue this process across the rest of my background mountainous scene over the next month. It makes sense to finish the background scene first, as I wouldn’t want to be reaching over a completed foreground scene to work on it.

Completed mountain forest scene tree-line

Miyerkules, Abril 27, 2016

Linggo, Marso 27, 2016

Tips For Scenery On Your Layout or Diorama


     Have you ever wondered how modellers of dioramas and railroad layouts get nice clean, carved lakes, water bodies and cool mountain scenery?  How its done without the heavy hassle of wood and plaster?
    
     The trick is to making your project lighter, easier and more fun to work with is the Insulating Styrofoam. You know the dense stuff that comes in Pink or Blue. Its easy to get from home improvement stores or somewhere that sells construction supplies. The foam usually comes in 4' x 8' sheets and doesn't flake away or create a huge mess like the pellet white Styrofoam can.

     Using a knife, hot wire foam cutter or other creative tools you can carve into it, cut it, and paint it (with acrylics). To create water bodies outline the area with a pencil line gently pressed into the foam (you can change or adjust it as needed). When you have the area lined out, carve it out with varying depths for realism. Make sure you seal the bottom with an acrylic sealer or a layer or two of white glue.

     The pink Styrofoam is very rigid and I have found it's also very easy to stack to make very realistic looking mountains, just stack, glue and carve. You can add small areas of hydrocal rock faces for extra effect and little added weight.

     So, the next time your stuck in a construction related traffic jam, don't get to frustrated you can spend the time looking around for bits of discarded foam and thinking of that new idea to add that extra fantastic look to your next project.

~ submitted by Jesse Millington


(This article is by one of our staff. He has had experience with model building, model railroading and collecting. This article is his opinion. There are many different ways to make and design water and if you have any tips you would like to share or an article you think our readers would enjoy, we invite you to share it in the comments on this blog, on our Facebook (www.facebook.com/ChinookAndHobbyWest) or on our website (www.chinookandhobbywest.com). Thank you for following our blog Chinook Hobby Talk.)

Lunes, Nobyembre 9, 2015

Scenery Update USPS frustration and a sketch of the lower level trackage


This past weekend I had planned on getting the helix out to the garage and start installing it.  Well the USPS made sure that did not happen.  As I posted last weekend, I ran out of track for the helix.  The track has to be laid as you go up.  So on Tuesday, I ordered from Mainline Hobby (the best only train shop on the east coast!) in PA.  As always, I usually get my items 2 days after I order them.  Bonnie who runs the shop always sends out the tracking number on the USPS priority packages.  So it would be here in Thursday as per the tracking.  Thursday comes and no package.  To boot, I was off on Friday because of the weather.  OK, it will be here Friday, Nope!  Did not come Saturday either.  I was a little ticked.  The worst thing was it still said delivery on 1-9 even on Sunday!  This package went to a distribution facility near Baltimore, MD for 2 days, then to another one in Baltimore for a couple of days and then to Richmond, VA for a Sunday trip.  It finally came today.  Very frustrating!

While waiting for the track, I turned to my creative side and put the finishing touches on the scenery at the end of Battlefield Yard.  This is just about complete except the railroad tie retaining wall by a switch.
This is the tail track of the layout.  The tie retaining wall will by the switch stand on the left center.

GP11 #280 tkes a peek at the new scenery.

A detail shot of the weeds and growth.

Add some of my leftover trees to the scene.  Need to probable put a few more in.
I just about have my track plan for the lower level.  The top is complete. It's the lower left corner that's tough.  I'll go with what I have.


Lunes, Hulyo 14, 2014

Layout Scenery Part II The Background


Upgraded warren-truss train bridge with almost-complete scenery
The second section of scenery I tackled was the double track portion directly in front of the backdrop. This section runs from the right mountain tunnel portal, over the warren-truss bridge, and in front of the remainder of the mountain scenery in the right-hand corner of my layout. This segment was probably the most inconvenient to work on, entirely due to the fact that I had to lean way over the rest of my layout to work on it, resulting in many sore and strained muscles. However, now that the background portion is complete, the middle and foreground should be a much easier and more convenient experience.

Small mountain with first layer of foam earth-blend ground coverOld bridge and background scene before scenery

Woodland Scenics pine trees and scenery products added to backdrop

To start, I first needed to complete the tree line that runs along the top if the rock ridges and spans between the 2 mountains in each corner of my layout. I had already previously painted trees onto the backdrop, however this did not suffice to represent the forest above the rock ridges, and definitely required more texture. These rock ridges are only about ¼ of an inch thick, so the pine trees needed to be literally attached directly to the backdrop. When building the tree armatures, I made sure the back sides of the trees were flat, which allowed the finished trees to be easily glued to the backdrop.
Light vegetation between tracksBallasted tracks with light vegetation and overgrowth

Background scene under construction with upgraded warren-truss bridgeBackground scene under construction with upgraded warren-truss bridge

With the addition of actual model pine trees to the backdrop, I also added clumps of Woodland Scenics conifer green foliage directly to the painted trees, further adding texture and blending the painted trees in with the actual trees. The tops and faces of the rock bluffs were finished with various foliage, ground foam, bushes, and lichens.
Scenery and vegetation under constructionUpgraded warren-truss train bridge

The completion of the scenery around the road that passes under the warren-truss bridge and disappears into the background was also on the list to be completed. I started by temporarily removing the bridge so I could more easily access this area. I applied fine gray gravel to the shoulders of the roadway, then the normal cementing regiment of thinned glue and isopropyl alcohol. The next layer was earth coloured ground foam, followed by coarse turf and bushes, which I applied generously around the base of the bridge abutments.
Original warren-truss bridge structureUpgraded warren-truss train bridge with almost-complete scenery

Upgraded warren-truss train bridge with almost-complete scenery

While I had the bridge removed, I decided that it required a bit of an upgrade. I originally had to custom build the deck of the bridge using 3 Atlas bridge girder pieces to allow dual tracks to run over it, and used the truss supports from an Atlas warren-truss bridge kit, which I glued to the sides of the deck. I wasn’t happy with the design or look right from the beginning; the truss structure rubbed against rolling stock, and looked to be too small to support the double track.
Forest scene with Woodland Scenics scenery products and upgraded warren-truss bridge

Background forest scene almost completedForest scenery between tunnel portal and warren-truss bridge

I started by adding 3/8” wide styrene strips to each side of the deck, thus widening it by ¾” so trains would no longer rub on the support structure. I wanted the truss structure to also be enclosed over the top, which required raising the original Atlas warren truss supports. To do this, I built 1” risers out of styrene, which I then glued to the bottom of the trusses, following the angles of the original struts and bracing bars. The horizontal struts and bracing were also constructed out of styrene strips, which I built into t-girders for the main roof supports.
Completed background mountain scenery around trackBallasted track and scenery on background section

The truss system is not attached to the deck; but instead sits in 2 support slots that are located on the deck. I needed to build it this way so I could slide the deck back under the track-work as the track is no longer easily removable. The re-designed bridge was then sprayed flat black and lightly weathered with powdered pastels. I then simply slid the deck under the track and onto the abutments and place the superstructure into position.
Scenic details of rock face, ballast, and vegetation along tracks

Scenic details of forest scene on top of small mountainCompleted mountain scenery at track level

Ballasting the rails was next, followed by weathering the center of the track with black powdered pastels and applying light vegetation and overgrowth between the double tracks (once the ballast was dry of course). The backdrop section of track and surrounding areas are the same type of mountainous scenery as the completed tunnel mountain, so I used the same methods as before to build up the scenery here (see my Scenery – Part I post).
Background forest scene almost completedCompleted background mountain scenery

I ran out of trees to fully complete the raised section of track leading up to the trestle, so I will need to finish this once I put more trees together. At this point I’m not sure what section of scenery I will tackle next; most likely the area in front of the single and double tunnel portals on the front of my mountain and the area right in front of the backdrop section I just completed. However, I am currently working on finishing my very first scratch built structure, which is a priority to complete in the next day or two.
Forest scenery between tunnel portal and warren-truss bridge

Martes, Hulyo 1, 2014

Layout Scenery Part IV Bringing It Together


Main overview of Ty's Model Railroad Layout
I find it quite amazing how fast things sometimes come together. I’ve been working on this project for just under 3 years, and even though it’s a ways from being complete, it’s definitely now past the 90% mark. While building a project like this, you constantly wonder what the final result will be. You meticulously plan everything out, trying to achieve a certain look and feel, and even though you have a good idea of the direction you’re heading, you never quite know exactly how everything is going to come together in the end. This is especially true if it’s your first go at building a layout.

Then it happens; that most exhilarating part of model railroading that so many modelers talk about – the part when everything all of a sudden comes together. And what a grand and epic moment it is. After all of those long evenings planning, painting, plastering, sanding, nailing, wiring, cutting, and gluing, you finally get to see the results of your efforts. I reached this point with my layout just last week.

Left half of my layout under constructionConstruction of the parking lot using plaster

I had previously posted about completing my main-street town scene which took up almost one full half of my layout, so here I will cover the second half of the layout, which includes the turn table and represents more of an industrial setting. The first steps I took here were to prepare my layout for the building structures. I used plaster to build a parking lot behind the turn table which my Cutting Scissor’s Co. and scratch-built garage buildings would sit on. After sanding and leveling the plaster, I painted it with the same coloured paint I used on my roads.

Adding sifted sand to benchwork before adding structuresConstruction of the parking lot using plaster

My Pioneer Press (Northern Light & Power Kit) is to sit upon a gravel lot, so I used sifted sand and applied it directly to the plywood base using diluted white glue. At the same time, I also started the process of adding the same sifted sand to the turn table area and track. I ended up having to lay the sand down quite thick in this area to make it almost level with the tracks. I used a pipette to first wet the sand with isopropyl alcohol, then used a second to apply diluted white glue. After drying over night, I noticed that some large cracks had developed in the sand. This required reapplying more sand to fill in the cracks and sealing with white glue.

Industrial section of my layoutCutting Scissor's Co. and scratch-built garage building installed

Before positioning the structures on the layout, I drilled holes through the benchwork for the power leads to pass through for lighting. At the same time I also drilled holes and installed the remainder of the street lights along the roadways. I then carefully positioned each building onto its intended position. The leads to both the buildings and street lights were then wired to the rest of the electrical system beneath the benchwork.

Left mountain tunnel portals with ballasted trackIndustrial section of my layout

Fencing was added next. I used a section of fence from an Atlas White Picket Fence kit that I painted brown in front of the Pioneer Press building. For the turntable yard, I surrounded it with custom built chain link fencing (explained in my Layout Scenery Part III - Downtown post). The rest of my structures were added at this point, including the signal tower, water tower, freight station, and 2 small shed structures made from spare pieces.

View of main roadway and track at center of layoutStyrene platform used to cover Atlas remote switch machine

The switch machine controlling the turnout into my turntable has been an eyesore since it was first installed. I wasn’t able to install an under-table machine here like I did on my other turnouts, so now I had to find a way to cover the mechanism. To do this, I built a small platform out of styrene, which I then painted and weathered to look like concrete. I then added small railings made of brass rod. The platform then sits on top of the switch machine, conveniently hiding it from view. Now you might ask, “What exactly this platform is for?” Well, I’m not exactly sure. But one thing I can tell you is that it looks a whole lot more believable then that big black ugly switch machine! It blends in well with the rest of the scenery and goes mostly unnoticed anyways.

Installed Atlas water tower and Atlas signal towerPioneer Press building (Northern Light & Power kit)

Main overview of Ty's Model Railroad layout

Vegetation and greenery where added next. This included adding ground cover, bushes, shrubs, and trees to the remainder if the layout and to blend separate scenes into the surrounding terrain as needed. I still have a few small places to touch up and a few foliage elements to add, such as little grass tuffs, but overall the main scenery elements are complete.

View of converging mainlines in front of water towerTurntable yard shed

Ballasting the remainder of my track was the last major step. I didn’t have much left to ballast at this point, as I ballasted most of my track section by section over the last year. I did however have to take some extra time and precaution when ballasting all of the turnouts at the front of my layout. I had to make sure that I didn’t get any glue onto the turnout’s moving parts, so I used a fine paintbrush to apply small amounts of glue around the ties. After carefully adding the ballast, I vacuumed up the excess and ensured the turnouts moved smoothly. I finished the track by weathering it with black powder pastels.

Control panel with industrial section in background

Currently I am working on completing some nighttime lighting effects that represent a moonlit sky, which I should have complete in the next few days. I am also currently on the hunt for vehicles, figures, and other scenic details needed to complete the finer details of my layout. Street signs are also on my current to-do list.  

Center section of layout looking towards the town centerCutting Scissors Co. and scratch-built garage buildings
 
 
SEE MY UPDATED POV VIEDEO OF MY LAYOUT: