Ipinapakita ang mga post na may etiketa na â. Ipakita ang lahat ng mga post

Miyerkules, Oktubre 12, 2016

Layout Scenery Part I – The Mountain


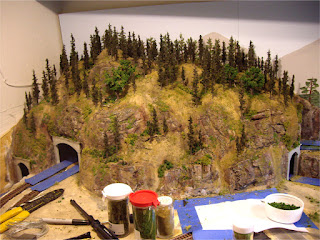
Completed mountain forest scenery
I’ve been excited to start the actual scenery on my layout since I began this project over 2 years ago, and finally, the time has arrived. Building my layout thus far has been mostly a step-by-step process, starting with benchwork, then track, electrical, plaster terrain, etc. This one step at a time progression always meant that I knew exactly what I needed to work on, and what my next steps were in the construction of my model railroad. However, once I finished my hard-shell terrain a couple months ago, I realized that I now had several options as for what project I wanted to tackle next. It was now time for the scenery stage. I soon though realized that the ‘scenery stage’ was quite a broad term and entailed pretty much the rest of the construction on my layout. I needed to break down this scenery step into more manageable stages, so I decided to fully complete one section of the layout at a time. With that plan in place, what a better section to start on then the main feature of my layout, the mountain.

Creating bushes with ground foamFine and coarse foam ground cover

I’ll first start by saying that I don’t really have any evolution photos of the scenery on the mountain but only before and after shots. This is because I did a lot of experimenting with different ground cover and techniques, and before I knew it, my scenery was pretty much complete before I even considered taking photos. So instead, I will describe the materials used. The terrain and rock croppings were already previously painted (see my Painting the Terrain post), so I didn’t have to worry about this step.
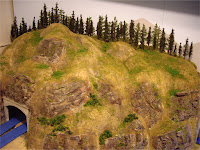
Start of tree line in the backgroundCompleted mountain forest scenery

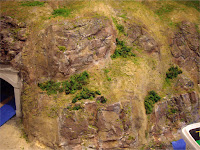
I started by liberally applying thinned white glue with a paint brush directly onto the painted terrain, spreading it over about 6” by 6” sections at a time. I then sprinkled Woodland Scenics earth-blend blended turf over the wet glue. The earth-blend turf seemed to really compliment the tan colour paint I had used on all of the hard-shell terrain. I used the same firm’s green-blend turf to then highlight certain areas, such as more level areas where green grass would be more prevalent. I had a rather large gap between the bottom edge of my backdrop and the mountain terrain, so I filled this space using light green lichen, also from Woodland Scenics. Everything was then sealed in with a light spray of thinned white glue.

Mountain forest scene details with ground foam, trees, and talus

Trees were the next step, which I had previously completed putting together (see my previous post). I started with smaller trees in the background, placing them quite densely so they would blend into my backdrop. As I moved forward, I used increasingly taller trees which seemed to add a bit more depth to the forest. I also found that placing tall and short trees side-by-side made the terrain look steeper than it actually was. I didn’t use the supplied bases that came with the trees armatures; instead I drilled small holes directly into the plaster terrain so I could attach the trees using the small insert pins at the bottom of each tree. Any plaster dust that came up from drilling was carefully blown away with a can of compressed air.

Completed mountain forest sceneryCompleted mountain forest scenery

Bushes, coarse turf, underbrush, lichen, and other various types and colours of ground foam were added next, mostly all from Woodland Scenics. This step took a lot of trial and error and paying around with different materials to achieve the look I wanted. However, nature is quite random and has a lot of variety when it comes to colours and plant life, so applying the different scenic materials in a haphazard manner only adds to the realism of the forest scene. I chose mostly Woodland Scenics material because the different ground foams and colours can be easily combined in any way and still look natural, which is a great, fool-proof method for first-timers!
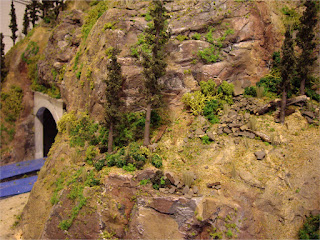
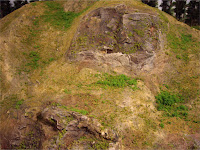
Scenery using Woodland Scenics ground foam and field grass products

To finish the scene, I added natural talus rock that I found in the coulees near my home. I added small tuffs of Woodland Scenics field grass in random areas, and added any additional details in spots that I may have missed. For deadfall, I used small wood pieces that I carefully picked out of a bag of old potting soil, as well as real deadfall I found in nature.

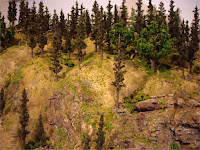
Scenery using Woodland Scenics ground foam and field grass productsMountain forest scenery

I’m quite happy with the final results, and will continue this process across the rest of my background mountainous scene over the next month. It makes sense to finish the background scene first, as I wouldn’t want to be reaching over a completed foreground scene to work on it.
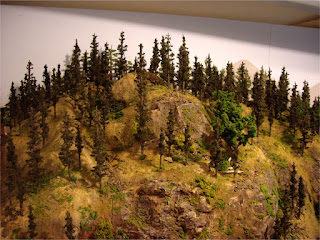
Completed mountain forest scene tree-line

Miyerkules, Abril 20, 2016

Throwback Thursday 10 – GT 4612 at Palmer MA In January 1992


A snowless January 24, 1992 finds GT 4926 on the point of a switching move while interchanging cars with CSX. David Simmons photo, author's collection.

OK so a little late, but it’s still Thursday (on the west coast) – today’s Throwback Thursday takes us back to January 24, 1992. We’re at Palmer, Massachusetts, the location of the crossing between CSX’s former Boston & Maine Selkirk-Boston mainline and the Grand Trunk (Central Vermont) line from St. Albans Vermont to New London Connecticut. In this photo by David Simmons, taken on January 24, 1992, the CN-controlled GT is making a reverse move to the interchange yard located adjacent to the CSX tracks toward the east side of town. The GT’s own yard is located to the west, on its’ own north-south line. The power for this move is GT 4612-CV 4926-GT 4605.

In the intervening 23 years, a good deal has changed at Palmer. The most obvious change was the takeover of the CV by Railtex’s New England Central Railroad in 1995. Gone were the blue and red (or green and yellow) geeps, replaced by GP38’s in an attractive yellow and blue paint scheme. Railtex was folded into RailAmerica in 2000, itself taken over by Genesee & Wyoming a few years back. Another shortline, Massachusetts Central also interchanges with CSX at Palmer, utilizing trackage rights over NECR south from their own line north of town. Power for the Mass Central is (among others) a pair of leased GP38-2’s in a retro-B&M paint scheme, a GP9 in the same paint scheme, and an eclectic ex-Southern NW5. Not only have the railroads changed, but the former GT station is now a popular local eatery, the Steaming Tender Restaurant; I’d be hard-pressed to find a better railfan-friendly restaurant!

What about the locomotives? GT 4612, a 1989 graduate of the GT GP9 rebuild program at the railroad’s Battle Creek Michigan shops, was no stranger to the area, having been built at CV GP9 #4923 in March 1957. The Battle Creek shop forces overhauled the mechanical systems on the engine, but more noticeably chopped the nose and applied an EMD Spartan-type cab; additionally, the unit lost its’ distinctive “torpedo tube” rooftop air tanks. Following its’ rebuild, the engine served the CN North America system until 2011 when it was sold to the Carolina Coastal Railway, and became CLNA 4612. Photos on the internet reveal that the engine is alive and well on the CLNA in and around Wilson, NC, still largely in its’ early-90’s blue and red paint. CV 4926 was likewise built in March 1957 and also eventually got chop-nosed (retaining existing cab and getting new number boards), but interestingly retained its’ green and yellow paint scheme. Evidently not as popular as the GT rebuilds, the unit was sold to the Arkansas & Eastern Railroad in 1993. GT 4605 began life as CV 4551 and similarly went through the GT rebuild program in 1989. The unit survives today as SSRX 4605 (Manning Rail), a grain elevator switcher at Fairmont, NE – a long way from its’ New England background! The unit is painted in a nice red and blue paint scheme.

A couple of my photos from a day spent railfanning the junction on July 8, 2014:

NECR 3015, the former CN 9457 is probably not a stranger to the rails through Palmer. Here is is seen shoving a good-sized cut of cars to the CSX interchange on July 8, 2014. Photo by author.
Mass Central 1751, in a nice modern rendition of the classic B&M paint scheme, has set off the interchange cars for CSX and heads back to home rails with a handful of cars for the shortline's customers. Author's photo, July 8, 2014.

Steaming Tender Website

‘Til next time,
Cheers,
Peter.


Huwebes, Hunyo 11, 2015

Weekend Project – Athearn Tank Car “Repaint” 100th Post!


Over the weekend I turned an Athearn RTR UTC 30,000-gal tank car that was originally decorated for DODX into one decorated for Procor (PROX). 


Lately my free time has been reduced a bit due to work demands, so I thought I’d attempt more small projects that I could reasonably accomplish in the span of a weekend. This past weekend I wrapped up the first of what will hopefully be a series of regular updates on this sort of thing. And, as it turns out, this is my 100th post - how time flies!

This week’s project involves redecorating an Athearn RTR Union Tank Car prototype 30,000 gal general purpose tank car. I say redecorating because I didn’t actually repaint the car. Instead, I took a ready to run model that was painted for the US Department of Defense (DODX) and used a Badger air eraser to scrub off the unwanted lettering. The air eraser is essentially a small grit blaster that can use baking soda or aluminum oxide as a blasting media (I use baking soda, it’s much cheaper than aluminum oxide). I carefully masked the areas to be removed, which allowed for preservation of most of the car’s original finish. I specifically chose the DODX car to start with as it had substantially less graphics to start with compared to other paint schemes of the same car. Also, it’s somewhat less desirable, so it was much cheaper to buy than some of the other RTR schemes.

After masking the areas to be removed, I blasted off the unwanted lettering outdoors. Doing so does take a sizeable air compressor due to the amount of air required, at relatively high pressure. After I was done, I rinsed the car with water and let it dry overnight. I then used Microscale’s set 87-1466 (Procor/PROX, Various Tank Cars) to reapply the desired lettering. The set is a great improvement over some of their previous offerings for Procor equipment, but still contains a number of inaccuracies. Using the air blaster, I was able to preserve some of the original graphics such as the “2 INCH HF COMP SHOES” on the side sill and the COTS decals. Lettering was pretty straightforward, using prototype photos found on Chris Vanderheide’s Canadian Freight Car Gallery website. I found a car only two numbers away; I chose PROX 44815 since the number was already aligned in the decal set and wouldn’t require any splicing of individual digits. In prototype, the car is used to carry condensate, essentially a thinning agent used in crude oil pipelines to improve viscosity. The real-life car was built in 2007 at UTC’s now-closed East Chicago, IN plant, and is one of many so-called “short GP30’s” in the fleet (General Purpose, 30,000-gal capacity, less than 60’ in length over pulling faces).  I enjoy decal work since it’s easy to see the results of one’s work, and in this case, pretty quick; the car was decaled in less than an hour. After decaling I used Testor’s gloss coat to seal the decals to the car. I will eventually weather the car lightly, as I model up until 2010, so the car would still be relatively clean and shiny in my modeling era.

‘Til next time,
Cheers,

Peter.