Ipinapakita ang mga post na may etiketa na Mountain. Ipakita ang lahat ng mga post

Miyerkules, Oktubre 12, 2016

Layout Scenery Part I – The Mountain


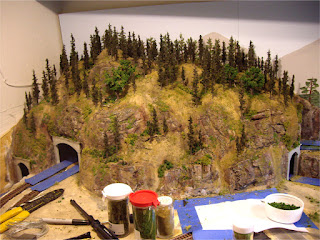
Completed mountain forest scenery
I’ve been excited to start the actual scenery on my layout since I began this project over 2 years ago, and finally, the time has arrived. Building my layout thus far has been mostly a step-by-step process, starting with benchwork, then track, electrical, plaster terrain, etc. This one step at a time progression always meant that I knew exactly what I needed to work on, and what my next steps were in the construction of my model railroad. However, once I finished my hard-shell terrain a couple months ago, I realized that I now had several options as for what project I wanted to tackle next. It was now time for the scenery stage. I soon though realized that the ‘scenery stage’ was quite a broad term and entailed pretty much the rest of the construction on my layout. I needed to break down this scenery step into more manageable stages, so I decided to fully complete one section of the layout at a time. With that plan in place, what a better section to start on then the main feature of my layout, the mountain.

Creating bushes with ground foamFine and coarse foam ground cover

I’ll first start by saying that I don’t really have any evolution photos of the scenery on the mountain but only before and after shots. This is because I did a lot of experimenting with different ground cover and techniques, and before I knew it, my scenery was pretty much complete before I even considered taking photos. So instead, I will describe the materials used. The terrain and rock croppings were already previously painted (see my Painting the Terrain post), so I didn’t have to worry about this step.
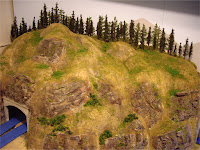
Start of tree line in the backgroundCompleted mountain forest scenery

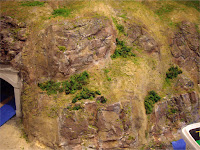
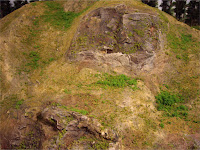
I started by liberally applying thinned white glue with a paint brush directly onto the painted terrain, spreading it over about 6” by 6” sections at a time. I then sprinkled Woodland Scenics earth-blend blended turf over the wet glue. The earth-blend turf seemed to really compliment the tan colour paint I had used on all of the hard-shell terrain. I used the same firm’s green-blend turf to then highlight certain areas, such as more level areas where green grass would be more prevalent. I had a rather large gap between the bottom edge of my backdrop and the mountain terrain, so I filled this space using light green lichen, also from Woodland Scenics. Everything was then sealed in with a light spray of thinned white glue.

Mountain forest scene details with ground foam, trees, and talus

Trees were the next step, which I had previously completed putting together (see my previous post). I started with smaller trees in the background, placing them quite densely so they would blend into my backdrop. As I moved forward, I used increasingly taller trees which seemed to add a bit more depth to the forest. I also found that placing tall and short trees side-by-side made the terrain look steeper than it actually was. I didn’t use the supplied bases that came with the trees armatures; instead I drilled small holes directly into the plaster terrain so I could attach the trees using the small insert pins at the bottom of each tree. Any plaster dust that came up from drilling was carefully blown away with a can of compressed air.

Completed mountain forest sceneryCompleted mountain forest scenery

Bushes, coarse turf, underbrush, lichen, and other various types and colours of ground foam were added next, mostly all from Woodland Scenics. This step took a lot of trial and error and paying around with different materials to achieve the look I wanted. However, nature is quite random and has a lot of variety when it comes to colours and plant life, so applying the different scenic materials in a haphazard manner only adds to the realism of the forest scene. I chose mostly Woodland Scenics material because the different ground foams and colours can be easily combined in any way and still look natural, which is a great, fool-proof method for first-timers!
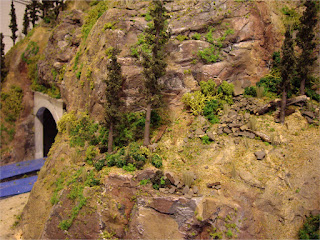
Scenery using Woodland Scenics ground foam and field grass products

To finish the scene, I added natural talus rock that I found in the coulees near my home. I added small tuffs of Woodland Scenics field grass in random areas, and added any additional details in spots that I may have missed. For deadfall, I used small wood pieces that I carefully picked out of a bag of old potting soil, as well as real deadfall I found in nature.

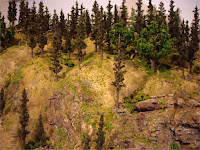
Scenery using Woodland Scenics ground foam and field grass productsMountain forest scenery

I’m quite happy with the final results, and will continue this process across the rest of my background mountainous scene over the next month. It makes sense to finish the background scene first, as I wouldn’t want to be reaching over a completed foreground scene to work on it.
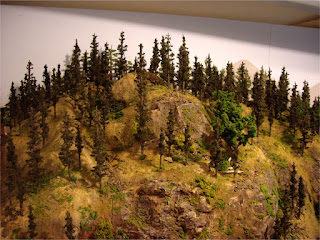
Completed mountain forest scene tree-line

Huwebes, Enero 15, 2015

Mountain Tunnels Part I


Before I could start the tunnel structure, which would be the base for the future mountain, I had to finish the track. First was paint. I experimented for a few days to find a method that covered quickly, and looked effective. Since my layout is right beside my furnace and hot water tank, and there is no ventilation, spray paint and enamels were out of the question. That left me with hand brushing with water-based acrylics.

Painted railroad tracks

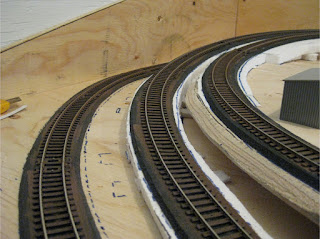
To paint the track, I used Burnt Umber acrylic, mixed with a bit of grey and thinned it with 25% water and 25% isopropyl alcohol (70%). This mixture covered well, and dried quite uniformly on the ties and in the webs of the rails. I had to use extreme caution when painting the turnouts, making sure I moved them frequently while the paint dried so they didn’t get stuck in place. Once the paint was dry, I cleaned any paint off the top of the rails using a fine grit sanding block.

Painted railroad turnoutsPainted railroad tracks

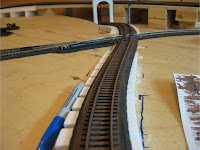
With the track painted, the last thing I needed to do was ballast the track. Unlike painting the track, I only ballasted the track that would be in the tunnels. This would allow me to finish the rest of the scenery on the layout and avoid having to work around the ballasted track.

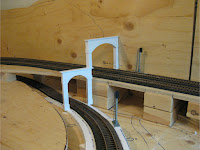
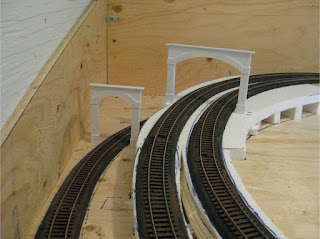
Right tunnel entrances with portalsFuture mountain tunnel entrance positions

I used Woodland Scenics Medium Buff ballast. This, like most everything else, was my first time ballasting track, so doing it in the tunnel sections, where it would be a lot less noticeable, was a perfact place to start.

Left tunnel entrances with portals

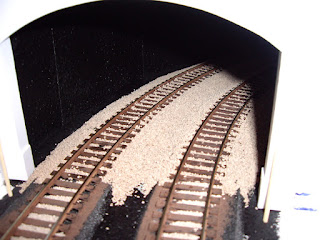
I used a method that I found to be most popular in my online research. This method is to lay your ballast on the track and shoulders, then use a brush to level it between the ties and make it uniform. Then, using alcohol and an eye-dropper, gently wet the ballast. This reduces the water tension when adding the glue, and allows the glue to wick better through the ballast. Once the alcohol soaks in, apply a liberal amount of white glue, thinned 50% with water, and let this soak in as well. Be careful not to add too much glue at once, or your ballast with start to flow away. Once the glue completely dries, about 24 hours later, the ballast will be hard as concrete!

Tunnel entrance with track ballast

One thing I learned from this first ballast attempt is to not use too much ballast. You can always add more, but using too much makes things messy, and it’s almost impossible to brush all of the granules off of the tops of the ties. Model Railroader Magazine has a really good article in their February 2011 magazine about ballasting track. They explain a 2-part application process of ballasting, where you first apply glue, then ballast, then re-apply ballast and glue again. This method looks really nice in the end. I just might try this when I complete the rest of my track.

Tunnel entrance with track ballast

With the track and tunnel portals complete, I can finally start building the large mountain which the 2 tunnels will run through. Before I can build the mountain, I need to build each tunnel structure, which the mountain scenery will sit on. Each tunnel, which will include the supports, the walls, and a common ceiling, and will act as the base for the mountain.

The first task is accessing de-railed trains inside the mountain. The double wide tunnel is wide and short enough that I can access the inside of the tunnel from either side. The smaller, single tunnel which goes under the double tunnel, is the opposite situation. To solve this, I cut an opening in the benchwork right beside the track. This will allow me at least some room to retrieve a train if it becomes stuck in this tunnel.

Track access hole

Tunnels are dark, so to keep things as dark as possible, everything inside the portals was painted black, with no exceptions. Since there were sections of the tunnel that didn’t have a complete wall, it was important that everything was blacked out, so nothing could be seen inside the tunnels. I used cheap black acrylic paint from the dollar store, which worked great for this purpose.

Mountain tunnel interior area painted blackMountain tunnel interior area painted black

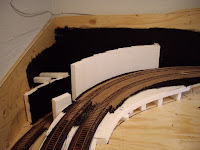
I then used Styrofoam to start building the walls. I used a combination of white glue and toothpicks to hold the foam together and keep it in place while the glue dried. Once dry, each wall section was painted black. I did visual checks on each end with the portals in place, to ensure that no wood or white Styrofoam was visible from any angle, and if there was, I quickly covered it with black paint.

Foam walls and supports for tunnel structureFoam walls and supports for tunnel structure

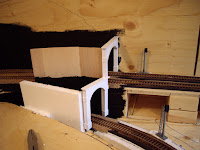
Due to spacing limitations, I had to combine the small and large portal on the tunnel entrances on the right hand side of the mountain, as seen below. I cut off 1 inch at the left base of the large portal, and glued it to the top of the right side of the small portal. This now allows both portals to exist where they were both intended to be.

Construction of right tunnel entrancesConstruction of right tunnel entrances

The entrance to each portal is the most visible, so it was important that there were complete side walls on both sides of each portal, extending far enough into the tunnel so you could not see that it ended. As seen in the top portal, right side of the mountain, I used 1/16” wood craft board as a divider from the lower tunnel portal. This was to prevent light from either of the portal entrances, showing through to either the top or lower tunnels. I had to use the thin 1/16” wood craft board as the foam I had was too thick to use without interfering with the lower tunnel.

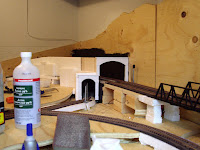
Mountain tunnel interior foam structure nearing completionMountain tunnel walls with portals in position

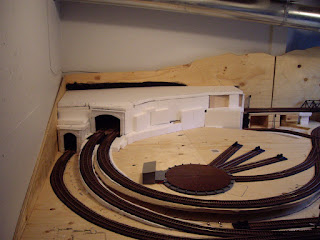
Once I ensured the tunnel portals fit correctly, and were temporarily in place, I did a final visual inspection to make sure everything was pitch black inside. I then used a large template to cut a solid one-piece foam roof for the entire tunnel structure. I attached foam supports on the back-board, secured with screws and glue, to support the back and left edge of the roof. I painted the roof and foam supports black, and glued it into place.

Tunnel walls painted with Mar’s Black acrylic paintCompleted foam tunnel structure

Any gaps were filled in with carefully cut pieces of foam, and upon my final inspection, there was not even a sliver of light visible inside the tunnels. Now I have a solid tunnel structure which my mountain can be built on top of, without any possibility of affecting the tunnels themselves.

Completed foam tunnel structure

Sabado, Setyembre 6, 2014

Mountain Tunnels Part II


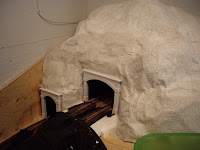
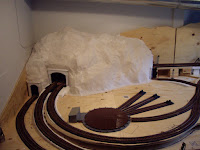
I started building the basic mountain structure by bunching up news print into various sized balls, held together with masking tape. I then started placing the crumpled paper balls over and beside the tunnel structure.

Crumpled paper for hard shell sceneryCrumpled paper for hard shell scenery

I started with the largest pieces first, and worked my way up with the smaller pieces. I crumpled paper into specific shapes in certain areas, and re-arranged the paper until my mountain was the basic shape I was looking for. Once everything was in place, I used long pieces of masking tape to hold the paper structure in place.

Crumpled paper balls for mountain structureMasking tape to hold crumpled paper in place

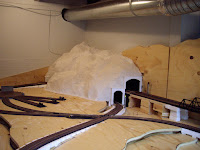
Using plaster cloth that I cut into 3 – 4 inch strips, I started to cover the crumpled paper, overlapping each strip by 1 – 2 inches. I started at the top, and worked my way down, ensuring there were no gaps and used my finger to smooth out any rough edges. I kept my tunnel portals in at this time so I could ensure the plaster cloth and portals fit together correctly. Once the first layer of plaster cloth was dry, I put on a second layer to make a sturdy, hard shell.

First layer of plaster clothFirst layer of plaster cloth
 
While the large mountain was drying, I built a second small mountain at the opposite end of my layout. I used the same method as before, arranging crumpled paper to get the desired shape, then covered it with plaster. I also added a rock casting that I previously made using a Woodland Scenics rubber mold and plaster of peris. I held the rock casting in place temporarily with tooth-picks until I was ready to use the plaster cloth.

Paper base for small embankment and mountainPlaster cloth on small corner mountain

Once the plaster cloth was dry, I used a soupy mixture of plaster of paris to cover the entire mountain structure to give it its final shape. Now I must admit, using plaster of any type is probably my least favorite thing to do. Plaster of paris is difficult to use as it sets extremely quickly, so there is only a small window to work with it, and you must use small batches at a time. I would have loved to use sculptamold, but the one hobby store in Lethbridge that sells it is closed for a month as they relocate.

Existing backdrop between mountainsCompleted plaster cloth on hard shell mountain

I attempted to carve rock faces out of the set plaster, and found this to be very difficult, and not the right affect I was looking for. The carving worked in some areas, but not all as the plaster was either too soft or too hard, and just chipped away from the plaster cloth. In the problem areas, I used shallow molds that I made out of aluminum foil. This was also problematic as they need to be placed on the mountain at just the right time, or else they would crack and crumble, or just ooze out of the bottom of the mold.

Completed plaster cloth on hard shell mountainFirst layer of plaster on mountain

First layer of plaster on mountain