Ipinapakita ang mga post na may etiketa na Kit. Ipakita ang lahat ng mga post

Sabado, Oktubre 8, 2016

Model Kit Building And Painting Tips And Tricks


Our staff here at Chinook & Hobby West have noticed many of the same questions from our beginner level model builders. We have done some research and pooled our own knowledge to share some tips and tricks to help you along your hobby adventure.

Please leave a comment below and let us know your tips, ideas or if this article helped you.
Enjoy and Happy Hobbying!


Building a Model
  1. You need a designated space such as a large table with good lighting.
  2. Read through the instructions a couple of times before you start.
  3. Cut, don't snap off, individual parts from the plastic sprues.
  4. Compare the parts included, to the list of parts in the instructions.
  5. Smooth the edges of parts using a sanding stick or file to remove nubs and excess plastic resulting from manufacturing, then wash them in a mild detergent and allow to dry. Make sure to use gentle pressure when sanding so you don't take too much off.
  6. Collect your tools.
  7. Follow the parts assembly sequence exactly. Be patient and don't jump ahead.
Extra Tips
-Use the minimum amount of glue necessary to make a solid bond. 
-Enhance your assembled model by filling in gaps with putty and carefully sanding the filled surface.

Come down and see us at Chinook & Hobby West or email us if you have any questions.

Painting Your Model
  1. Do some research if you're building a replica. Every era has incorporated its own style. A replica of a Cadillac painted pink would not be an accurate model of the original car but may be your vision of your dream car.
  2. If you can, find a modeler's club and learn hands-on tips from more experienced modelers. There are some great online forums on the internet.
  3. Plan your paint scheme if you're doing your own design. Write down the colours you're thinking about so you don't forget that vision.
  4. Work on a clean surface.
  5. Clean your model. Use rubbing alcohol or plastic prep and let the model dry thoroughly. This helps to remove all oil and any other contamination, including excess glue.
  6. Put the model or model part on a paint stand or on a drop cloth.
  7. Shake the spray can thoroughly to mix paint properly.
  8. Test the nozzle by spraying a piece of cardboard, such as the inside lid of your model box.
  9. Plan on multiple thin coats rather than one thick coat.
  10. Start spraying to one side of the model, stroke over the model, and spray past the model before you stop.  Keeping the spray about 6 to 8 inches away from the project.
Extra Tips 
-Aerosol spray paints are good, but you may want to invest in an airbrush as you grow in the hobby.  
-Bright, shiny finishes can be achieved by painting the desired color, letting the model dry, spraying with a clear coat, and then finishing with a buffing compound. 
-Complete the detail work as necessary with fine-tipped artist brushes.
-Use thinners for your type of paint (acrylic thinner for acrylic paint) when brush painting.
-Paint in a ventilated area. 
-Wear a painter's mask if you are sensitive to smells. 
-Many experienced modelers suggest using primers when painting.

We hope that these tips and tricks help you create a piece you can be proud of.  Remember to have patience, take your time and if you get frustrated, walk away (after you clean up). You can always go back to it later!
Please leave a comment and remember, these ideas are not finite; there are so many things to try and experiment with.  Have FUN!


These tips are suggestions and we are not responsible for damage or accidents that occur to your project.


Martes, Hulyo 26, 2016

10 Tips For Buying A Model Kit


Generally a model kit contains a scale model of an object or vehicle - automobile, aircraft, military vehicle, motor, building, replica figure, etc. (there are many to look at and choose from). Such kits include all the necessary pieces of the idea photo on the box (make sure to ask if you are unsure as some buildings show fences and trees, but these are sold separately or just a special part(s) of a larger model), which the hobbyist assembles and then personalizes with paints and decals (usually sold separately).
With model kits, there are two primary types of hobbyists: the builder and the collector. The builder fancies the challenge and the hands-on aspect. The collector, on the other hand, focuses on the possessing, and many collectors opt to display the kits untouched, in their original packaging.

Buying a Model Kit

For the new hobbyist, buying a model kit can be a daunting task simply due to the sheer amount of choice that’s available. Collectors have to choose a vehicle and the scale at which they want to work. Then, they have to factor in price, complexity, customization, tools and supplies, and so forth. If the desired model is no longer manufactured, then the hobbyist has to deal with a series of additional concerns, including appreciation. Choosing a kit is not simple, but even the new hobbyist can avoid the most common pitfalls by following these 10 tips:

1. Research Model Kit Types

The first step is awareness of the various types of kits that are available. The traditional model kit, often called Snap-Tite or Skill Level 1, is made of plastic and simply snaps together. Snap-Tite kits are very newbie-friendly and usually only require mild filing and light gluing to complete.  Experienced hobbyists will eventually graduate to Skill 2 requiring glue and paint and to any of the more advanced Skill 3-5 kits as well as die cast models and radio-controlled vehicles.


2. Choose a Vehicle Type

The next step is to choose the type or class of vehicle. The most popular model kit classes are classic, sports car, NASCAR, hot rod, truck, and service vehicles. Classic car models tend to focus on American muscle, but there are models available for the classics from all over the world. Skill 1 classics tend to be the most accessible kind of kits for the beginner. Hot rods are roadsters, typically open wheel, that have very distinctive aesthetics and engine mount configurations. Hot rods make great looking models, but they can be quite challenging in the building and customization stages. The most popular type of automotive model kit is the sports car model (Corvette, Austin Martin, Ferrari, etc), a class that focuses on street legal sports cars from all years and from all around the world. In the U.S., NASCAR models rival the sports car and classic car classes in overall popularity. The service vehicle class, which are intricate and challenging, includes vehicles like fire trucks, ambulances, snowplows, and so forth.
And just to add to the pile, don't forget Military vehicles, aircraft and ships.

3. Select an Interesting Subject

When choosing a particular model, collectors should opt for a subject that engages them. A Porsche 911 is very popular and a staple in most automotive model collections, but it can also be very boring due to that commonness. Rather than choosing a model based on what is already known, the collector should shop around until a model chooses them. Finding a model car that is aesthetically interesting, challenging to build but still suitable to the beginner, can be difficult, but such models are available.

4. Decide on Scale

The next step is to choose the scale of the model. The most common model size for a car is 1:25 (and manufacturers often use 1:24 rather than 1:25), which is approximately 6 to 7 inches long. In Europe, 1:18 is also very popular. The 1:18 kits are approximately 9 inches long. There are also 1:60 scale kits, which are approximately 3 inches long and are particularly well suited to the small hands of a young child. Small kits are also popular among collectors and builders who enjoy the miniaturization aspect, but tiny kits can require a great deal of patience and fine hand control.
We will discuss in a future blog about the different scales in military, ships and aircraft.

5. Evaluate the Complexity

After choosing the model and scale, consider the complexity of the kit. The first gauge of complexity is the number of pieces in the kit. A Skill 1 kit usually has less than 50 pieces. A Skill 2 kit can have up to 200 pieces. A Skill 3-5 kit can have 200-1500 or more pieces and include many fine parts.
Skill 1 kits are preferable for beginners, children, and adult builders who just want a relaxed experience. Most children can complete a Skill 1 kit with little supervision and only occasional help. Skill 2 or higher kits require additional skills, tools, and supplies. Be aware that choosing a complex model that the builder isn’t ready for can intimidate and overwhelm the builder and therefore loose interest in a very enjoyable hobby.

6. Consider Customization Options and Necessities

An often hidden aspect of model building is the optional, and sometimes necessary, customization and personalization of the model. Automotive model kits are often labeled 2-in-1, 3-in-1, and so on; what that means is that the build process has a branch that allows for multiple finishes. For instance, many classic car kits come in a 3-in-1 configuration, which means that the collector can build it as a stock car, custom car, or race car. Many hobbyists opt to build these kits in all variants and display them alongside each other. First-time builders, however, should consider a basic kit that has no variants for simplicity.

7. Consider the Needed Tools and Supplies

Another important consideration is tools and supplies. The beginner will require basic hobby tools, such as a hobby knife, tweezers, paint, a fine file, and modeling glue/cement. Skill 2 and higher kits, however, will require a range of hobby knives and files as well as putty, sanding paper, spur cutters and perhaps a rotary tool or other power tools. Diecast models require metalworking tools, and radio-controlled models require batteries, an electronic motor, controller, and so forth.

8. Opt for a New Automotive Model Kit

Manufacturers produce kits in runs, which are typically time-limited. Once a run ends, the kit then becomes vintage and begins to appreciate in value. Vintage model cars sell at many times their original sticker price. For the builder, the most common reason to buy vintage is to get a particular classic car, which tend to go in and out of production. Although this will limit the hobbyist’s options, the beginner should focus on new kits in order to work with modern materials and avoid the vintage premium. (many kits are done in a re-release at milestone marks such as the 10th, 25th or 50th year anniversary of that kit or the car/piece)


9. When Buying Vintage, Price It and Haggle for It

If the collector opts to purchase a vintage model, then they should price it first. Price guides will provide a general appraisal, and the Internet is a powerful resource to determine the actual going rate. When buying a vintage model, shop around; check online, local shops, garage sales and shows/conventions. Once found, don’t settle for the listed price, which is generally a best-case scenario for the vendor.
(Be realistic in your negotiations you don't want to insult the one selling the kit in case you want to buy from them again)

10. New Builders Should Have a Contingency Plan

New builders should have a contingency plan because first builds usually do not go according to plan. A benefit of buying a current kit is that the collector can easily purchase an additional kit from the store or replacement parts directly from the manufacturer. Some vendors sell open box kits, which may be missing parts but are a cost-effective way to have spare parts on hand.


Conclusion

Buying a model kit for the first time can be difficult due to the sheer amount of choice available. A hobbyist’s first step should be to educate himself or herself on the various options that are available: classes, models, scales, books and other sources. Next, the beginner should choose a subject that interests them, but also one that isn’t so complex that makes it difficult to learn. With the first build under one's belt, the builder will be able to graduate to one of the more intricate kits the next time, and go into dioramas - but that's another blog......

What did you think of this article?  Please email us or comment on this post and let us know your thoughts and questions.


partial source 

Linggo, Hunyo 12, 2016

Atlas Water Tower Kit


Atlas Water Tower Kit
I purchased an HO Atlas Water Tower kit quite a while back, even though I originally had no intention of using it on my layout. This was mostly because my layout wasn’t going to be set in the steam-era, and lack of space on my layout. However, now that most of my structures are situated on my layout, I decided that that maybe I could make room for it after all. And as for it being from the steam era, well that hardly mattered as there are still many original water towers standing today, some still even currently being used. The water tower will stand in front of the turntable, directly to the left of the signal tower, and will service directly on the main line track.
Unpainted Atlas Water Tower kit pieces
The first step was to paint the components that made up the main structure. The Atlas Water Tower kit shows the completed model painted with a light green tank, however I opted for a more generic look by painting the entire structure brown. I started by spraying each piece with Camouflage Brown Krylon paint, then letting them dry for 48 hours. The brown base coat was quite dark, so I mixed several washes of brown enamel at different shades, and randomly painted different pieces of the superstructure with the different shades of brown. These slight colour variations add a more realistic, natural look to the overall wood structure. The same process was also used on the vertical planks that make up the main water tank.

Water tower under construction
Assembling the pieces was quite straight forward, and all the pieces fit snugly together. I needed to scrape off paint on every joint of the tank’s support structure to ensure the pieces slid completely into each other. For the roof, I first painted it flat black, then dry brushed it with satin aluminum enamel paint. I finished it with orange powdered pastels to represent the presence of rust. Once the entire structure was together, I weathered it with various powdered pastels and sealed everything with 2 coats of Testor’s dull-coat.

Atlas Water Tower Kit
A final detail that isn’t included in the kit, but is highly recommended, is the chains and counter-weights that support and raise/lower the water spout. You can represent these with black thread; however chain link has the most prototypical look. I found some small chain link in the jewelry clearance section at Walmart, which I then cut to length and painted black before installing it onto the model. Even though the chain is a bit larger than a prototypical sized chain, the look is quite convincing. Now that the model is complete and installed on the layout, I’m definitely happy that I decided to use it.

Linggo, Oktubre 11, 2015

Cuttings Scissor Co Kit


Cutting’s Scissor Co. kit by DMPThe Cutting’s Scissor Co. kit is my second structure kit from Design Preservation Models. My layout does not have much more room for commercial or residential structures, but I do require a couple more industrial structures to fill some empty real estate, which this kit fits into perfectly. As always, I started by removing any edge spurs (left from manufacturing), and sanded the edges of specific wall pieces down to 90 degrees, ensuring a good fit when gluing the model together. This is required on most all DPM kits, as the structure edges are not at a perfect 90 degrees, and constructing the model without sanding will result in either a crooked structure, or large gaps in the exterior joints.
After sanding the required pieces, I washed them in warm, soapy water to remove any oils that my hands may have left on them from the previous step. Once dry, I glued the walls carefully together on a level surface, ensuring the wall pieces fit together perfectly and evenly. I made sure each corner was square by using a square wood dowel on the inside of each corner joint while I was gluing them together. 
Constructing my Cutting’s Scissor Co. kitRoof supports inside a DPM model

Once the structure had dried for an hour, I cut 2 roof structured from a sheet of supplied styrene, and glued on the roof supports, which were also supplied in the kit via a bulk length of strip styrene. I did not glue the roof structures on at this point, as I needed the roof open to add window glazing and interior details later on. The kit also calls for awnings over the loading bays using a leftover piece of styrene from the roof structures. I opted for a textured styrene awning that I had leftover in my scrap bin, which looked a little more authentic. I also added horizontal supports for the awnings using narrow strip styrene.
Masking model windows for faster and more accurate paintingMasking model windows for faster and more accurate painting

After 2 coats of brick red paint had dried, I started masking the structure so I could paint the details, including trim, windows, and doors. Masking takes time, but as hard as I try to paint free hand, I can never achieve the same crisp lines and accuracy as I do when I mask. I use a small flat head jeweler’s screwdriver to press the masking tape into tight corners and on narrow edges to make sure paint doesn’t bleed underneath. Bleeding paint isn’t 100% avoidable, but is easy enough to touch up in the final steps of painting.
Name change from Cutting’s Scissor Co. to Velikovsky’s DistributersInserting styrene interior lighting structure into the kit’s exterior shell

Once all parts of the model were painted, I weathered it lightly with pastel powder, and applied a dry transfer decal (Velikovski’s Distributors) to the exterior wall. The last paint layer was a final spray of dull-coat to seal everything in. Once everything was dry, I applied clear styrene for window glazing, then cut and applied printed paper blinds to the inside of the windows using small strips of masking tape (clickhere for printable blind templates). It was also at this point that I started to assemble the interior structure, which would serve as lighting and interior rooms.
Interior styrene and cardstock insert structure for my DPM kitWiring for interior lighting of DPM kit

As most previous structures I have built, the interior is completely removable from the building structure itself. By simply sliding the exterior shell off, I can easily access the lights and add interior details as needed in the future. The interior structure is built in such a way that once fully inserted into the building’s shell, the building looks as if it is full of separate rooms when looking through any of the small windows. Cardstock was used for texture and colour on the floors and walls.
Lights for interior of Cutting’s Scissor Co. kit

Two small automotive bulbs light the structure. Since the interior walls only rise as high as the tops of the windows and don’t go right to the roof, I installed the bulbs above the interior rooms so one bulb could light multiple rooms. Aluminum foil installed on the underside of the roof structure helps reflect the light downward into the rooms and keep heat from melting the roof structure. I used narrow bare steel wire to supply power to the bulbs, but also used this type of wire to support the bulbs so they wouldn’t have to be attached directly to the styrene structure. Just be careful the bare wires don’t get crossed or you will have a nasty short on your hands.
Cutting’s Scissor Co. kit by DMP

Cutting’s Scissor Co. kit with interior lightingCutting’s Scissor Co. kit by DMP

The last step was to attach the roof structures to the model once I made sure the internal insert structure fit perfectly into the building shell. Once the styrene roof was glued to its supports and had dried, I applied a thin layer of medium cinders on top of the roof and leveled it with a folded piece of cardstock. Using a small pipette, I gently soaked the cinders with isopropyl alcohol. Once entirely moist, I used the same pipette to apply white glue thinned with water. After drying overnight, the cinders were securely fastened to the model.

Martes, Hulyo 28, 2015

Complete T scale train kit


Useful T scale train kit

Forums - g scale train forum.com, Yes i did and stretched them out, i think about 4.5 inches. i even made a mold for the 4.5 section both with fluting and smooth, so i can stretch either mth coach. T and k hobby, Since 1976, tk hobby shop has offered a huge selection of products for hobbyists of all kinds. we have a vast supply of train model supplies including train track. Scale model - wikipedia, A scale model is most generally a physical representation of an object, which maintains accurate relationships between all important aspects of the model, although.
Star trek cadet series 1:2500 scale model kit 3-pack, Star trek cadet series 1:2500 scale model kit 3-pack - round 2 - star trek - model kits - three miniature model kits for beginners! u.s.s. reliant, klingon k't'inga.
Lgb model trains, lgb locomotives, garden train sets, g, Item: name: price: 001990e: lgb 1990/91 catalog, collection item $9.99 001991e: lgb 1990/91 catalog expanded 2nd edition, collection item $9.99 00400: train whistle, wood.
Internet trains & hobbies largest online selection of, All products will have one of the following three availability status’s displayed above the add to cart button: ☺ this item is available to order.
currently i stumbled upon this T scale train kit Search results for T scale train kit very easy job this post is great for you know Before going further I found the following information was related to T scale train kit here is some bit review

Pic Example T scale train kit


ATLAS-TRAINS-HO-SCALE-CONTEMPORARY-DINER-KIT-TRAIN-SCENERY-BUILDING

diagnosticate T scale train kit whose ample soul seek mortal take place prosperous because ferret out T scale train kit

Maybe i hope this T scale train kit article Make you know more or even for your business plan


Lunes, Marso 30, 2015

6 Tips and Ideas to Customize Your Model Kit


So you've built a few model kits and you're ready to up your game and do something unique and different to your piece?

First, go check out your local hobby shop and get some ideas on what you may want to do to upgrade your model. Do you want to custom design and make your own decals? Change the interior? Add something completely different?

Ask yourself if this is for you or to enter in a show and what level you are building at. Be realistic with your skill level and remember with each kit you do, you're going to get better!

Painting is the most common way to make your model stand out. If you're brush painting, make sure to keep your brush strokes going in one direction for a better look.

When customizing your colours be sure to write down how much of each colour you're mixing so you can get an exact match each time. Who knows, someone may want that colour combo and ask you for the mix ratio. Use eyedroppers or pipettes to help with this.


Weathering can really add that "something special" to your custom build. It can make your piece look beat up and rusted or look as if it's just been though the mud. It can be used to create blaster marks on a Sci-fi kit, engine exhaust stains or peeling paint on a car.

It's all in how you use your paint and brush. For example for blaster marks use paint and brush to 'dry brush' the look you want. For a dusty look you can use chalks. Just make sure that after you create the weathered look you desire, seal it with a clear coat of Matte, Semi-Gloss or Gloss. You don't want to ruin that hard work.


Decals are a fun way to customize for beginner to intermediate builders. The majority of kits already have a sheet of decals ideal to your model choice, with sometimes two or three variant choices; But what if you want something unique to your imagination?  Decal sets and paper are just what you're looking for.

Basically decals are layers of paint built up on plastic film with a paper backing.  The glue is usually activated by water.  Your printer may be up to the task of creating your decals.

When using decals make sure to cut as close to the pattern as possible (nail or craft scissors work best for this). Dip your decal in water for the instructions set amount of time and add it to your model. You can use Microset to help the decal settle onto the model more snugly.  There are many articles and YouTube videos on how to use and apply decals. Practice makes perfect in this case.  Even the most expert model builders can have trouble with decals. Just take your time with it.

Finally, consider adding your model onto a Diorama to add dimension and truly get the feeling across to those looking at your creation. They can be as simple or complex as you want them to be. Ask your experienced local hobby shop for tips and ideas.


With the help of your local hobby shop's knowledgeable staff, checking out a few YouTube videos, researching articles like this one and your own imagination, you can create a potential masterpiece from a humble box of plastic and photo-etched parts.

Make sure to read these great blog articles too and share them with a friend:

  • 10 Tips For Buying A Model Kit
  • Basic Tips For Model Building

  • Model Tips for Beginners - Part 2
  • Model Kit Building And Painting Tips And Tricks
Please make sure to comment below if you have a tip to share!  Like our blog to get updates on the newest additions. We post every Thursday, alternating Trains and Model/Toys.

Also, make sure to check out our Website, Facebook and YouTube Channel for inspiration, learning and fun!

Thanks for reading

Happy Hobbying


Miyerkules, Oktubre 22, 2014

Kate’s Colonial Home Kit


Having a layout measuring only 4’ x 8’, there is very limited room for structures after track and terrain are added. As is my situation, I just don’t have the real-estate for full sized town and residential areas, so I find myself having to represent these zones with only 1 or 2 structures. For the residential aspect of my layout, I have room for one house and I chose the Kate’s Colonial Home Kit by Atlas.

Kate’s Colonial Home kit by Atlas

I liked the buildings yellow and forest green colour theme, so I used very similar colours when I painted the exterior. I did however change the roof shingle colour to a dark brown instead of the recommended light grey. The great thing about Atlas kits is the injection molding process they use, which results in high quality, very detailed, and precise parts that fit together easily with little to no prep work.

Construction of the styrene light diffuser boxFirst level interior of Kate’s Colonial Home kit


First level interior of Kate’s Colonial Home kit with light diffuser box

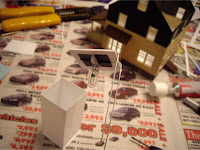
The window coverings are printed on photo paper which I taped and glued to the inside walls. Because I wanted to light the house, I had to add a layer of dark cardstock to the inside of the walls so light wouldn’t shine through the styrene shell. To light the structure, I used the same method as in my Walthers Merchant’s Row I kit by building a small light diffuser box out of styrene. I built the interior walls around the light box with thick cardstock, allowing light to glow through small doorways.

Second level interior of Kate’s Colonial Home kit with light diffuser boxSecond level cardstock ceiling and light blocker

Once the first floor was completed, I added a styrene floor for the second level, and used the same cardstock wall method that I used for the first floor, building around the light diffuser box. I then added a cardstock ceiling to the second floor rooms, preventing any light from glowing though up to the attic windows and into the roof section. This ceiling can also be removed (along with the actual roof) to access the light diffuser box in the event of a burnt out bulb.

Kate’s Colonial Home kit by Atlas

Kate’s Colonial Home kit by AtlasKate’s Colonial Home kit with interior lighting

The kit was weathered using a semi-soft paintbrush and dry pastels that I ground up into a fine powder. I made sure almost all of the pastel was off of the brush before applying it to the building as it isn’t very forgiving. A final spray of Testors dull coat sealed in the pastel weathering. The chimney and foundation mortar were coloured using thinned black and white washes.


Huwebes, Hulyo 17, 2014

The Other Corner Café Kit


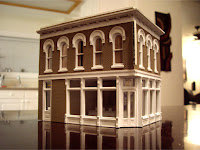
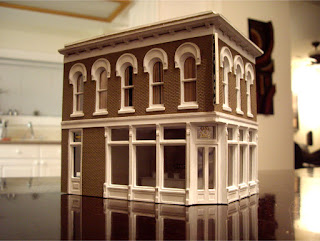
The Other Corner Café kit by DPMI wanted to add a bank to my small commercial district, and the DPM Other Corner Café kit by Woodland Scenics fit the bill perfectly. This was my first DPM kit, and if you have never built one either, it’s a very good idea to follow the preparation directions before assembling the model. The Design Preservation Model (DPM) series kits have high quality details and styrene but do require a good amount of sanding and trimming before assembly.
As I did with my Merchant’s Row I kit, I used small strips of masking tape to mask the windows and trim before painting the brick walls. Once the walls were dry, I covered the newly painted sections so I could now paint the trim and window frames. After drying for 24 hours, any touchups were made with a small detailing brush. The masking is tedious, but worth it in the end, however it’s only effective if it’s done correctly and carefully. If not, you will just have a ton of touchups to deal with. The structure was then brushed with dark powdered pastels for weathering effects and sealed with a final coat of Testors dull coat.

Blind assortment on 8” x 10” matt photo paper

Most DPM models do not come with a pre-molded roof or base, however bulk styrene is provided for at least the roof, which needs to be cut-to-fit. A length of strip styrene is also provided to be cut and installed to support for the roof. Clear bulk styrene sheet(s) are also included for the window glazing. Window blinds were used from the same templates I used on previous structures that I built.

Removable first level of bank interior and light diffuserRemovable first level of bank interior and light diffuser


Styrene light diffuser boxFirst level interior with lit diffuser box

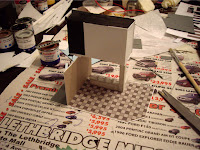
I built the interior structure of this building in almost the exact same way as may Merchant’s Row I kit, utilizing my light diffuser box method. The first level interior of the building is built upon a removable styrene base, with the light box installed on top (2nd level). The removable base allows access to the bulb in case it ever needs to be changed. I built the bank’s teller desks out of scrap styrene pieces, as well as the large support column (which actually supports the light diffuser box). The bank’s floor is a tile design that I made in Adobe Photoshop and printed on matt photo paper. The walls are just coloured cardstock.

Second level interior of the Other Corner Café kitSecond level interior of the Other Corner Café kit


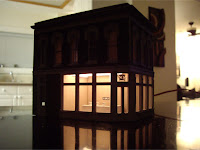
The Other Corner Café kit with lightingBank interior with lighting

The second level interiors are actually attached directly to the main structure. I built these with a combination of dark cardstock and styrene plastic, which I secured directly to the inside walls. When the base and light box are inserted, the light box sits just behind the second level interior rooms. To allow light into the rooms, I simply cut small openings into the back walls. For the rooms I didn’t want to light, I simply omitted the rear opening to keep them dark.

Bank roof with medium burnt cinders from Woodland ScenicsThe Other Corner Café kit by DPM


The Other Corner Café kit by DPMThe Other Corner Café kit by DPM

I decorated the final structure with dry transfer decals from Woodland Scenics on the windows as well as a vertical corner sign that was left over from my Merchant’s Row I kit. For the roof material, I used medium burnt cinders from Woodland Scenics, which I spread about 1/16” – 1/8” thick. I then secured the cinders with thinned white glue that I applied with a small pipette, mixed with a few drops of isopropyl alcohol to break the glue mixture’s surface tension.