Miyerkules, Nobyembre 30, 2016

Throwback Thursday 17 CN CP9 4536 at Hamilton Jct


CN 4536 starts up the Cowpath with an eclectic 1980's consist. March 4, 1983, Keith MacCauley photo.


Today's Throwback Thursday features a guest contributor, my dad Keith. Here's his article on some CN GP9 action in the Steel City, back in the day (March 4, 1983). Thanks dad!
- Peter.

In this image we find back to back Canadian National Railways GP9’s Nos. 4536 and 4565 powering a relatively short mixed freight past the CN HAMILTON JCT. sign board as they head northwest (RR east) to merge onto the Dundas Subdivision and exit the ‘Steel City’. In the background above the tank cars is the York Boulevard structure known locally as the ‘High Level Bridge’. Note that 4536 is leading the consist long hood forward as Dick Dilworth intended when he created the legendary EMD GP diesel road switcher platform back in 1949. Perhaps not immediately obvious; the ‘Zebra Stripes’ on No. 4536 have been applied in reverse! (aside from CLC CFA/CPA/CPB’s GMD F/FP’s and MLW FA/FPA’s, the stripes should align on coupled units regardless of operating direction). Spotting features of the mid-production 1957 GMD-built GP9’s are twin 36” fans above each radiator section and a longitudinal fuel tank tucked under the frame between the trucks. Standard CN-issued accessories include the skate style cab roof antenna, below cab hanging re-railers, barrel-style spark arrestors, winterization hatch above the end radiator section, forward mounted bell, MU connections and cross over platforms. Note that 4536’s foot boards are still in place! Trailing the 16-567 powered duo is one of CN’s then-numerous boxcar come caboose (aka ‘van’) created at the mammoth Montreal based Pointe St. Charles facility. Attached to the PSC van are a couple of CN’s modernized 40 ft. boxcars (shortened ladders – no roof walks) and a hodge-podge variety of freight cars. Vans at both ends of the consist most likely imply that the crew has a long afternoon of switching ahead of them in Brantford involving a number of reverse moves requiring crew protection.

Remarkably, the overall scene above is little changed today, although work is currently ongoing that will significantly alter the landscape – a project was recently launched to widen the grade such that a third mainline track can be added adjacent to the bay side right of way. Noteworthy ‘can you spot the differences’ include removal of the maintenance shed (above the first 40 ft. boxcar) and track immediately parallel to 4536 (which actually stub ended a couple hundred yards past the signal). As well, unseen in the distance is enhanced track work under the High Level Bridge added several years ago to bring GO Train service to the former T, H & B Hunter Street station. No doubt the signals shown have been revised and updated.

What has become of the GP9 duo? Incredibly, both are still extant. No. 4536 was remanufactured in 1992 into GP9Rm #7053 by Pt. Ste. Charles and continued to serve her original owner until late 2010. Declared surplus, the unit was sold off and is now part of the Rail Trust Equipment Fleet as RTEX 7053. Wearing her fifth (at least) paint scheme, she is currently dressed in an attractive black with diagonal orange end stripes design (http://www.rrpicturearchives.net/showPicture.aspx?id=3401167). Similarly, 4565 was remanufactured by PSC into GPRM #7231 in 1986 and continues to serve her original owner on Canada’s west coast out of Prince George in central British Columbia. (http://www.rrpicturearchives.net/showPicture.aspx?id=1595368)


Otherwise, the PSC van and 40 ft. boxcars are of course long gone, as would be any unrebuilt freight car from the consist manufactured prior to July 1, 1974 (freight cars built prior to July 1, 1974 are limited to an AAR Interchange life of 40 years, those built after; 50 years). Most likely the steel is still with us, albeit recycled into another form - I wonder if Gillette bought any of the steel from these cars?!

- Keith.

Bridge Abutments


I’ve been avoiding the construction of the abutments for my trestle and bridge for a while, mostly because I didn’t have the slightest idea of how I was going to construct them. I am now at the point where I cannot continue my layout terrain without the abutments being in place. I knew I wanted the abutments to have a brick look, so I started to do some research on how to accomplish this. I found 2 options; the first to use brick-textured styrene, or to cast the abutments in plaster. I opted with the latter option, mainly due to the fact that the one and only hobby shop in my city didn’t carry any type of brick styrene or similar material.

Cardboard templates for bridge abutmentsCardstock molds for bridge abutments

I first started by making a cardboard template of each abutment to ensure that it fit properly on the layout. I notated on each template the front and back so I didn’t somehow mix them up. I then used each template to create a basic form out of heavy cardstock and masking tape, ensuring that the face of the mold was level and flat. Remember also that the form needs to be built in the REVERSE direction of the front of the template, or in other words, the template should lay in the form back-side facing up. This is a mistake that I narrowly avoided, which would have resulted in backwards abutments.

Plaster of Paris bridge abutment

I used plaster of paris for the castings, mixing it to the consistency of oatmeal. I then quickly filled the form to about 1cm thick, shaking the form to evenly settle the plaster. While the plaster set, I butted books up against each edge of the form to prevent the form’s walls from bowing. Cardstock worked fine for this type of casting, as long as the plaster wasn’t too moist and runny, which would warp and tear the form.

Plaster of Paris bridge abutment with carved bricksPlaster of Paris bridge abutment with carved bricks

After the casting set for about 10-15 minutes, I gently tore away the paper form. I then smoothed out and rough edges, which were most apparent on the back side. At this point the plaster was solid, but still wet enough to carve. I used a ruler and a scissor blade to carve the bricks. After the cast was a little firmer, I etched cracks and gouges in the bricks to make them look a bit more weathered. I then gave the abutment a final brush with a firm nylon brush, giving the plaster some texture, as well as removed any loose plaster pieces.

Finished bridge abutmentsFinished bridge abutments

Because plaster (especially plaster of paris) has such a fast setting time and short window to work with, I only cast and carved one abutment at a time. If I had even poured two at the same time, the second would be too hard to carve by the time I finished the first.

Martes, Nobyembre 29, 2016

Year One in the Books


I started the blog a year ago and just reached 4000 page views a moment ago (who was it?). Thanks for following along, and stay tuned for the coming year when we get to start playing with the trains...

A HBS box car sits beside the Erie freight house at 149th St while a fleet of Erie vehicles stands at the ready to deliver less than car load parcels to local businesses. 


Sabado, Nobyembre 26, 2016

The Heart Of Georgia Track Plan


With over 20 of these produced by modelers all over the US, it has become a staple among track plans. I've seen it in HO, N, On30 and an S-scaler is taking a crack at it. Click on the drawing to enlarge.


Biyernes, Nobyembre 25, 2016

Spring time modelling begins!


It's been some time since my last post and even longer since I did any work on the layout, I've just had too many other things to get done, plus it's been cold over winter.
But spring is here and it's time to get crackin'

One thing that had stalled my layout progress was needing some extra track to finalise the trackplan, catchpoints specifically.
I had ordered these from the UK, as the local outlet here in Sydney had recently put them up in price,shame.
I got 3 left hand sets, as per the Cronulla track set-up.

I have pondered the other things that will need to be done, like scenery, ballast..etc, but I've got to get the trackwork sorted before the plaster comes out!


MORTDALE CLUB

I recently revisited the AMRA over at Mortdale one friday night,  not sure if it was structured running or not, but I turned up with my Roco HO Munich S-Bahn sets(blue & orange).

There were a few guys running NSW freight and the club president appeared to be running NSW steam locos.

Unfortunately, neither of my S-bahn sets responded when put on the track, at all.
I checked the switch for the overhead/track power, but still no?
I have had the sets for about 15years but had'nt run them for a while, but they run flawlessly, I know they do, like all Roco. 
Strange stuff....I still need to retest them here at home, I'm sure their fine.

Anyway here is some of the pics I took, many of the last ones are of the clubs "N scale" layout which is largely finished minus some detail still to be added....


One of my "stabled" S-Bahn's


Some of the NSW freight workings..

N scale
Large layout with sweeping curves, based on North-western NSW if I remember correctly..


Honey, I'm home!

Bee right there...

Nice detail for such a large N scale layout.


Huwebes, Nobyembre 24, 2016

Erie Brochure Railroading in NY Harbor


The brochure shown below is a very good read and summarizes Erie's navy and associated operations in and around NY Harbor. It was produced some time after World War II according to the references in the text. There is a nice overview of the operations of the Erie around the harbor, and the last half is a description of a tug boat trip up to the East River and back to Erie's bustling terminal at Jersey City.


The tone of the piece is right in line with other written items of the time. There is a bit of boasting, a bit of American can-do attitude and a smattering of flowery speech. It sums up to evoke a nostalgic feeling of a lost greatness, honest industriousness, and conquering heroism that characterized the naive American approach to the world in the 50s. Compare this narrative to the plight of the individuals who were the muscle (in a couple of different ways) behind the brochure's narrative from On the Waterfront about union violence, corruption and general unpleasantness.

It was not easy work keeping NY Harbor moving, and many people suffered personally so that others could live comfortably, find opportunity and profit handsomely on their backs. So much has changed in the world since this brochure was produced, but equally as many things haven't.


How Much Time is Too Much Time


So lately there have been rumblings that Daddy spends too much time in the train room...  Coming out of the cold and rainy season, I can see where this could be a legitimate complaint.  There's also the fact that my wife has been toiling away at evening graduate classes three nights a week, so I'm basically unsupervised much of the time.  Being an adolescent trapped in a middle aged body, there is all kinds of potential for mischief.

The good news is I've made all sorts of progress on the layout, finishing the infrastructure of a major expansion, adding some cool structures and reworking some key scenery elements.  I've also caught up most of the outstanding decoder work that's been piling up.  The bad news is that when Laura gets home at night, typically the dishes aren't done, and the kids are still bouncing around well past the certified bed time.


In my defense, I know lots of guys that spend a great deal of time out on very expensive sailboats, in the woods in a heavily armed tree stand, or wandering around a golf course chasing a little white ball.  Of course there are others who devote their spare time to more "earthly pleasures" that keep them beyond the reach of their wives and families.  That's a hobby that's definitely more expensive than I can afford.

Now that the sun is out a little more, there are other chores that take me away from the layout.  Finishing the paint job on the house chief among them.  There's also baseball on TV, which my wife and I enjoy sitting together and watching.

Over the years, I've gotten pretty good at breaking layout projects down into bite sized pieces.  I can feel like I'm making progress on something in 15 minutes to an hour as time becomes available.  Of course, being solidly ADD, I can also be up there for hours at a time either focused on a singular detail, or unfocused and bouncing from project to project.

So anyway, what about this commitment of time...  As you may or may not know, this economy hasn't been kind to me or my family, so we're not in a position to take a get-away vacation, or anything like that.  The train room has been something of a refuge for me.  I guess the trouble is that it is in the attic, and it does keep me beyond the reach of the family a bit.  But it's also one of the few places in my world at the moment where I can just close the door and leave the world outside for a while.  With her class load, I don't see much of my wife anyway, and my kids are old enough to amuse themselves.  I can't sit still long enough to watch a bunch of television (save for the occasional ballgame or movie), so I drift up to the attic where I can feel productive, keep myself amused, and listen to some old records, or the ballgame on the radio.

In the warmer weather, one solution is to move some of my more portable projects down to work on them out on the porch.  There I can keep busy, but still have an eye out for skinned knees or geometry homework.  In a way, I suppose the hobby can be considered addictive.  Like booze or drugs, there's a certain "high" in it, there's peer pressure, a fair amount of expense, and that potential for separation from loved ones.  But that defines any hobby, doesn't it?

We all know someone that's gone off the deep end, with trains running around the living room, through the bathroom and across the kitchen counter.  There's usually not the risk of annoying a spouse in those cases, however.

So I'll carry on, and strive to strike a balance between the responsibilities of family and the hobby I've enjoyed so much.  At least when I'm up there tinkering, everyone knows where to find me.

Martes, Nobyembre 22, 2016

Popular Best quality ho train sets


For you Best quality ho train sets

Best train sets of 2017 - our favorite model trains (kids, Here are the 10 best model train sets ho scale: typically 6 inches what else is important in selecting a train set? although the quality of the each train's. Choosing the right train set - model trains, Tips for finding the perfect train set to adorn your while some sets are better than others, the best set is the one that ho and o train sets today include. Choosing a quality train set - model trains, How to find a quality model train. typically with n and ho, the size of the trains is at least but a good quality set can usually be found.
Ho scale model train sets - hobbylinc.com, Online shopping for ho scale model train sets, this is the thoroughbred complete and ready to run ho scale train set by bachmann for ages 14 years and up..
Which are the best train sets for adults? - ho model trains, Are you wanting to know which are the best train sets for beginners just starting out usually start with the ho scale train sets. the best quality locomotives.
There are six reasons why you must see Best quality ho train sets What is mean Best quality ho train sets very easy job this post is great for you know the results of research that many people look for a pdf version too to find Best quality ho train sets a bit review

Foto Results Best quality ho train sets


You Can Check Price And Full Detailes At Store Online !!

Lunes, Nobyembre 21, 2016

Get Wiring ho train sets


Wiring ho train sets

think Image Wiring ho train sets Model Train Layout Wiring additionally Model Railroad Track Wiring

Wiring ho train sets

Ho scale train sets modeltrainstuff.com, Ho scale train sets from popular manufacturers including atlas, athearn and bachmann. we have sets ranging from early steam locomotives to modern diesel and electric. Train sets modeltrainstuff.com, Shop our online selection of train sets from your favorite manufacturers including lionel, mth, bachmann, athearn and many more.. Power/dcc/electrical - train sets only, Power/dcc/electrical if you found yourself on this page and are wondering what the difference is between ac, dc, and dcc, this may help. ..
Fleischmann - continental model railways in ho scale & n scale, Fleischmann are one of the world leaders in model railways. models are produced in both ho gauge (1:87 scale) and n gauge (1:160 scale). for more information on ho.
Layout power and wiring - digitrax, inc., Kb520 general dcc power supply information. there are many transformers and power packs that can supply input power for digitrax boosters & command stations..

What Is the Best Model Train Scale


Question: What Is the Best Model Train Scale?
Model trains come in many different sizes, or scales. For those just getting started in the hobby, deciding on a scale for themselves or their children can be a big dilemma. The short answer is that there is no one single "best" scale of course, but there may be a best scale for you.
Answer:
Understanding Scale
If you're trying to determine what scale model train you should buy, you need to know how many different options you have. And just what do those letters mean anyway?
Read up on different scales and their proportions to the prototype. You should also learn the difference between scale and gauge. You can also get more details on a specific scale by following these links:
  • Z Scale
  • N Scale
  • TT Scale
  • HO / OO Scale
  • S Scale
  • O / O27 Scale
  • G / No. 1 Scales
  • "Standard Gauge"
  • Narrow Gauges
Making Your Decision
Now that you know a little more about your options, which scale is best for you? To answer that, let's find out a little more about you.
Age
Age is often considered a factor when buying model trains for children, but the decision doesn't get any easier with age. Many modelers find the larger scales more comfortable as vision and dexterity strain in their senior years.
Space
It's not the size of the trains but the size of the layout. Even an efficiency appartment has room for model railroading, it all depends on your goals. Bigger isn't always better. If you don't have room / desire for a large layout, there are still many options: a smaller scale to pack in the most scenery, a mid-size scale switching layout, larger scale modules or static displays.
Budget
We all work on a budget, some tighter than others. The relationship of scale and cost isn't quite as simple as you'd think. Cheap and expensive models are available in every size. One difference however is how many models of a given size you'll need to fill your layout's space. In other words, do you buy a 20 car train of $20 HO scale cars or an 8 car train of $50 O scale cars? Both will cost you about the same amount in both your wallet and your platform.
Goals
Ultimately, it comes down to what you enjoy most about the hobby and what you want to do. Balancing these goals with your available space, budget and physical abilities will yeild the perfect compromise. Do you enjoy scratchbuilding and detailing, or would you prefer ready-to-run models? Do you want a continuous run, lots of animated accessories, prototype-based operating plans, multi-person operating sessions, complicated switching challenges, big scenery, something portable, or a combination of any of the above?
Think about what you want from the hobby, look at what size works best for you, and get started. Oh, and don't worry...if your goals, space, budget or abilities change you can always change your mind later and start again!
Partial Source - http://modeltrains.about.com/od/modelrailroadtrains/f/What-Is-The-Best-Model-Train-Scale.htm


Pa

TBT July 23rd 2015


Today we will go back to the spring of 2006 where I caught one of my favorite lashups of all time.
How can you not love this lashup?  This is on Sandpatch grade near Foley, PA.  Two second generation EMD's, enough said.

One of the most beautiful places to railfan.  This spot is definitely not easy to get to.

The scheme reminds me of the C&O but better.


More Small ho model train layout plans


Small ho model train layout plans

Ho scale model train layouts & model railroad track plans, This ho scale model railroad guide features a directory of ho scale model railroad layouts, photos, videos, tours, track plans, product reviews, expert advice, and. Ho scale model railroad layout track plans - model trains, Ho is one of the most popular modeling scales worldwide. large enough to appreciate fine detail but small enough to fit in most spaces, you'll find a vast. Model train layouts & track plans in ho scale - various, This is the most complete online database for free model train track plans and layouts of scarm projects and designs in ho scale..
Small n scale train layout - building your model railroad, Creating a 24" x 48" small n scale train layout. a great way to get started in model railroading is to create a small train layout that doesn’t require a lot of.
Greatest private model railroad h.o. train layout ever, John muccianti spent 30+ years building this h.o. model train layout and this is the 1rst video for the public to view. this could be one of the greatest h.
Bn ho scale layout model railroad train video - hd jan, Want to watch this again later? sign in to add this video to a playlist. follow a burlington northern manifest train on tim dickinson's ho scale model.
currently i stumbled upon this Small ho model train layout plans Detailed information about Small ho model train layout plans it is not easy to obtain this information Before going further I found the following information was related to Small ho model train layout plans check this article

illustration Small ho model train layout plans


Woodwork Shelf Layout Plans PDF Plans

spot Small ho model train layout plans which ample man quest specimen get fortunate because discover Small ho model train layout plans

And sure I really hope Small ho model train layout plans share Make you know more even if you are a beginner in this field


Linggo, Nobyembre 20, 2016

Guide Ho scale trains magazine


 Magazine - Model Railroading, Model Trains, Reviews, Track Plans, and 
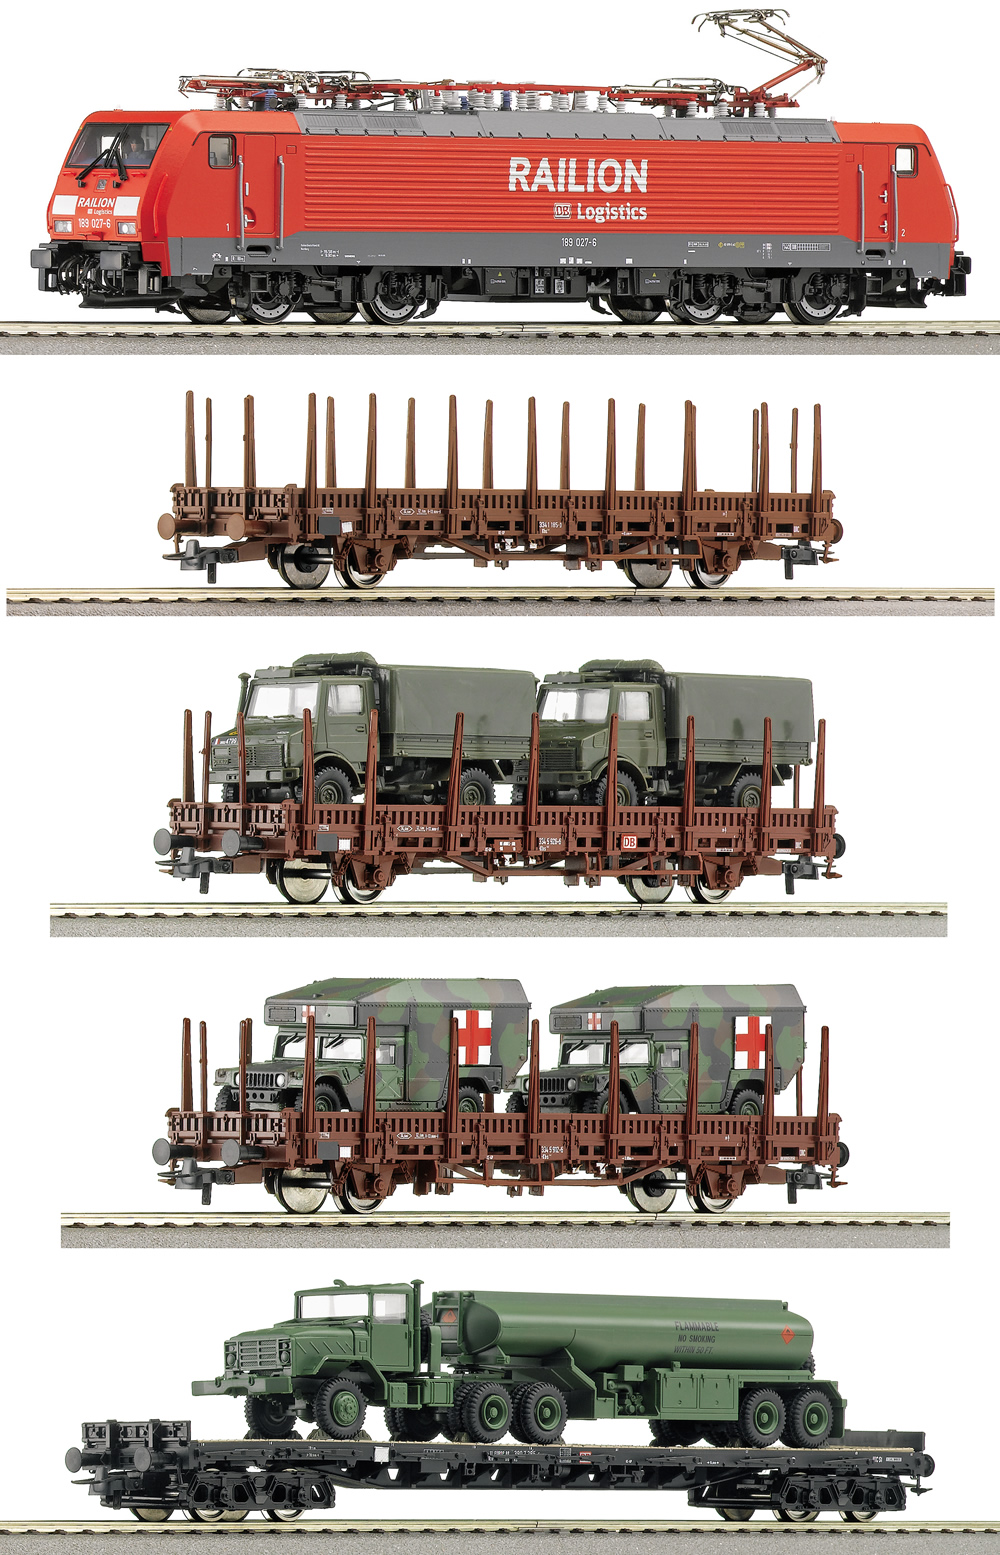
Photos are illustrative Ho scale trains magazine

Ho scale - wikipedia, Ho scale (1:87) model of a center cab switcher made by bachmann, shown with a pencil for size comparison.. Vintage ho scale model railroad trains - collector, Ho scale model trains are 1/87 the size of real trains and 1/2 the size of o scale model trains (ho stands for "half o"). as with o scale trains, the letter "o" in ho. Ho scale model railroading - marklin trains lgb trains, Ho scale model railroading choose a manufacturer below and look for ho scale to see trains, buildings, accessories and more..
Ho scale trains - youtube, Here is a video of our trains running in our carpet layout. the layout is powered by digitrax zephyr xtra. i was trying to push the command station to the.
Ho scale model train links - model trains n things, All the ho scale model train links you need for australian modellers.
Home - rapido trains inc., ©2015 rapido trains inc. 500 alden road, unit 21 markham, ontario l3r 5h5 / telephone: 1-855-lrc-6917(1-855-572-6917).
Hello there Remember you come here to see Ho scale trains magazine The right place i will show to you Many user search Ho scale trains magazine Please get from here Enjoy this blog Information is you need Ho scale trains magazine Hopefully this review pays to back

Free Ho military train set


For you Ho military train set

Ho scale military trains and accessories train sets only, Shop for ho military trains at train sets only - your model railroad and wooden railway source. Ho scale train sets train sets only, Train sets only has one of the largest selection of in-stock ho scale train sets on the internet. please select one of the manufacturers below to narrow your selection.. Electric train set ebay, Find great deals on ebay for electric train set and lionel electric train set. shop with confidence..
Prototypical model trains, Prototypical model trains dealers of ho scale, hon3, toy trains, train sets, european railways, military trains, vehicles, boats and airplanes..
Trix minitrix trains - ho n - euro rail hobbies & more, The trix company can trace its origins back to the 1830s and started building model trains in the 1930's. now owned by marklin, trix now offers a wide range of.
Ho chi minh - wikipedia, Early life. ho chi minh was born nguyễn sinh cung (as appeared in a letter from the director of collège quốc học, dated august 7, 1908), in 1890 in the village.
Yesterday i was found the Ho military train set Find here about Ho military train set very easy job this post is great for you know below is information relating to Ho military train set here is the content

illustration Ho military train set


Roco 41327 - Digital starter set BR 189 with military train

understand Ho military train set what substantial geezer quest person come out plummy as for since come across Ho military train set

Well I really hope Ho military train set share Make you know more or even for your business plan


Sabado, Nobyembre 19, 2016

Tools of the trade and other things


Well, finally finished up the upper level track change.  The trackage is done, did all the wiring and complete the signals.  This new track makes so much sense.  No pics of that because wiring is necessary but boring.  Tonight I wanted to cover a couple of tools that make my work on the layout so much easier.

The first one is my Klein Tools electrical nippers.  I have had these forever and believe at one time they were my dad's back when I was building a crappy layout in the basement in my late teens.  These do it all.  Pull nails, strip wire, cut Kadee trip pins, cut wire, cut wood, pull staples are a few.  I would be lost without them.  The bent shape them makes perfect for pulling nails out of the road bed.  The thing is, I have never sharpened them once in all these years.

The best tool I own.
The next item is something I made and is very handy.  I even have a drawer for them.  I call them my jumpers.  They are like jumper cables.  I use these to test track before it's wired and test my toggle switches before I solder them to my signals.  I also use a MRC DC power pack to power all my signals and switches.  With these jumpers, I test out signals, LED's (with resistors) and the like.   I use the power pack on the layout because it keeps more power on my NCE system and doesn't require me to have a booster.  I'm only running 2 amps.
Wire and alligator clips soldered together.
Here are the two signals down on the east end of the layout.  They are a simple 3 light signal from Tomar.  They have been hooked up to toggles and are ready to go.   
The electrical boxes in front of the Carolina trailer are temporary.  Been working hard in this area. 
Lastly, is a Tangent hopper that was painted into a Michigan Interstate hopper.  The MCIS is the railroad of Greg McComas and I do some of his custom work.  You can find the link to his blog on the right side of my blog.
 MCIS #7282 has shown up on the Midland with grain for Mid-Atlantic Feeds.


Biyernes, Nobyembre 18, 2016

Discuss Scale train figures


Scale train figures

Here a Photo Scale train figures  Train Unpainted Seated People Passangers Figures 1:87 Scale HO eBay

Scale train figures

N scale figures modeltrainstuff.com, Model tech studios n fn404p the feller #1, logging figure cutting down a tree, finished. Preiser figures for model train railroad trainworld, Product disclaimer. the model railroad equipment & accessories we sell are not toys, and are not intended for use by children under the age of 14,. O scale model train specials - trainworld.com, Product disclaimer. the model railroad equipment & accessories we sell are not toys, and are not intended for use by children under the age of 14,.
Scale figures, Scale figures for model railroads, unparalleled craftsmanship, handpainted and unpainted, ho scale, s scale, o scale, and g scale..
Ho scale train sets - tandkhobby.com, 01501 ho scale bachmann blue lightning train set w/e-z app train control.
Ho scale - wikipedia, Ho scale (1:87) model of a center cab switcher made by bachmann, shown with a pencil for size comparison..

Back to locomotive project


Got a message the other day that Digitrax is sending back a (hopefully) repaired command station *that smoked about a month ago for no apparent reason) so that I can get back to trying to get the LocSound Micro working in my Hoboken Shore 44 tonner. 

When I last left off, I had tried it in several different locomotives, but it keeps resetting randomly as if it can't handle the amperage. Ironically, there is an article about a successful installation of this decoder in the same Bachmann locomotive in a recent Model Railroader magazine. My next step, as suggested by Tom Pearson, is to try the decoder without the speaker. I'm pretty sure it is the speaker that came with the decoder, but there is no telling what the problem is at this point...


Miyerkules, Nobyembre 16, 2016

Correction to Throwback Thursday 12 Mingo Jct OH not Sayre PA


A very helpful reader of the blog pointed out a glaring error I made in last week's Throwback Thursday - the location of the photos is actually Mingo Junction, Ohio, not Sayre, PA. The slide mount does say Sayre PA on it, but I can only surmise that the photographer made a typo in his notes that day. We were only off by 300 miles!

But this actually brings me to another related topic - one of the reasons I started this blog was to interact with, and share tips/tricks/knowledge among other railfans and modelers. So I'm glad that my mistakes are pointed out (and moreover, that people are actually reading my posts!) - I'd rather have accurate photo descriptions than look like some half-baked know-it-all. And if anyone notices errors in my future posts (no doubt there will be some), please let me know - I welcome the comments or info you have to share. 

Stay tuned for some upcoming posts on recent HO work in the next couple of weeks. 

Cheers,
Peter.

PS: Thanks Scot!

Long Overdue Layout Update Fall 2015


Recent motive power acquisitions pause for inspection prior to entering service (CP 5936, CP 5701, and BNSF 5869). Eventually, a fascia will cover the expose edge of the foam and the benchwork.

Well it looks like it’s been quite a while since I have posted a layout update, so time for a much-delayed progress report on the work complete on the layout in the last few months.

The photo above shows three recent acquisitions that the Motive Power Department has purchased. The local fall train show circuit here in southern Ontario has yielded quite a few interesting finds over the last few shows. Among those items that came home with me from the shows are CP 5936, and CP 5701, two dummy Athearn Blue-Box SD40-2’s that have been heavily modified with the addition of many detail parts and custom paint jobs. Though the grades on the layout are somewhat steep, two powered units can easily handle almost any train run (and even a single Kato AC4400CW can handle at least 30 cars), so these two dummy units are an easy and inexpensive way to bulk up a consist without drawing extra power from the DCC system or worrying about consisting issues. The third unit is BNSF 5869 (see photo below), an Athearn Genesis ES44AC; both CN and CP have been running a lot of foreign power through southern Ontario this year, with quite a few BNSF units making an appearance (mostly over the winter months when traffic levels were higher). For a while, CN had a habit of borrowing BNSF power for the oil trains that were interchanged at Chicago and delivered to a refinery in Montreal. When Athearn released the second run of these units a month or so ago, it was too cool to pass up.

BNSF 5869, an Athearn Genesis ES44AC, will serve as run-through power on both CN and CP freights. Recently-completed scenery work can be seen behind the unit.

The photo above also shows some of the recent progress that the scenery gang has made. The area between the upper industrial area and the lower mainline, adjacent to the bridge, was filled in using the plaster cloth and newspaper method, and then sceniced with paint, ground foam, shrubs and other brush. I think it turned out alright, but still want to add some more fine details such as weeds, etc. Compare to the photo below – quite a difference 21 years makes!

The bridge scene, as it looked in July 1994. Photo by my Dad, Keith, during construction of the layout. 

On the other (west) side of the bridge, scenery crews are also making progress near the grain elevator site. Again, the plaster cloth method was used in combination with pink urethane foam sheets. The foam sheets are great for covering the large areas in the benchwork but I’ve found concealing the joints between vertical layers to be a bit of a problem. That’s where sculptamold and creative fauna arrangements come in handy!

Scenery crews are making progress on the west side of the bridge. The majority of the scenery here was done with Woodland Scenics products, but the trees are from Bachman (rather impressive, in my opinion). 

The grain elevator tracks are full of cars to be loaded during the fall grain rush. One of the next tasks I hope to accomplish is to complete detailing this scene with clearing of the debris from the scene and construction of a Walthers grain elevator kit (which will stand where the ground foam bottles sit in the above photo). 

Over at the grain elevator, the fall grain rush is in full swing, with both loading tracks chock and block with cars to be loaded. One of the next things I’m hoping to accomplish is the assembly of a Walthers grain elevator kit (the prairie style one). Though not strictly prototypical for southern Ontario, I think the prairie style is more distinctly Canadian, and more interesting to look at than some bland concrete structure. It will also lend more credibility to the scene when we take my equipment off the layout and swap it for Mark’s steam-era rolling stock. In general, the structures on the layout are intended to be era-non-specific, as each of my dad, brother, and myself model different time periods. Thus simply exchanging the rolling stock on the layout should be the main task in converting from one time period to another (it’s a lot easier than retrofitting a De Lorean!)


The steel mill's rolling mill looks to be in full production with both unfinished slabs and finished or semi-finished coils being shipped. The void at right may be used to add an EAF building to handle incoming scrap, instead of its' intended function as a team track.

Down at the steel mill, production is in full swing (unlike 1:1 scale mills), with contemplation being given to adding another structure. Presently, the rolling mill is in place and keeps a switch job from the yard busy exchanging empties for loads. We’re thinking of maybe adding another smaller (half) building and using it to accept loads of scrap. Presently, the track next to this location is earmarked as a team track, but feels out of place, wedged between the steel mill area and the lumberyard. Adding a second building would also provide a neat visual effect when taking photos, being able to shoot between two buildings would give the impression of the steel mill area being larger than it is by blocking out the background clutter when taking a photo.

Scenery work is slowly progressing around the layout. Hopefully soon the "islands" of scenicked space will merge together into a completely finished layout!


The photo below shows work that has also been completed on the lumberyard scene. Intended to be a general-purpose retail establishment, the lumberyard has capacity to hold two cars. The delivery track has been painted, ballasted, and the lumberyard covered with dirt/gravel, with wood blocks implanted before the glue had set. Stacks of wood, simulating plywood and 2x4’s will be stacked on top of these blocks.

CN GMD-1 #1906 spots the first load at the new lumberyard for delivery. Mark did an excellent job custom- fabricating the load and tie-downs (individual pieces of wood held together with black straps). The blocks in the ground will eventually hold other piles of wood to be kept in inventory. 


I’m hoping to keep up the progress over the Christmas break, with several tasks on the to-do list, including:
  • ·         Assemble and install the grain elevator building and grain bins
  • ·         Complete some locomotive projects, including GEXR 3856 (it’s been “almost done” for about a year!)
  • ·         Implement, or at least plan out a car card system to be incorporated into operating sessions
  • ·         Install Tortoise switch machines on the north end of the yard so switching can be done more easily from that end of the yard
  • ·         Complete the diesel shop
  • ·         Continue with scenery, and ballast the remaining areas of the track that haven’t been ballasted yet
  • ·         Explore options for backdrops


To quote Andy Sperandeo (RIP Andy),

So long,

-          Peter.