My wiring and control panel are finally complete! The challenge over the last week and since my last post has been to move the control unit down to the basement and to hook it up to my layout.

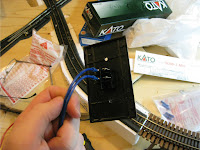
I first attached the back of control unit base to the three 4x4” hinges with six ¼” bolts. This allows the control unit to fold under the table when not in use. However, for the moment I have not yet made a final decision on how the unit will latch when in its upright position, so for now I fastened it up with 3 screws.


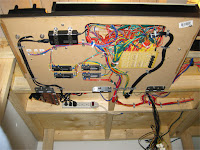
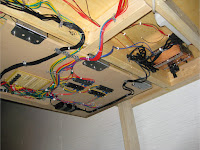
I ran the leads from the control unit and hooked them up to the corresponding terminal screws on the previously installed terminal strips. The terminal strips made it very easy to detect any crossed over wires, and even easier to correct the problems as I only needed to swap the crossed wires to the correct screws. Remember, it doesn’t matter how organized or well planned your wiring layout is, mistakes will happen, so leave room to make corrections!

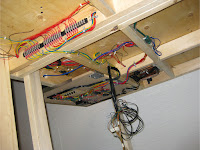
I kept the layout wires attached to the benchwork using small metal cable fasteners. These can be purchased at Canadian Tire for about $1.99 for 20, which compared to other products and retailers I found, is not a bad deal. Small zip-ties also help to keep wires organized and looking neat.

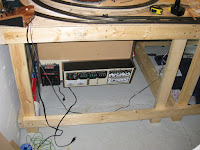
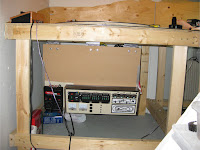
While testing my control unit, I realized that I needed a higher powered AC power source to power my switch machines, separate from my MRC Tech 4 280 power pack. For this, I mounted an older MRC power pack to the underside of my benchwork, and ran the new AC line back into my control box. This 2nd power source can also act as an additional 12VDC source in the future.
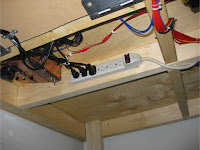
To provide reliable safe power to the different components, I installed a surge protected power bar below my benchwork for all the components to plug into. This is then connected by and extension cord to the wall outlet.

I didn’t plan a master on/off switch into my control panel design, which is something I most definitely should have done, as I have no way to turn my components off (not including the power pack). To solve this, I purchased a rocker switch ($2.99 from Princess Auto), rated at 120V 20A, which I tapped into the cord on the power bar. I then mounted the switch into a standard light switch cover panel that I painted dark brown. I drilled a hole into the front of my benchwork beside my control unit so the rocker switch panel could fit flush against the bench. This switch now cuts the power off to the power bar, so I can leave my layout plugged into the wall outlet at all times.


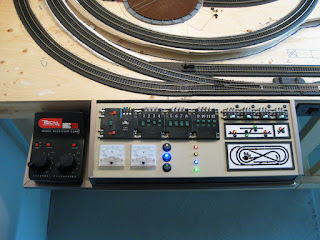
The track signals are still all displayed together on a temporary paper panel. This is purely for testing and making sure the signals work correctly when switching tracks. They will eventually be positioned on standards in the necessary positions along the tracks.


Other than a few small required adjustments, everything works great as far as the electrical system goes. The dual cab control works awesome, and I couldn’t be happier with how everything turned out. The next step will be to find a method to easily raise and lower the control panel and latch it when it’s upright. I’m also going to start smoothing out flaws in my track work and most importantly, take out the steep grade coming off of my trestle.


Also check out my Design and Planning page for updated schematics for different systems on my layout so far!


0 (mga) komento:
Mag-post ng isang Komento