Ipinapakita ang mga post na may etiketa na My. Ipakita ang lahat ng mga post

Linggo, Oktubre 16, 2016

My Day with The Empress by Robby Part 1


My dad came to tell me (morning of July 5/12) that instead of going to my Nana's with my sister for the day, I will be coming to work with him and my mum at Chinook & Hobby West, our hobby store.

I usually only get to go to the store to help my parents on Fridays so I was super excited to get an extra day at the store.
This is me and my Dad testing a locomotive
On our way to the store Daddy and I stopped at Walmart where he bought me a pair of steel toed work boots." I was very confused and asked him where we were going that I needed these boots? He said 'Its a surprise, you have to wait until 3:30 this afternoon'.

I am 9 years old I am not good at waiting for surprises; back at the store I asked my mum "where is Daddy taking me today?", and mum said 'I'm not sure, Daddy has a surprise for you', aaahhhhh this is driving me crazy.

After I had my crazy moment I went to go help Dad and Jesse sort out Diecast cars for the North and South stores.  After sorting, I had lunch and after lunch Daddy said 'Do you want to know where we're going today - just you and me?' I said "yes, yes, yes please!"

He said 'We're going to the CP Rail Yards to see #2816 and that's all I'm going to tell you right now'.  I was so excited I nearly exploded!  Then we talked again about what time we were going and Jesse was eavesdropping on what Daddy was telling me, Jesse said "So where are you going?" and Dad said "Well, we kinda got an invitation to see 'The Empress' at the CP Rail Yards." And Jesse said how lucky we are and asked if we could take him. Dad said the invitation was just for Dad and me only, not even my mum could come.  Daddy commented on how ticked off Jesse was that he couldn't come.

We finally arrived at the yard parking lot, and Dad called John, the engineer of 2816, and let him know we were there so he could bring our hard hats, safety goggles and safety vests.


John and Robby & Daddy's thumb


Safety Gear - check!


After meeting John, he took Daddy and I to see 'The Empress' (2816). John asked me 'Do you know how a steam engine works?'. And I said, " Yes, I do know how a steam locomotive works!" Then I started explaining it all to him and you could see on his face he was really surprised with how much I knew! His mouth came open!

Then John said it was time to check out the cab of the locomotive. He showed me how to climb in. You had to put your foot on a high bottom step, then hold the side bars tightly and climb up the ladder into the cab.

Then when we got into the cab it was bigger than I thought it would be (to be fair I've only seen cabs in my DVD movies and on my model trains).  Next John told Jim how much I knew about steam locomotives and then Jim said "He can't know what our jobs are?" and I said "As a matter of fact, I think I do".

I said to Jim you apply the brakes and watch for things on the track, and John drives the train forwards and backwards with that steering wheel thingy" (it does look like a small sized car wheel), Jim looked surprised.

Jim looking out of the cab

John at the 'steering wheel thingy'

In Part 2 I will go over some of the things I learnt about the inside of the cab.  See you next week!

Miyerkules, Agosto 3, 2016

Share How much is my ho train set worth


How much is my ho train set worth

Foto Results How much is my ho train set worth
Indian summers in Shimla - Telegraph

Train to busan - asianwiki, Profile. movie: train to busan (english title) / for busan (literal title) revised romanization: busanhaeng hangul: 부산행 director: yeon sang-ho. The guide to ho steam locomotives, The guide to ho steam locomotives this document is a guide to ho steam locomotives (of north american prototype). it is organized by manufacturer.. Thomas the train : target, Shop for thomas the train online on target.com. find thomas the train at target..

The play trains! guide to the best wooden train sets 2016, I agree with your opinions primarily. my elder son (4) doesn’t care about thomas but i find our imaginarium train cars have much weaker magnets than the few thomas.
Railroad line forums, One detail which is not obvious in the belt drive systems i have seen modeled is how do you turn on or off power to a specific machine, once the main distribution.
At your approved service - toy train revue, At your approved service. by joseph stachler there was a time, when the vast majority of operators of lionel trains, used approved service stations to get trains.
My dad like How much is my ho train set worth can be use for your plan useful this post is great for you know even if i is newbie though


Linggo, Hulyo 31, 2016

Making Trees My First Forest


With the first section of my layout’s ground cover well under way, it was finally time to start putting some trees together. Since my layout is set in a mountainous terrain somewhere in the Canadian Rockies, it will feature forests comprised of pine trees, most of which will be in the back-half of my layout. The front half will feature more deciduous type trees around the residential, commercial, and industrial areas.

I decided to use Woodland Scenics plastic tree armatures for my pine trees, and for the majority of my deciduous trees. Using the tree armatures does of course require assembly, but are a lot less expensive and look far more realistic then most pre-made trees. Making trees completely from scratch however is probably the most economical option, but I like the look and ease-of-use of the tree armatures, so this was the method I chose.

Woodland Scenics pine and deciduous tree armaturesWoodland Scenics pine and deciduous tree armatures

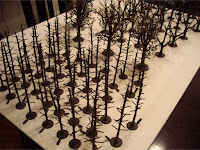
The first step was to prep the armatures by bending the branches and limbs into a 3-dimentional shape. Once all the armatures were properly shaped, I mounted them by their bases to a sheet of foam board. I will not use the bases of the trees on my layout as they look very unrealistic, however the bases work well for holding the armatures upright while I work on them. I airbrushed the armatures with a mixture of chocolate brown and gray paint to get a more realistic colour. I then applied a coat of dull-coat to get rid of any gloss left on the trees.

Tree armature covered with Hob-e-Tac adhesiveTree armature covered with Hob-e-Tac adhesive

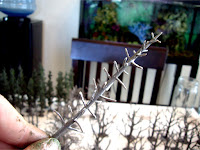
The next step was to apply an adhesive onto the armatures. Woodland Scenics recommends their own tacky adhesive, Hob-e-Tac, so this is what I used. I applied it to the armatures using the supplied brush, doing about 6 trees at a time. I was careful to not apply too much glue to the trunk of the tree, as most trees don’t have a large amount of foliage growing out in that area. I let the Hob-e-Tac set for about 15 minutes until it became clear and very tacky.

Dipping and rolling tree armature in scenic ground foamWoodland Scenics pine tree armature with conifer green foliage

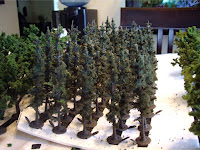
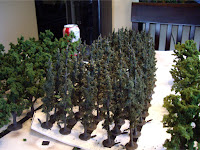
I then dipped and rolled the armatures in Woodland Scenics foam products. For the pine trees, I used Conifer Green Coarse Turf, and for the deciduous trees I used a combination of Medium Green Clump Foliage and Underbrush. I had a couple deciduous armatures from Life-Like, which I covered with Light Green Coarse Turf. I found that the pine trees looked a little empty, so I used Conifer Green Foliage to fill them in a bit. By using different sized pieces of foliage which I stretched out and placed randomly between the branches, the pine trees lost their generic, pipe-cleaner look.

Woodland Scenics deciduous tree armatures with medium green clump foliageFirst batch of pine trees ready for my layout

After applying the foliage to all the trees, I noticed the next day that large amounts of the clump foliage had fallen off of my deciduous trees. I realized that unlike the very light coarse turf I used on my pine trees, the heavier clump foliage did not get a good enough grip on the Hob-e-Tac adhesive from simply rolling the armature around in the material. Instead, I had to hand press all of the clump foliage onto the armature to ensure that it was properly secured. I then shook each tree to remove any loose pieces and to see where I needed to apply more.

First batch of pine trees ready for my layoutLife-Like deciduous tree armatures with light green foliage

The final step was to highlight the trees with blended turf, which gave the trees a more realistic look. I sprinkled a little bit of Earth Blend on the pine trees, and used Green Blend on the deciduous trees. I then gave all of the trees a spray of thinned white glue to seal everything in. Be careful to not get the clump foliage too wet, as the added weight is actually enough to cause the clumps to drop off of the armatures.

The trees are now ready to be added to my layout. I should have my fist post on the first stage of my scenery within the next couple weeks, as long as everything goes as planned.

Biyernes, Hulyo 15, 2016

My Favorite Part of Aviation History An Interview with Glenn K


November is National Aviation History Month:

This is an interview with one of our staff members who's hobby is aviation history.  Glenn has many passions, although his want for knowledge (especially Aviation History) is massive and unquenchable. Come by and talk to him sometime.

Glenn K.


 Valerie:   Have you always been interested in Airplanes?  
Glenn: Not really.  I am more of a history buff and I became interested in aircraft after watching an old black and white documentary about the Avro Arrow on TV when I was a teenager.  I was intrigued with the history of the aircraft and over time, I read everything I could get my hands on about the Arrow.  In those days, not much was available.  In 1997 (I think), CBC produced a movie about the Avro Arrow starring Dan Aykroyd as Crawford Gordon.  Gordon was the President of A.V. Roe Canada, the aircraft manufacturer that produced the Arrow.  Although it is a movie, it does have a lot of history facts about the building of and the ultimate demise of the Arrow.  And, for the record, nooooo . . . an Arrow was not “spirited away” !!!!!!!!! 
Interesting Video Clip


 Valerie:  What was the first Aircraft you became enamored with and why? 
 Glenn: Well of course it is the CF-105 or more commonly known as the Avro Arrow.  The key reason why is because it was a totally Canadian built jet-fighter interceptor and was head and shoulders above anything else in the world.  It is unfortunate the Arrow program was terminated and all existing aircraft were cut up and sold as scrap.  Almost all of the drawings, plans and tooling were destroyed and no sales of the Iroquois engine were ever allowed, even though the French government wished to purchase at least 400 of the them.  One can only imagine what kind of an aircraft industry Canada would have developed, had the government not terminated the program.     


Versions of The Avro Arrow
  
Valerie:  Why is the Avro Arrow your passion when it comes to Aircraft?
 Glenn: It was the most advanced jet-fighter interceptor in the world at the time.  In the end, A.V. Roe not only designed, developed and built the Delta wing airframe but also developed and produced one of the most powerful jet engine of its time (26,000 pounds of thrust).  Eventually, A.V. Roe, Canada even took over the development of the firing system to be used in the Arrow. 
A very bold step for a single aircraft manufacturer to design and develop all three major components of an aircraft. 


A. V. Roe


 Valerie:  What two facts about the Avro Arrow do you find the most interesting?
 Glenn:  One of the most interesting facts about the Arrow is that it had “fly-by-wire” technology in 1958.  This technology was not used in military aircraft until 1971 and even then it was limited.  I’m not quite sure but I believe commercial aircraft (Airbus being the first) did not use this type of technology until the 1980’s!!  A second significant fact is the aircraft was not built as a prototype, that is, for testing purposes only.  Every single aircraft was designed to be built and put directly into service.  This was and still is something not normally done by aircraft manufacturers.
        Something not specific to the Arrow but significant nonetheless, was the “Brain Drain”.  When the program was terminated in 1959, many Avro workers were recruited to work for major British and US aircraft manufacturers as well as for NASA.  Some of NASA’s space  research and development technology, such as the Apollo lunar orbiter and the Canadarm, were developed with the help of key Canadian engineers and scientists that came from A.V. Roe Canada. 


Valerie:   Do you have a favourite pilot? Why do you find him/her interesting?  
Glenn:   I guess Max Ward comes to mind.  He was a Canadian pilot who originally flew bush planes in the north.  He was a pioneer in aviation and also an excellent pilot.  He went on to form his own commercial airline called Wardair Canada.  It began as a simple but quality charter airline (which I had the distinct pleasure of flying to Europe on in 1968).  Wardair grew to become an independent transatlantic airline, the 3rd largest in Canada behind Air Canada and Canadian Pacific (CP Air).  Wardair was eventually acquired by Canadian Pacific Airlines


Max Ward

Valerie:  Have you built any model airplanes? Which one? Do you have a photo? 
  Glenn:As a teenager, I built several aircraft, mostly military jets.  Interestingly, I built a Lancaster bomber, which ironically was manufactured during WWII under license to A.V. Roe Canada, in Malton Ontario.  Unfortunately, those models have long since disappeared however, I still have an old Avro Arrow kicking around.  Not in the best of shape but I probably built it more than 20 years ago.  I have attached a couple of photos for you – don’t laugh.


There are quite a few links for you to enjoy on this post.  We hope you will check them out to learn even more about some of Aviation Histories interesting events and people


  • Avro Canada CF-105 Arrow


  • The Avro Canada CF-105 Arrow was a delta-winged interceptor aircraft, designed and built by Avro Canada as the culmination of a design study that began in 1953. Wikipedia

  • First flight: March 25, 1958
    Length: 24 m
    Wingspan: 15 m
    Designer: James C. Floyd
    Manufacturer: Avro Canada
    Engine types: TurbojetPratt & Whitney J75


  • We hope you enjoyed this blog, please leave a comment to let us know what you thought about this blog.


    Chinook & Hobby West
    Where The Fun Begins!

    5011 Macleod Tr. SW
    Calgary, AB   T2G 0A9
    PH- 403-243-1997
    toll free- 877-525-5785
    hobbywest@shaw.ca

    Don't Forget To Join Our Collectors Club! http://www.chinookandhobbywest.com/collectors-club.html

    website: http://www.chinookandhobbywest.com/
    blog:      http://chinookhobbytalk.blogspot.ca/
    facebook: http://www.facebook.com/ChinookAndHobbyWest
    twitter:   https://twitter.com/HobbyandToy

    LinkedIn: http://www.linkedin.com/pub/valerie-gale/39/7a1/990


    Sabado, Hulyo 9, 2016

    Ive Laid The Benchwork For My Train Now What


    Believe it or not many people get stuck on what to do after they've made the benchwork for their train layout.  Some want to just start putting their track right on the wood..... STOP! DON'T DO IT!

    First plan out if you have any hard to reach places on your layout. Unless you have a long arms reach, you may want to plan to put mountains, or a town, or something that doesn't require your constant attention. Ask yourself, if I have to clean the track in that area or get my derailed train, how easy will it be?

    Next cover all the top surface with a layer of styrofoam. It can be the regular white sheets, but the blue or pink used for insulation is the best and doesn't leave little round bits when you cut it.


    You can use the foam to carve rivers and gullies, build up pieces for easy mountains, and as for trees? Just stick them right in the foam! By using the foam you're going to have an easier time with many aspects of the layout.

    Now, this is when you plan your track out, don't glue anything down yet though as you need to plan out buildings and scenery too.

    For this stage in planning, paper is your best friend! Cut squares out for approximate building base sizes, circles where you may want a forest, strips for roads and rivers, etc.  Yes, this seems like work, just keep in mind that this will help you have a successful and running layout that you will enjoy. How crappy would it be if you were just laying things down and your track dead ended at a building or you have no place for that really neat roundhouse?  Make sure to design your track plan too.

    One of our guys, Tyler has a fantastic layout and he did three posts for you to check out and get guidance and ideas from. Check them out:


    1. An HO Layout In Progress
    2. Thompson River Canyon Blog Edition 2
    3. Thompson River Canyon Blog Edition 3
    4. Thompson River Route Blog 4 (this is labeled as 5, but is part 4)


    Now it's your turn!  What questions can we help answer?  Do you have photos to share with us? We love to see/share layout photos.  Let us know how we can help you get further in your hobby.

    Email us

    Thank for reading our blog and Happy Hobbying!


    Linggo, Hunyo 26, 2016

    My Favourite Trains By Robby Gale


    This post is from the view point of a 10 year old boy fascinated by Model Railroading and Railfanning.

    Mikado Locomotive

    The Mikado steam locomotive was owned by many different rail way companies.  Her are just some of the companies that owned this fine locomotive. Canadian National, Canadian Pacific, Union Pacific, Santa Fe, Pennsylvania and other fine railways.

    This engine is quite big but it is an extremely useful one. The bigger the locomotive the stronger the locomotive.  

    When steam was in service (like the diesels today ) they were often freight pullers.


    Russian Locomotive

    The Russian Locomotive was a pretty big locomotive.  Its wheel combination is a 2-10-0 a locomotive built to pull about 20 freight trains across Canada.  The railway companies that owned these locomotives are Canadian National, Union Pacific, Eerie, and Pennsylvania.


    Big Boy Locomotive

    The Big Boy Locomotive is one of the Giants of the West.  They were built to pull big, heavy freight trains across North America.  The wheel combination is a 4-8-8-4.  One drive-wheel is seven feet tall.

    The Railway companies that owned these engines are Union Pacific, Pennsylvania, Santa Fe, Great Northern, and Milwaukee Roads.  Each one looked a little different.


    Tram Car

    The Tram (or Trolley Car) was invented in 1900.  It was invented for two reasons, one was for a smoother ride to transport people and the other was to make less work for the people who had to build the railway. 

    Tram Cars ran on railways called road lines.  This made less work for the workers because when they built the road,  all they had to do was put rails in the road, make two flange spaces and power poles along the side.  Or they put a third rail down the center and made the third rail electric.  

    These Tram Cars were small but useful.  Now C-trains and subways have taken their place.


    The Subway
    The Subway system was built in approx 1867. They became popular in the 1970's because, most of the passenger railway companies had gone out of business or stopped their passenger trains because they were not making enough money.  The only railway that was permitting passenger travel at the time was AMTRAK.  A popular railway with only passenger travel.

    It still only does passenger trains today.  They are also participating in the subway business.  The subway transit is located in New York, The Cordillera and many other busy city's in North and South America.


    All of the drawings on this page are original line drawings by Robby. Robby works at Chinook & Hobby West on Friday afternoons and loves to talk to anyone about Model Railroading and Trains.  He has been studying Trains since he was 4 years old.

    For more info on these locomotives, click the titles below.
    Please comment on this post and let us know what you thought.


    • Mikado Locomotives
    • Russian Locomotives
    • Big Boy Locomotives
    • Tram Car
    • The Subway


    Chinook & Hobby West
    Where The Fun Begins!

    South:
    5011 Macleod Tr. SW
    Calgary, AB   T2G 0A9
    PH- 403-243-1997
    hobbywest@shaw.ca

    Don't Forget To Join Our Collectors Club! http://www.chinookandhobbywest.com/collectors-club.html

    website: http://www.chinookandhobbywest.com/
    blog:      http://chinookhobbytalk.blogspot.ca/
    facebook: http://www.facebook.com/ChinookAndHobbyWest
    twitter:   https://twitter.com/HobbyandToy

    LinkedIn: http://www.linkedin.com/pub/valerie-gale/39/7a1/990


    Lunes, Agosto 17, 2015

    Completion of my hidden staging


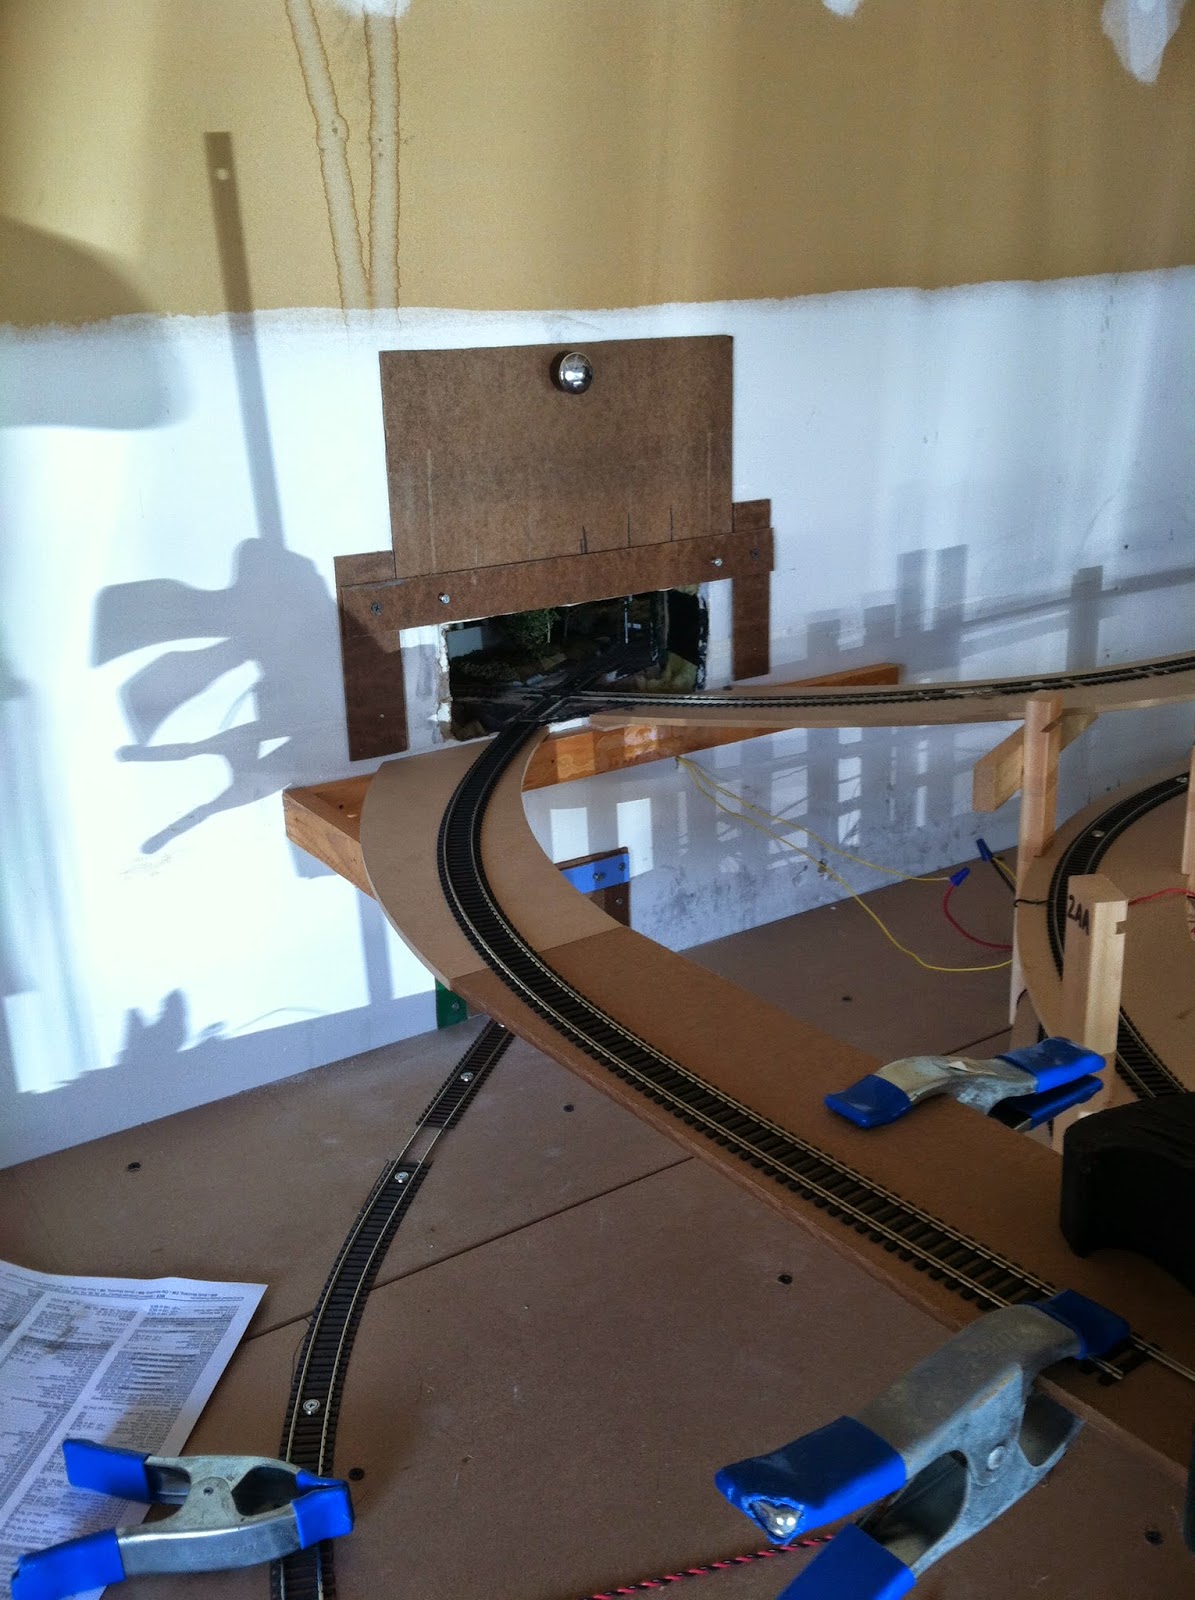
    Had to the chance to get some layout work done this week, since it is my spring break.  This afternoon, I completed the RF&P hidden staging in the garage.  It's one of those things I did not have to do right of way and really did not want to do it in the cold weather, like I did with helix.  The weather was great today and opened the garage door and went to town.  The staging shelf is right beside the helix and uses the same hole in the wall.
    With the 90* crossing in the wall, it makes the helix entrance and the hidden easy to co-exsist.

    A piece of real rail makes a great weight.  The track to right goes to the helix.
    The base of the staging is clamped, waiting for the wood glue to dry.

    The track is positioned and the track base is clamped now.  MDF board is easy to work with.

    Overview of the work.

    Track is laid and ready for a test run.

    Typical train in staging: one engine, 5 cars and a caboose.
    RF&P GP40 #124 is ready for it's entrance.


    Sabado, Marso 21, 2015

    How do i know what gauge my model train is


    How do i know what gauge my model train is

    Take a look Images How do i know what gauge my model train is 675 project - Model Train Forum - the complete model train resource

    How do i know what gauge my model train is

    Model railway track layouts - the do's and don'ts, What model railway track should i buy and what should i avoid? well there are two main manufactures of 00 gauge track, hornby and peco. there are also two types of. Free bird dog training tips. how to train school your, Free bird dog training tips, video, manual. school your own bird dog on how to whoa, how to heel, how to back honor, how to retrieve. tips for brittany pointing bird. # do car batteries increase performance - car batteries, Do car batteries increase performance you to keep your car battery charged where to get batteries for car remote do car batteries increase performance car battery low.
    Model trains for beginners - step-by-step guide model, How to plan and build your dream model train layout within the budget and space you have available. model trains for beginners is a step by step guide.
    # led dual marine battery voltage gauge - charging a 12, Led dual marine battery voltage gauge ft 6 4 5 6 volts battery led dual marine battery voltage gauge six volt battery at tractor supply 12 volt dc power supply with.
    Pugvalley [model trains - manufacturers], Welcome to pugvalley. this site offers rock midi files, online games and links to model train, music and recipe sites..

    Biyernes, Agosto 8, 2014

    Running My USRA Light Mikado 2 8 2


    It’s been a while since I last posted. Currently I’m experimenting a bit with weathering rolling stock and locomotives; more to come on that later. I’ve also been doing a bit of touch-up work on my scenery and backdrop. In the meantime, I made a little video today while testing out my Broadway Limited Paragon2 Series USRA Light Mikado 2-8-2 steam locomotive, CN#3725. I have no rolling stock on this run, just a caboose tailing the locomotive’s tender. Check it out below!