Ipinapakita ang mga post na may etiketa na Laying. Ipakita ang lahat ng mga post

Sabado, Hunyo 25, 2016

Track laying


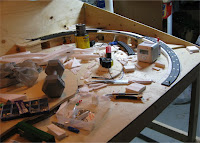
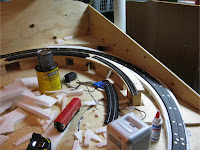
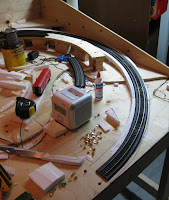
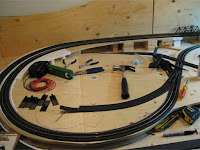
I was able to make progress on track laying this weekend. Main line from yard past Bethlehem Steel to car float yard in. Also got track into Maxwell House and American Can. 
Coming out of west side of yard. 
Car float yard skeleton is in. 
Maxwell House and American Can. 
West yard crossing. 
Yard ladder. 
Bigger picture of the chaos. 


Miyerkules, Pebrero 17, 2016

Laying Trackbed


Over the last month or so I have been building the ramps to allow the tracks to go from one level to the next. I purchased some ¾” sheets of Styrofoam and used this for each of the ramps. It took several attempts to get a few of them right, as it is very difficult to get a perfectly even and level transition from one level, onto the Styrofoam, then onto the next level. I’m sure there are other techniques and products available to make this process much easier, but I’m determined to use what I have!

The first ramp completed successfully is the right curve of the main line oval. After hours of trying to get everything just right, it was time to lay down the very first section of track bed. I glued down one half at a time in about 20” lengths. I used WeldBond multi-purpose glue and thumb tacks to temporarily hold the track bed in place.

Foam roadbed installationFoam trackbed installation using thumb tacks

Foam roadbed installation using thumb tacks

Once the track bed was dry, I loosely placed 22” radius track (as per plan) to make sure everything fit, which it did.


Foam trackbed installation with trackFoam roadbed installation with track

Martes, Disyembre 22, 2015

Lower level track laying and a custom car delivery


In my last post, I said I would have a post up by Sunday/Monday.  Well it's Thursday night and the post is finally here.  I had a sinus infection on Sunday and actually missed work on Monday.  So nothing got accomplished those two days.  Did get another snow day on Wednesday and got a little done that I had wanted to get done earlier on in the week.  The mainline is finished through the area I started on.  The mainline comes out from the helix and through the wall to the lower level.  It comes through a set of turnouts and continues to hidden trackage that leads west.
In this view, we are looking east towards the "hole in the wall".  The mainline is the trackage in the picture.  The roadbed on the right will lead to the branch line.

In this view, we see the hole to helix and the branch line trackage the bulkhead is on.  I will put a curved turnout where the foam starts for the runaround track for the branch line.

The mainline west.  There will be another turnout added for a runaround track for the branch line.   Tortoise switches were already installed for the On30 track.  I used the same basic layout I had so I did not have to move the Tortoises.

Norm Wolf did a custom MOW tie hopper for me.  He delivered it to me on Wednesday.  It's an Athearn blue box Ex SCL hopper.  Norm did a sensational job on it.

He even added a scrap tie load to the interior.

It will look right at home with my other MOW cars like the side dump car is coupled to.


Huwebes, Hulyo 30, 2015

Laying Treckbed Complete


Last weekend I purchased my 5 turnouts, as well as a 60 degree crossing from PM in Calgary, along with a bit more track and a few other items. I now have almost all of my track other then the turn table and a few pieces that aren’t part of the main lines. Now that I have my exact measurement and can see exactly how the track is going to sit, I completed the rest of the roadbed for the front staging area as well as the lead to the future turn table.

Completed front staging trackbedCompleted foam trackbed

Martes, Hunyo 9, 2015

Laying Track Part II


The track on my layout is 99% complete, with just a few small items to finish. I have almost completed the turn table, however it still needs to be painted to get rid of the “plastic sheen,” so it is only tacked in place, thus the approaching tracks aren’t attached either at the moment. I also painted and installed the bumpers, 5 in total on my layout. They look pretty decent, however may need a little more detail added in the future. My turnouts also look and fit great. I tested them with a few cars and they see to carry the cars very smoothly.

Atlas turntableInstalled Atlas turnouts

I’m still not sure how the descending grade from the trestle is going to work out with a full set of cars and engines. It’s just so steep as it needs to drop down 3.5 inches in a very short distance, leveling out briefly halfway for the crossing. This is the one part of this whole project that has me worried. At this point the layout is divided into the planned 12 electrical blocks, using insulated terminal joiners. I have also attached all terminal connectors, feeding the wires through drilled holes to the underside of the table (pictured below).


Completed track on right half of layoutWire leads to terminal connectors

Tomorrow (which I guess now is today), I plan to paint the turn table to make it look a bit more realistic, and finish attaching the approaching tracks. The big project now is to start the wiring and construction of the control panel. The under-table switches and wiring components also need to be done at this point. I also need to test me track with an engine, so for the mean time I will probably just attach all the terminal connectors to one main wire and control box, just to test things out. That will be a next weekend project.


Completed track left half of layoutCompleted track right half of layout

Completed model train layout track work

Sabado, Disyembre 6, 2014

Laying Track Part I


It’s been a little while since my last update, and it might seem like not much has been done, however this is not the case. I’ve spent most of the time since my last update planning the wiring in more detail as well as the design of the main control box. I have a diagram drawn up, but I need to make a few changes before I post it on here. As for the actual layout, I’ve been working on attaching the track to the roadbed, as well as installing the terminal connectors to each isolated track section. Below are the 60 degree crossing as well as the right side curves and trestle. I have not yet attached to track to the trestle or bride as they still need to be finished with paint and stain.
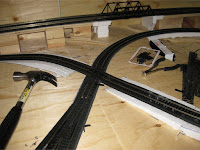
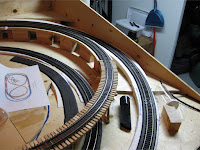
60 degree rail crossingTrack installation

In the next photo are the remaining 4 turnouts that will be at the front of the layout. They have been measured about 10 times to make sure they fit, along with assorted Atlas track pieces. I will attach these track pieces last as I want to complete the rear sections first and not have to lean over the delicate switches all the time. At this time I have also laid the descending track from the trestle to the 60 degree crossing. This part is the one the worries me the most. I have tested this with an old Canadian Pacific engine it works fine, however it isn’t prototypical at all and I haven’t tested it with cars. I will just hope for the best. Also notice in the background track right before the bridge the terminal connector wires coming below the track and though the main benchwork.
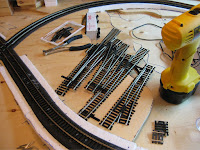

New Atlas Mark 4 turnoutsNew Atlas Mark 4 turnouts

As for the left side of the layout, the curve of the figure-8 is complete, leaving the outer main curve as the last large section of track that needs to be completed (other than the front section). This entire curve will be flex track. Also notice my new track bumpers that will be used at the ends of the staging area and soon-to-be turn table. I also built my own terminal connectors by soldering bare wire to the bottom of track connectors. I have installed a bunch on the layout already, and they hide great. I did this by drilling holes the width of the wire right beside the track, right through the roadbed then running the wire through to the underside of the table. They are almost impossible to see.


Track installation on left side of layoutHandmade terminal joiners

I will be working on the remaining track and start wiring during the next few weeks. Under-table switches, turn table, and the control box are also on the list for things to start working on.