GEAR
Sunglasses
You know what's really cool about the transparent colors
? When you paint them over a solid color, you can create some fantastic effects. Want to cool up your sunglasses for your Joes? Paint the lenses silver, then paint over them with either blue or smoke transparent paint. Suddenly, you have gargoyles! -- Steve HarrisonBoots
There are different sizes of feet and that means different sizes of boots! It's easy to put a smaller foot into a bigger boot. If you want to go the other way, see the tips below. If you can help me the IAM measurements, I'd appreciate it. -- JMYou can use a soldering gun to mend split boots. The trick is to melt only the inside of the boot, and not all the way through to the outside. However, it has to be melted enough that both sides of the seam will bond with the other. I was able to then place the boots on and take them off my Joes, with repairs still intact afterwards. From the outside, you cannot tell the boots had been repaired. Note: The splits were either in front at the laces or in the back, but not at the soles. -- Kevin
The Arctic Mission Gear, if good for nothing else, is good for the white boots that come with the set. At a time when Joe currently has no athletic shoes, these can easily be transformed into them. The boots are easily "cuttable." My one word of advice is to cut slowly and evenly. I actually have a pair of athletic shoes right in front of me as I cut, in order to get the cut just right. You can then use the shoes like that, or if you have a thing for exactling detail (and a steady hand), some paints and a small-tip paintbrush should allow you to add some detail. -- Bidz
| Figure | Footprint |
|---|
|
| HOF/HOFA/USSM | 1 3/8" |
| SLU | 1 7/16" |
| Elite | 1 11/16" |
| Vintage/ME/CC | 1 13/16" |
| AM/IAM | - |
Getting the Classic Collection (CC) GI Joe boots off the old-style feet was a bit of a job, so I dusted the boots before putting them back on. -- Rob Dean
I found out that by heating a HOF boot in the microwave oven for two minutes it will slip on a masterpiece joe foot as easy as Cinderella's slipper, and does not damage either the boot or the foot! -- Caemson
The US Serviceman Memorial Collection boots will fit if you put a dab of vegetable oil on the heel of your CC or HOFA Joe. I used the black boots as dress shoes (pants over top). -- Matthew Mehlich
Some HOF boots will fit CC figures. Some are too tight. The hair dryer technique with the boots will help. Warning: To take off a tight HOF boot from a CC Joe will require lots of pulling. I used the hair dryer technique and the heating action also made the CC's ankle joint very soft. When I finally pulled the boot off the ankle was slightly stretched. This CC Joe now has a leg slightly longer than the other. My advice is to buy Cotswolds boots for the CC Joes. -- Thor Sadler
Also, the foam rubber boots for CC Joes, though looks alot better than the thick HOF boots, they resist attempts to make the CC Joe stand. The hard plastic boots of vintage Joe and Cotwolds boots make CC Joe stand easier. -- Thor Sadler
CC Joes can wear both HOF and vintage Joe uniforms. Hats and boots are a hit and miss subject. -- Thor Sadler
There are different sizes of feet from HOFA vs. CC or ME as a result there are different sizes of boot too. The CC boot will go on a HOF/HOFA foot with no problem. The reverse is not true, unless there is some secret handshake involved, you won't get a boot from HOF/HOFA onto a CC/ME/Vintage figure. If you force the issue, the boot may go on but you'll probably end up cutting the boot off or traumatically amputating the foot. -- Joe Shipley
I've put the HOF boots on both my Elite and CC Joes with no real problems. The green HOF boots are stiffer than the black and they are the only HOF boots I have not been able to get the "Big Foot" into. The HOF boots also come off without any real problems. Use lots of powder to help them slide on & off. -- Rob Sorrels
HOF boots don't fit CC joes well, except for Major Bludd's, whose boots fit well. -- Blair
The Target WWII boots are too big, but if you simply paint the boot black or dark brown (using something like Liquitex), and either paint the spats tan or leave them as is, you get a decent looking boot. -- gijoe1964
Head Gear
Here's what I did to make the FAO pilot helmet look a little more realistic. First, I painted the visor Black. I then I removed the original elastic and installed 2 wider pieces measuring 1 1/2" long. I bought a couple of black sew on snaps and sewed the male end to the ends of the elastic and on the helmet I made a template and using a high speed dremel press drilled small holes and sewed the female end to the helmet. -- Michael VentureHere's how to smoke the lens without making them pitch black? Try clear red Chart-Pak tape, like you use on overheads and briefing slides. Similar products are available in art and office supply stores. Failing that, try window tint. -- Mark Walsh
I've always wanted to try this helicopter pilot helmet modification for myself but I haven't gotten around to it:
- Snip the elastic 1/2 way.
- Take screws from an old pair of ray bans.
- Hold visor on helmet to "eye-ball" where the straps fall. They should be at about 4 and 8 o'clock as you look down from the top and about 1/3 the way from the bottom.
- Drill a tiny hole in the helmet
- Attach with tiny screws. -- Joe Shipley
To smoke a helmet lens, go to any well stocked hobby shop, and look for Tamiya Acrilyc model paint. They have a line oftransparent paints, designed for wind shields, canopies, and other places that a transparent color is useful. It comes in red, blue, green, amber, and smoke. Cleanup with water, rubbing alcohol, or you can go ahead and buy a bottle of thinner for it. Figure around $2.25 a bottle, but you'll get a lot of use out of it.
It air brushes very nicely. You can also brush paint it. If you are careful, it dries clean and streakless. Remember, less is more. So build up layers to get the darkness you need.
As always, you would be wise to practice a bit before committing to your one-of-a-kind helmet It might be a good use for all those CC goggles you've got laying around.
Now, there may be some other brands of transparent model paint. I know Gunze Sangyo makes some, and I have used it, but I think you want to make sure you've got water based acrylic. It's safer on you and the plastic. -- Steve Harrison
I made an Apollo "fish bowl" type helmet out of a plastic x-mass ornament mold, vinyl, metal foil and a hot glue gun. -- Wolfman
After opening a few of the new WWII US Service mans uniforms I noticed that the fabric covered helmets are to small for your Hasbro-produced GI Joes. There are a couple of things that I found that you can do to make these helmets to fit a little better.
- Use a pliers and remove the inner helmet liner.
- With a sharp knife remove the 4 plastic posts that the plastic liner attached.
- If needed use glue to tack down any of the loose fabric.
Unfortunately, the size is still not perfect, but its a lot closer. -- Mad DogTry removing the cloth cover from a WWII US Service Man's helmet and fitting the cloth on to a Joe/AM M1 helmet, takes a little work but gives and even better result. -- Winch (Alan Dawson)
I used a dremel tool on a USSM WWII Infantry Helmet. I pried the inside black piece out and then used the rounded cone shaped attachment to grind down the little plastic posts that were left. The helmet now fits on an Action Man perfectly. -- JM
I used pliers to rip out the posts inside the USSM WWII helmets. They rip right out just fine. -- Robert
I don't know of any way to repair a vintage "shrunken head" Joe. but I put a small wad of cotton under the helmet/hat so that it sits correctly. -- Greg Buck
I tried to put a 21st century helmet on my fuzzy head action man figure and it wouldn't stay on for anything. I decided to ameliorate the situation by taking velcro with adhesive backing (not the fuzzy side, the prickly side if that's any way to describe it) and cutting four small 1/2" strips and placing them about halfway in the helmet all the way around. If you fuzzy guy has anough hair it'll hold quite well. It worked for me anyway. -- Denny
I found a way to make the Wool cap that comes with the WWII figures wearable. Take a sweater shaver and shave down that big stub on the top inside of the cap. Now put it on under the helmet, and it doesn't look so ridiculous. -- Rob
Packs
The original Halo CC Joe was short on equipment because he's missing his ALICE pack. Here's the solution. Grab the backpack (sans the web belt) from the Aussie ODF Joe. Put it on the front of the Halo Joe and then use the hook on each side of the ODF backpack, and hook it over the shoulders to the straps on the parachute in back of the Halo Joe. Voila, an accurate 'airborne ranger'! The ODF pack is the same color as the parachute pack. -- Rebonitz
Put about 1/4 inch airplane glue on the 21st Century Toys pack straps and let dry. They will then feed easily. -- Oz
Use tweezers or foreceps to buckle a 21st Century Toys pack. I use foreceps and can do a pack in about 5 minutes now. -- Rob
Here's how to "assemble" a 21st century ruck sack:
- First get a large safety pin and a lighter.
- Use the lighter on the ends of the straps only for a second and squeeze it together this will keep the ends from fraying.
- Use the pin to fish the straps though the buckels.
- The shoulder straps go to the bottom corner straps
- The pocket straps are easy.
- The top straps go through the loops on ruck cover.
- Then, on three pocket pack, connect to the bottom inside straps, and travel on either side of the middle pocket.
- On the two pocket ruck sack, they travel under the pockets one strap under each pocket and then connect to the bottom straps. -- Black Dog
Parachutes
If you can get a hold of a T-10 reserve PILOT Chute and take out the spring, the remaining midget parachute is the perfect size for joe. The one I have fits perfectly into the CC HALO pack tray. I have not modified the parachute yet but when I finish, it will look like the MC-3 Free Fall Parachute as recently seen in Disney's "Operation Dumbo Drop". It is not a square RAM AIR parachute, but I'm not that motivated yet and these pilot chutes are regularly discarded by DRMO. -- Katy JeebI finally got my hands on a pilot chute. It looks pretty cool with the Airborne Ranger. It was kind funny that a rigger came in needing stitches and I asked him if he could hook me up. A direct supply line to a expendable item. The only thing that I had to do was cut the stiches and take out the spring thing. The chutes look great green and about the right size. Now all I need is the proper way to pack it. Any Riggers know how thanks. Remember I jump a pack and don't actually pack my own chute. -- Daniel Weiske (Dan the Airborne Man)
Dan, go to the rigger's shed and watch them speed pack the chute. If you can make the pack tray, the deployment bag and the harness you'll be in business. You can cut corners on certain items such as cotton webbing ties and break lines (in real life wedon't cut corners).
Here are the steps I remember from way back when:
- Get parachute in proper layout. Stretch on table with apex tied to end of table. Separate suspension lines according to left/right risers, get rid of twists and turns.
- Dress the parachute by making two sets of triangle flaps from apex to skirt. It'll look like a elongated triangle that is intersected through the center. (I'm using layman terms here so bear with me)
- Fold one triangle over on top of the other. Be sure to keep your suspension lines separated! In real life you would place break ties along the chute to keep it neat and controllable. It'll be a b*tch to stuff in the D-bag other wise. Sorry Amy did I say a bad word? 8-)
- Now "thread" the apex of chute to the deployment bag (make sure there is a static line or a mini pilot chute attached). Use a slip knot to secure the apex to the D-bag.
- Slowly and carefully, stuff the D-bag left to right then right to left in a zig-zag pattern until you are out of silk.
- With the "separated" suspension lines (my memory goes fuzzy here), carefully bring the lines to the top of the D-bag in the center of the suspension lines loops TOGETHER (you'll lose separation at this point BUT keep them separated as long as possible until you "loop the lines" through.
- The opening flaps of the D-bag have locking loops. Pull the male flap to the female flap and tug the loop through the female flap's hole.
- With the suspension line you take a bite of line through the flap loops. Now carefully use a paper clip as your "hook" to pull a "loop" or a small "bite" of lines through the locking loops of the D-bag, do not get the lines tangled or twisted.
- Take the lines to the top left loops of the D-bag. Now carefully use a paper clip as your "hook" to pull a "loop" or a small "bite" of lines through the top loop of the D-bag, do not get the lines tangled or twisted. (Clear as mud huh?) Then crisscross the lines from Left loop one to right loop one to left loop two to right loop two....until you reach the end of the D-bag. The lines through the loops should not look like Amy's pasta dinner. It must be neat and clean looking.
- Now the D-bag is ready. Attach the risers to the harness. Lay the D-bag ontop of the Pack tray and close the pack tray flaps around the D-bag. Eand P-tray flap has a hole or loop to draw the cotton webbing through, in our case use the "guts" strands of 550 cord. Take one strand and "thread" it through the P-tray flaps to form a circle. BTW - make sure the static line is outside of the P-tray at the "TOP" of the tray.
- Try to make the pack as tight as possible by drawing the flaps as close as possible. It may require you to use a little palm action to "flatten" the D-bag to a manageable size.
- When 11 is done, tighten the "strand" of the P-tray and tie another slip knot.
- Since there will not be enough force to break the last slip knot, you will have to tie the other end of the strand to the static line so as when the static line is "pulled" it will also pull the slip knot out.
- Using small and thin rubber bands, make the loops for your static line down your P-tray. You know you should crisscross these as well.
- Attach static line hook to the P-tray for storage purposes.
Now sign the rigger's inspection book with your name.
The Rigger's motto is I will be sure always. Do the same by double checking my instructions. You'll learn alot from this process. And a Paratrooper, it is good for a soldier to be familiar with his/her equipment even beyond their training.
The chute should work like this:
- Static line attached to an anchor point at a height that will permit the chute to deploy.
- When Joe is released, his weight will pull taunt the static line thus pulling the slip knot at the P-tray's flap closures.
- The tray now open, pulls the D-bag out and away from the jumper.
- The suspension lines now slip through the loops until the locking loops of the D-bag are pulled.
- Thus the silk is drawn out, skirt first, filling with air.
- Until the last slip knot connecting the apex to the D-bag is pulled.
- Thereby freeing the chute from the D-bag and the jumper drives on with his descent.
- Mission Complete.
BTW - For those who can't get a military pilot chute, here's a POC:PAI Parachute Equipment Corp.
1-800-526-2822
Parachute.equip@prodigy.com
Some pilot chutes run for $70.00 -- Thor Sadler
I went to the Fabric area in Wal MArt and bought a Dritz Plier Kit which will enable me to put 1/8 inch eyelets into the Nylon material. I then bought #18 twisted nylon twine for the ropes. If you open the HALO Rangers chute pack there is a strap that you can use to attach the chute. The Pliers were about 6 bucks but I can use them on other plans and the eyelets were about a buck. I still haven't figured out how to open the chute. It will probably not be packed when he "Jumps" and I will only pack it for display. -- Robert
T-10 Reserve Pilot Chutes are the only way to go! They fit Joes pack-tray and they are military issue. -- Jeb
Here's how to pack a parachute: Square parachutes are packed sort of like an accordion. If you hold the entire left side of your Joe chute, it should be folded so that it will collapse down on the right side (accordion style). The individual cells should be open. The nose and tail of the chute are then folded down, kind of like folding the coner of a dollar bill (the amount of fold varies for desired chute opening speed), but roughly, have the upper corner of the (accordion folded) chute touch the bottom of the chute. Then neatly fold the thing so it will fit into the pack. The lines go in last and are held in place by rubber bands. -- Torch
We did a little experimentation last night with a new material - a 45 inch diameter chute out of a lightweight ripstop material that is a pretty good approximation of a "silk chute." It's got a grid-looking pattern like ripstop, but it feels like parachute fabric. The material was in the remnant bin at a fabric store. OD green, too! Cost less than a buck, I think. I hemmed it and added 8 lines using yellow rope like the ice pick and AT accessories sometimes used. The kids and I tested it last night. This chute is too large for ME guys. It has to drop a long way before it opens, and is a slow descender with a CC Joe attached. With the ME guys, I had to leave a length of line unwrapped so it'd kinda "yank" on descent and open the 'chute. We did a tandem jump with a CCand an ME Joe and it looked about right. Lesson #1 learned: 45" is too big. Lesson #2: Arm gets tired a lot faster when heaving 2 Joes instead of 1. -- Opie
Need a parachute for your joe? Check out the local hobby store where ESTES rockets are sold. They usually have chutes in all sizes, shapes and colors. Prices average about $15.00 for the good ones and they are tuff! Uh, oh. No harness to attach the chute to? Go to the local pet store and buy 2 chihuahua size black nylon adjustable collars with plastic connectors. Run these between joes legs and over his shoulders. Attach chute lines to leash snaps on collars. Your joe is ready to go! -- Oz
Looking to get someone else to make you a parachute? Go to your nearest paraloft. Parachute riggers have all the canopy material and sewing machine expertise required. I was a marine rigger and I made a few different canopy/harness combos for my joe collecting compadres. I only charged a 12 pack. -- Delaney
I think to pack the AT parachute this way, 25+ years ago...
- Hold on to the center of the chute, and pull it out straight so the chute and cords are relatively straight. It's also useful to untangle and seperate the cords so all the cords that attach on the left side of the chute pack are on the left side of Joe, etc.
- Fold the chute down from the top using about 4" folds. It's almost like rolling the chute up.
- Wrap the cords around the folded chute, not too tightly.
- Don't put the chute in the pack, it isn't going to work. You should have the chute rolled up against the top of the pack. I don't think the rip cord ever really did anything.
- Find a nice deck with a nice soft landing surface below.
Chuck Joe up in the air as hard and as far as you can. If you do it properly, the chute will unroll, inflate, and bring Joe down to a soft landing.
I remember having a 60-70% success rate with this method, which is why that soft landing surface is important! -- Jim
I remember some quite succesful AT parachute launches. Here's how I did it:
- If the chords are tangled, I always found it easier to slide the knotted end out of the slots at the top of the pack for unraveling.
- Lay the 'chute down and make sure there are no tangles.
- Fold a quarter of the 'chute in on the left and right to meet in the middle just like when you make the center fold on a paper airplane.
- Fold the two halve together and again as necessary to fit in the pack.
- Once the width is right roll/fold it to the correct height for the pack.
- Place it in the pack, close the clam shell, place the string over the closed clamshell from the top back down to his crotch and around to the belly area.
- The ring on the rip-chord should be where you thumb would be on the abdomen when holding the figure with your fingers on the pack. He' ready to toss!
- Throw him up, underhand and head first. What you have to watch out for is that his legs are not so close together that he snags the ring in his crotch.
- Anyways, the upward motion opens the clamshell and deploys the shoot.
- Its always a good idea to have a soft landing. Accidents do happen. -- E J Harsh
For those of you with vintage fighter pilots, 9 out of 10 times the lid from the parachute has become detached. I went to Home Depot, picked up some green colored caulking called "Color Rite Cauling Spectrum), and laid a very thin bead of caulk down on the lid and pack. It matched perfectly, stayed flexible and is removeable. This is just FYI if you want to attach the lid to the pack for display purposes. -- LogOffsys
Rifles
Here's how to make a more realistic AR15 shorty from a Hasbro HOF M-16-like rifle (the one with the goofy looking scope on the carry handle, fixed bayonet, and telescoping stock):
- Using a sharp pocket knife, carefully remove the scope.
- Again using the knife, remove the bayonet at the lug and sever the barrel at the flash suppressor and behind the handguard of the bayonet.
- "Eyeball" the length of the barrel and remove a piece to approximate a 16" barrel.
- With a Leatherman tool, clip a section of a straight pin. which I used in the manner of the "finger repair" trick,
- Heat the pin and shove one end into the shortened barrel and one end into the flash supressor. -- Rhino
Rifle Slings
To make your own rifle sling, go to your local craft, fabric or sewing store and get some olive drab elastic, 3/16" wide. Then look for some brass wire thin enough to fit through the holes on the rifle where the sling rings go. -- Dr. Paul Brothers
You can find rings already formed to the correct size as the Joe rifle rings at craft stores. -- Mad Dog
You can find close to the correct elastic (1/8") in a good sewing supplies store. They come in white and black. Black seems harder to find but, I'm sure a good store could order it for you. You can dye the white with permanent art markers. I use Pantone #5767-T for the olive drab rifle slings and #361-T for the brighter green helmet straps. Many crafts centers also carry gold-tone little metal rings for the slings as well. -- John Medeiros
To make a hasbro look-alike rifle sling, you can pick up the rings at most craft/jewelry sections. Can use 1/8th " black or white elastic and sew or carefully super glue. If you want them realistic, use Skiver leather, dyed to correct tone. Smooth side for leather slings and "rough" side for webbing slings. Web slings can be acrylic painted skiver too. You may be able to get realistic loops for the slings (oval rather than round) from "Toys'n Stuff", or from Cotswold. US WW2 slings are very complicated, having a couple of adjustment buckles with teeth. German ones also have a sliding adjustment buckle. -- Paul Walmsley
Rifle Scopes
On the scope, drill it out a little, and put a plexiglass lens in place. It looks cool. -- Wolfman
More tips from this article can be found HERE
GI Joe® is a trademark of Hasbro, Inc.
![Emily's Passenger Train Set (HO Scale) [00684] - $219.00 : Bachmann](http://shop.bachmanntrains.com/images/HO_Scale/00684.jpg)
![Emily's Passenger Train Set (HO Scale) [00684] - $219.00 : Bachmann](http://shop.bachmanntrains.com/images/HO_Scale/00684.jpg)


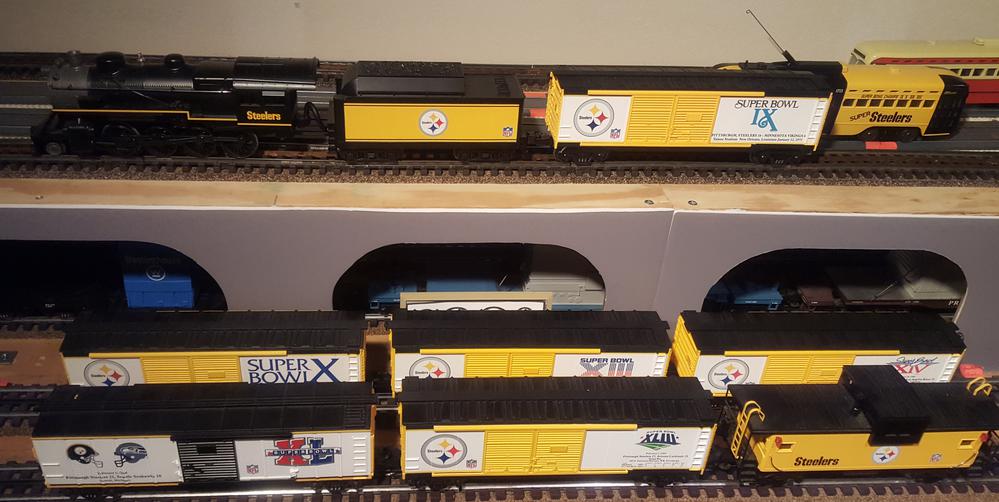


 Sample picture only for illustration Ho scale train sets cheap


