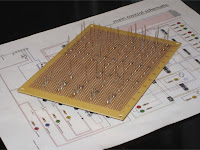
Now that my control panel is mostly done, I’ve been trying to figure out the best way to layout the wiring inside to keep it tidy and organized. There are lots of individual circuits, so I decided to use a grid style PC board for the components, such as the bridge rectifiers and all of the resistors.


I realize that I could have probably cut down on the amount of resistors I used, but to keep the wiring as close as possible to my original plan, I opted to keep a resistor for each individual circuit. I’m sure there are a thousand different ways this system could be wired, however this is the one option that I chose. I used my soldering iron to attach the components directly to the board. I will then eventually attach all my wiring to the back of the board to each appropriate component.


0 (mga) komento:
Mag-post ng isang Komento