Ipinapakita ang mga post na may etiketa na Scratch. Ipakita ang lahat ng mga post

Lunes, Enero 25, 2016

Finally an itch to scratch Modeling time!


Spent the past weekend at the Great Scale Model Train Show up near Baltimore, Maryland and this may have been the thing to get me going.  One of the show owners needed some help manning his tables all weekend.  I gladly obliged and I even had a 2 tables to sell my excess.  I did quite well both days and even found a few great deals.  It was a great weekend and I want to thanks Mike for inviting me and all the hospitality.  I may even be helping out with all their shows in the future!  In case you have never heard of the GSMTS, here's some info about it:
Great Scale Model Train Show

This show is one of the biggest in the mid-Atlantic and is held 4 times a year.  The fall and winter show are the most popular and larger ones.

Look what I found!  My lost work desk and it's clean.

Picked up this kit at the show.  An older Walthers kit.  A kit is always a good thing to get your modeling juices flowing again.

Never put one of these together.

Deal of the show.  Like I need another locomotive! But this one was too good to pass up!  A Bowser VO-1000 that has Tsunami sound, $50!  had to get it.
 

Biyernes, Oktubre 2, 2015

Tunnel Portals from Scratch


To be a bit thriftier, I decided to build my own tunnel portals of the 2 mountain tunnels. I built them out of styrene plastic and to my own custom size and specification so they fit my track and tunnels perfectly. I started out by measuring the sizes that they needed to be, then made a scale drawing on paper to show how I wanted them to look. I then traced templates which I transferred to foam board, and cut mock-ups of each tunnel portal. I used these foam mock-ups to ensure each portal fit the track correctly.

Tunnel portal templatesFoam tunnel portal mock-ups

Once I verified how the portals looked with the foam mock-ups, I used the same traced templates to cut the main portal shape out of styrene. To give the portals their 3-D shape, I used a scrap piece of square wood doweling to ensure each side was glued at a perfect angle.

Wood bracing for portal constructionWood bracing for portal construction


Styrene tunnel portals under constructionFace of half completed tunnel portals

I then used a thicker piece of styrene for the top of each portal, which each had a slight overhang. You can notice one of the large portals is flush on its right hand side. This is because it will but directly up to the backdrop.

Tunnel portals with topsCompleted single and dual tunnel portals

I then added the final details, which included an extending arch over the portal entrance, which wrapped around the portal itself. Wide footings were added to the base of each portal, and a curved inner arch for the roof was also put in. The last thing will be to paint them, however I’m not sure what colour they will be until I get further into my scenery.

Completed single and dual tunnel portalsCompleted single and dual tunnel portals

Sabado, Agosto 15, 2015

Scratch Built Garage


Scratch built styrene garage – front left view
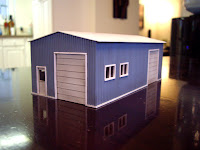
I’ve accumulated a small collection of scrap styrene over the last year or so, mostly from buying bulk bags of assorted styrene pieces from Evergreen (which in my opinion is a great deal by the way). A couple of the larger scraps I had consisted of various corrugated patterns, so I decided to try my hand at building an entirely scratch-built structure. I decided to keep the design simple for my first attempt, so I planned out a small garage/workshop, measuring about 2.5” x 5”. The design includes 3 overhead bay doors, 4 office windows, and 2 single entrance doors; the front having a half-length window. I also kept the size of the building to a minimum as my layout is quite limited for real-estate at this point. 

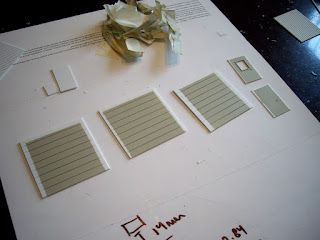
Scratch built garage walls cut from scrap styrene sheetI started by first planning the design of my building on paper, noting all the wall, door, window, and roof dimensions to ensure that they scaled down to realistic HO measurements. Using a new blade, I carefully marked the measurements on the backside of the styrene sheet, then scored the outline of the wall using a straight edge. I used a square and ruler to double check the measurements after every score line I made, ensuring that the walls were kept square and equal. I then gently flexed the styrene to break each piece apart. I fixed any rough edge with sand paper and a hobby knife.

Painted overhead and entry doors cut from styrene

The overhead doors were cut from scrap v-groove pattern styrene, and the entry doors from standard smooth styrene. For the main entry door, I cut a half-length opening for a window, and added strip styrene for the insert trim. I masked the very outside edge of all the doors so I could easily add glue to these unpainted areas when attaching the doors to the backside of the walls. The doors were then all sprayed with light aircraft gray paint.

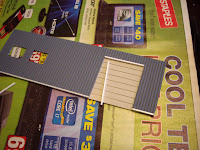
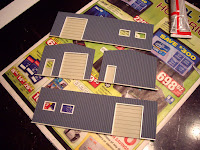
Installing trim on scratch built garage walls using strip styreneAlmost-completed walls of scratch-built garage

I hand painted the corrugated steel walls with a mix of blue and steel gray enamel paint, mixed 1:1 with thinner. After letting the 3 coats of paint dry for 24 hours, I glued the overhead and entry doors to the backside of each wall. I then added trim to the doors using 1.5mm x 1.0mm strip styrene. I used the same strip styrene on the base of the building to represent a foundation, as well as for building the window frames.

Garage structure with internal supports before roof installationScratch built styrene garage – roof detail

The 4 wall pieces were then glued together, and extra styrene support pieces were added to the interior for extra rigidity. The roof was a single piece of v-groove styrene, scored and carefully angled down the center to fit the slope of the building. After airbrushing the roof a light gray, I carefully glued it to the main structure. After making a couple touch-ups to the paint and trim, I weathered the walls, doors, and roof with a variety of powdered pastels. I then sealed in all the weathering details with 2 light coats of dull-coat.

Scratch built styrene garage – front right viewScratch built styrene garage – rear view

Once the structure was dry, I added clear styrene pieces to the backside of the walls for window glazing. The final step was to add a black cardstock divider and floor to the interior of the building so no white plastic could be visible through any of the windows. I am quite happy with how this little project turned out, and can’t wait to mix it in with my other model buildings.

Scratch built HO scale styrene garage