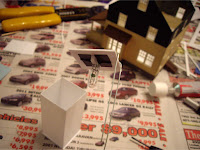
While I’m currently working on the first stages of my scenery, I completed a little side project that I’ve had on my mind for the last few months. A hobby store I had visited had rolling stock fitted with wireless cameras for an engineer’s-eye-view of your track layout, however these turned out to be quite expensive, even for the basic starter kit. I immediately began to look for a more cost-effective option, and figured that I might even be able to make my own camera car for little-to-no cost.
I have a junk drawer in my office with a bunch of old, obsolete cell phones that are serving absolutely no useful purpose, but all still function fine. Each cell phone however, has a camera that shoots and records video, all of which can be transferred to a computer via USB. And that got me thinking. Would I actually be able to somehow use one of these old cell phone’s cameras as a travelling cab-view camera? You bet I could.
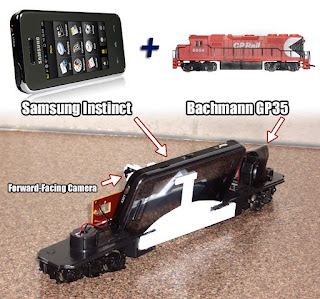
The biggest challenge of using a cell phone for this task was making the cell’s camera face forward. This is because a cell phone’s camera is usually located on the back of the phone, and since the phone would need to travel on its side to properly fit through tunnels and under bridges, the camera always naturally faced off to either side of the track. This meant that the camera would need to be physically removed and repositioned to a forward-facing location, while still staying connected to the phone interface.
I played around with a couple different phones and had no luck, as their cameras were directly attached and soldered to the phone’s mother board. However when I took my old Samsung Instinct apart, I noticed that its camera was only attached via a flexible data cable, which allowed the camera itself to move independently of the phone. I cut a hole in the back of the phone’s case so once re-assembled the camera could pass through and be accessible and positioned from the outside. I built an external support structure out of styrene to hold the camera in a forward-facing position, making sure that the camera was positioned at a correct angle so it would have an accurate and realistic recording.


I sacrificed an old Bachmann GP35 engine to carry the cell-phone camera. I removed the engine and cab structure, only keeping the motorized base. To allow the cell phone to pass through tunnels and under my trestle, it would need to be located as close to the track as possible, so I positioned it inside the engines fuel-tank structure, between the trucks. This of course was not long enough to house the phone, so I needed to cut the tank in half and extend it with rigid styrene extensions. The cell phone needs to sit at an angle to clear the bottom of the trestle, and the camera was adjusted and installed to compensate for this angle. I used styrene pieces to support and securely hold the phone to the engine structure.


The final product isn’t pretty at all, but it does its intended job very well. To use the camera, all I do is activate the camera and set it on camcorder mode. I then place the phone into position on the engine base. When ready, I press record on the top edge of the phone, energize the track, and let the engine travel around my layout. Once I’m done recording, I simply remove the phone, tether it to my computer via USB, and download the footage (as seen below). I know the quality isn’t as high as the expensive commercial products available, but this didn’t cost me anything, and the effect is equally as amusing.
The following video is of the very first test run of my entire layout with my new track-camera. Please don’t mind the speed of the camera and my under-construction layout - this was just a test!