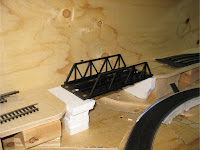
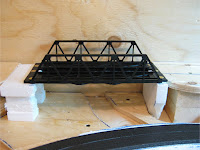
On Saturday, the third day of my long weekend, I decided to tackle the bridge that will carry both the main line and figure-eight line of track in the rear section of the layout. For this, I purchased a set of pier girders, as well as a warren truss bridge kit. With a little modification, I attached two bridge girders together using a 3rd girder. When these were dry, I attached bridge sides of the warren truss kit to the girder deck. Once all together, I used a few scrap pieces of plastic to add a little support to the trusses. The final look and design looks pretty good. I then placed the bridge onto my layout and fit foam supports on each end. I then finished with butting road bed right up to the bridge deck.
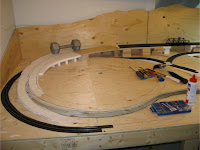
Below you can see the new bridge on the back of the layout. It will still need to be painted to appear more prototypical, but this will happen at a later date. Also pictured below is the extension that I had to add to the left curve of the main line (under the 15 pound weight). This extension was the result of a measuring mistake I made early in my original planning. Thankfully this was an easy fix. Trackbed was also added at this time to both tracks at the rear of the layout.


0 (mga) komento:
Mag-post ng isang Komento