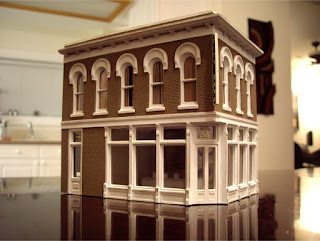
 I wanted to add a bank to my small commercial district, and the DPM Other Corner Café kit by Woodland Scenics fit the bill perfectly. This was my first DPM kit, and if you have never built one either, it’s a very good idea to follow the preparation directions before assembling the model. The Design Preservation Model (DPM) series kits have high quality details and styrene but do require a good amount of sanding and trimming before assembly.
As I did with my Merchant’s Row I kit, I used small strips of masking tape to mask the windows and trim before painting the brick walls. Once the walls were dry, I covered the newly painted sections so I could now paint the trim and window frames. After drying for 24 hours, any touchups were made with a small detailing brush. The masking is tedious, but worth it in the end, however it’s only effective if it’s done correctly and carefully. If not, you will just have a ton of touchups to deal with. The structure was then brushed with dark powdered pastels for weathering effects and sealed with a final coat of Testors dull coat.

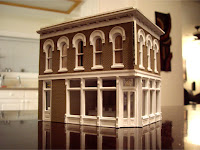
Most DPM models do not come with a pre-molded roof or base, however bulk styrene is provided for at least the roof, which needs to be cut-to-fit. A length of strip styrene is also provided to be cut and installed to support for the roof. Clear bulk styrene sheet(s) are also included for the window glazing. Window blinds were used from the same templates I used on previous structures that I built.
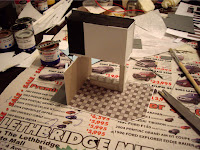


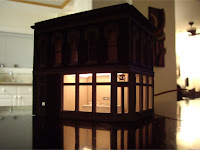
I built the interior structure of this building in almost the exact same way as may Merchant’s Row I kit, utilizing my light diffuser box method. The first level interior of the building is built upon a removable styrene base, with the light box installed on top (2nd level). The removable base allows access to the bulb in case it ever needs to be changed. I built the bank’s teller desks out of scrap styrene pieces, as well as the large support column (which actually supports the light diffuser box). The bank’s floor is a tile design that I made in Adobe Photoshop and printed on matt photo paper. The walls are just coloured cardstock.


0 (mga) komento:
Mag-post ng isang Komento